
Single Sock Dog Tutorial. I love these little guys and think I should spread the love.
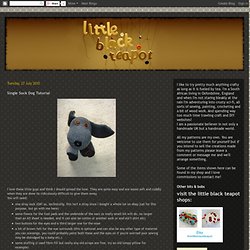
They are quite easy and are soooo soft and cuddly when they are done its ridiculously difficult to give them away. You will need: one stray sock (OK! Then cut the sock like so: The portion to the left is the legs, the middle is the body and head and the right is the tail and ears. The easiest method for me is to run some medium stitches all the way around then pull to gather and sew some stitches across the opening to secure shut. Notice how the heel of the original sock is going to be the forehead of our puppy.
Gather the bum end closed using the same method as above. When you're ready, take the remaining bits from above and cut to look like this: (Note, the remains are in the same order the first cuts we made above if you are uncertain). Each of the back legs and front legs is folded double. Cut 2 pieces of corresponding fleece for ears. The photo below shows the effect you're going for with the back legs. And that's it! Fluffly Flower Tutorial - artsy-crafty babe. I know that there are about a bazillion flower tutorials out there, but I thought I'd share my way of making them.
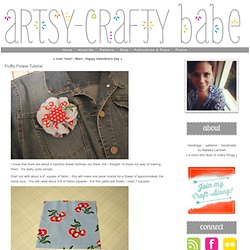
It's really quite simple. Start out with about a 4" square of fabric - this will make one petal cluster for a flower of approximately the same size. You will need about 6-8 of these squares. For this particular flower I used 7 squares. Fold in half. Fold in half again, matching short sides. Next, cut out an ice cream cone shape, with the folded corner of your square as the point of your cone.
When you open it up it should look something like this: Next, sew a circle around the center, just a simple running stitch. Pull threads together, like a little drawstring, tie the two ends of the thread into a knot, then cut off the strings. Repeat these steps for 6-8 petal clusters. Once you get them all gathered, string them on some thread. Pull the thread together, like you did for each petal cluster.
To finish, sew (or hot glue) a button to the front. Button flower tutorial - artsy-crafty babe. Here ya go, everything I know about making button flowers - enjoy!
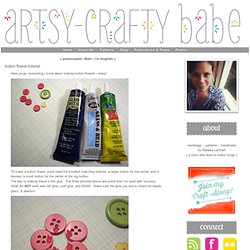
To make a button flower, you'll need 5-6 smallish matching buttons, a larger button for the center, and if desired, a small button for the center of the big button.The key to making these is the glue. The three pictured above are some that I've used with success. What did NOT work was hot glue, craft glue, and E6000. Make sure the glue you use is meant for beads, glass, & plastics. Make a ring out of your matching smaller buttons. Place the center button on top - flat side against flat side. Next, put a small dab of glue in the center, then place the small center button. If you want to make this into a brooch, you'll need a pin-back and a small circle of felt.
The ellusive cone « Cheeky Magpie. This is one of those unintentional projects that seem to plague my creative world.

The basics of this started brewing over a year ago. Last Christmas I made some party cone baskets. They were my first attempt and and I didn’t have a real pattern. They were shallow and wide, but kind of irregular. For most projects I would mind irregular, after all, I can kinda relate. This year I wanted to make trees out of cones. So now I have a basic pattern that could use for either a tree or cone. I’ve also been toying with printing a pattern on one side of paper and cutting parts of it out and sort of pushing edges up to make different embossed effects. So this is what I ended up with. I printed the pattern on the reverse side of paper but it would be done on white as well. I also cut the snowflakes out differently on each cone using an exacto knife. Once I got the designs all cut I decided to play and embellish them. Here I will note that most embellishments work best on an assembled cone.