
View topic - Anyone Can Sew: Vests and Blazers (Picture Heavy) Register In order to login you must be registered.

Registering takes only a few moments but gives you increased capabilities. The board administrator may also grant additional permissions to registered users. Before you register please ensure you are familiar with our terms of use and related policies. Please ensure you read any forum rules as you navigate around the board. Terms of use | Privacy policy Register. View topic - Anyone Can Sew: Jeans Tutorial (Picture Heavy) Register In order to login you must be registered.

Registering takes only a few moments but gives you increased capabilities. The board administrator may also grant additional permissions to registered users. View topic - Anyone Can Sew: Shirts Tutorial (picture heavy) Register.

Dolls clothes. Making clothes was enjoyable process for me.
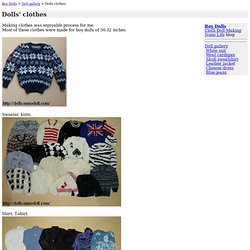
Most of these clothes were made for boy dolls of 30-32 inches. Download/Doll-Candy_MSDdress001.pdf. Free Patterns. Vintage charm: a BJD floral headdress tutorial. This tutorial shows how to create a floral headdress with vintage charm for your ball-jointed doll.

To produce an antiqued look, we dye the simple materials in coffee. Your base materials can have a variety of tones at the outset – the dyeing process will unify those tones with gentle variations. Putting this headdress together is a quick easy project that only requires basic sewing skills. You can click the images to see larger versions of them. Materials 1/2 yard/meter ribbon, 1/4″ to 3/4″ wide, depending on the size of the doll. Dye the Materials.
Eyewear Tutorial - Important note added! Here is how to make eyeglasses for your dolls at home.
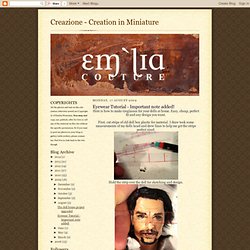
Easy, cheap, perfect fit and any design you want. First, cut strips of old doll box plastic for material. I draw took some measurements of my dolls head and drew lines to help me get the strips perfect sized. Hold the strip over the doll for sketching and design. Draw the design on the strip. Doll kimono tutorial 1 by ~Tenshi-blues on deviantART. FREE Step-By-Step Porcelain Ball-Jointed Doll Tutorial. 11cm Obitsu Crochet Bikini - make your own! Ivan is mortified at being forced to model a frilly, girly bikini!

Yes, I could have gotten any of the other bitty bitsu's to model it, they are all girls. But where's the fun in that? Here's how to make one for your own tiny dolls! Using size 20 crochet cotton and a #9 lace hook. Pattern (more or less)BOTTOM:row 1: chain 28, join.row 2: chain 2, (counts as first dc), dc in each stitch around, joinrow 3, 4: repeat row 2row 5: chain 2 (counts as first dc), dc in next 2 stitches, row 6: chain 2. reverse, dc in next 2 stitches, (you are making the crotch)row 7: repeat row 6 - do not break or join! Ruffle on bottomsjoin thread at back between row 2 and 3 of bottoms. row 1: *chain 3, skip one stitch, join,* repeat around. Hack an inexpensive doll to be poseable. Dolly Knee Stockings. Yesterday I posted a picture on my tumblr of an adorable pair of doll joint stockings worn by the lovely ladypoison ( Her's are air brushed (listed as made by kohUeno who is a bike customizer?)

, seeing as I don't have access to one I decided to try and replicate the look with fabric paint. i used:black and grey acrylic paintfabric medium to mix with the paintthigh high stockings I will start off by mentioning I have had several knee surgeries on my left knee so please forgive it's slightly wonky apperance. First I measured my knee (with the stockings on) The joint lines are placed 2 inches above and below my knee. 7 inches in total length. Then I marked out with a flesh tone washable marker the shape. Side view, make sure to continue the line along the side of the knee so it will match up with the back portion.
I then outlined with black fabric paint. Crystalinewings. In this i will share photos and tell you how i made my rooted Loki wig.
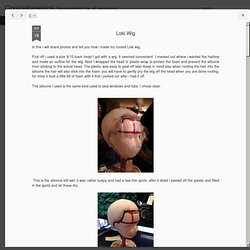
First off i used a size 9/10 foam head I got with a wig. It seemed convenient. I marked out where i wanted the hairline and made an outline for the wig. Next I wrapped the head in plastic wrap to protect the foam and prevent the silicone from sticking to the actual head. The plastic was easy to peal off later.Keep in mind also when rooting the hair into the silicone the hair will also stick into the foam. you will have to gently pry the wig off the head when you are done rooting. for mine it took a little bit of foam with it that i picked out after i had it off.
The silicone I used is the same kind used to seal windows and tubs. This is the silicone still wet. it was rather lumpy and had a few thin spots. after it dried I peeled off the plastic and filled in the spots and let those dry.