
CUTE ALERT! Moustache. Photo post designed by kristin ess While cruising the ol’ www this weekend we came across these and couldn’t help but share!

Probably the best way to do these is to start with a French Manicure, and before you seal it with a top coat, freehand the little mustaches on where the pink + white meet. Also– if you did these the other way, you could put your “Shhhhh” finger (um, that’s your index finger) up in a picture and have a cute ‘stache. Just when we thought we were over mustaches… these cuties come and change our minds! NAILED IT! New Year's Light. Photos + post design by Kristin Ess While you’re all probably busy decking the halls right now, perhaps you’ll be able to take a break to get fancy, festive + fun with this manicure tutorial from Lady Conrad!

She wanted to string some lights across her nails and so she did… Literally! Here’s how she created these lil’ cuties: TOOLS: base & top coat, green polish & red polish (you can use any colors you want), white or off-white polish, cuticle nippers or small scissors, black cotton string, a small brush or pointed q-tip. On clean nails, do a solid coat (or two thin coats) of white or off white polish.After the white polish dries, do one clear coat. Tags: bright, brite, christmas, DIY, do it yourself, holiday, how to, kristin ess, lauren conrad, light, lighting, lights, lite, mani, manicure, nail art, nails, string, the beauty department, thebeautydepartment.com, tutorial, xmas Related posts: FANCY FINGERS! Little Ribbon.
Photos + post by Kristin Ess By now you all know how much we love bows around here.

This little mani is so spring-y + girly and we simply couldn’t wait til mani monday to share it. PRETTY POLISH IDEA 4 gradients. Photos + post by Kristin Ess First of all, sorry for the lack of posts this week.
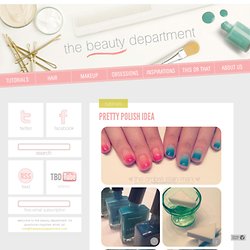
By now you know that Lady Conrad has a brand new book called THE FAME GAME. We joined her on her book tour and that busy schedule left little time for much else. But we’re back and bringing you the ombre stain mani! We’ve seen lots of ombre techniques in the past, but this one is pretty cool because it’s done on your bare nails and has more of a stain effect than looking like actual nail polish. You will need: 3-4 gradient nail polish colors (dark to light and all in the tonal family), a clear top coat, a triangle makeup sponge, a cup of water, a piece of paper for blotting the polish, a paint brush + nail polish remover for clean up.
Unscrew the lids of your 3 or 4 gradient colors so they’re ready to go. Try it in other colors. MANI MONDAY Golden Scallops. Photos + post designed by Kristin Ess There’s nothing more decadent than the Art Deco era so it was really exciting to translate that concept using black + gold on our nails.

Scalloped edges are a major factor in deco designs and create a very feminine feel. This is actually really simple to do but you’ll want to prep your nails with a neutral base color first. Tools: round-tipped brush (we got this one from our local art store), black + gold polishes, clear top coat 1. 2. 3. How to home pedicure tips and tricks. I’m not going to lie to you, today’s post includes a lot of gratuitous photos of my feet.

Not because I have a weird foot fetish – gross – today it’s all about how to home pedicure tips and tricks. How ’bout them apples? I really do apologize about the feet, but I couldn’t really find a way to do a how to pedicure post without showing an actual, you know, pedicure. Whatever. Tomorrow is the FIRST DAY OF SPRING! Let’s get started, shall we? 1. 5. Throw on a top coat and you’re done. Just like that you’ve given yourself a home pedicure. There you go! Pedicure supplies: nail polish removerbase coat nail polishcuticle stick/orange stickOPI chip skipnail filenail polish color {this is OPI Red Lights Ahead Where? Allison. The Nailasaurus: Gradient Nails Picture Tutorial. Exciting news today!
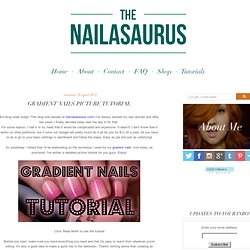
This blog now resides at thenailasaurus.com! I've always wanted my own domain and after two years I finally decided today was the day to fix that. For some reason, I had it in my head that it would be complicated and expensive. Nevertoomuchglitter's Weblog. Here it is, finally!
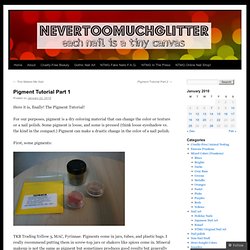
The Pigment Tutorial! For our purposes, pigment is a dry coloring material that can change the color or texture or a nail polish. Some pigment is loose, and some is pressed (think loose eyeshadow vs. the kind in the compact.) Pigment can make a drastic change in the color of a nail polish. NAILED IT! ROBIN’S EGG NAILS. Photos, graphic design, post by Kristin Ess Some people are more skilled at nail art than others and some can’t wear crazy funky nail art to the office.
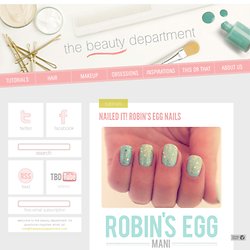
So here’s a simple look that anyone can do no matter your skill level or work environment. It’s 2 super easy steps and a really subtle, wearable look. This happens to be my all time favorite polish combo because it’s soft and sparkly and takes about 5 minutes. MANI MONDAY Peterpan Collar. Photos + Post by Kristin Ess Seems like the whole wide world of fashion is obsessed with the Peter Pan collar.

Well so are we! These are so much fun to do on your nails.