
Ombre photo frame how-to. Since I just had the pleasure of moving less than two months ago, I am fully aware of almost every one of my possessions.
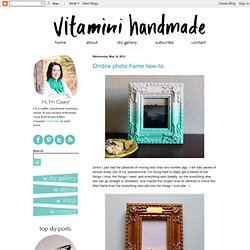
I'm trying hard to really get a sense of the things I love, the things I need, and everything else (ideally, so the everything else pile can go straight to Goodwill). And maybe this project was an attempt to move this little frame from the everything else pile into the things I love pile. :) DIY Sunburst Wall Mirror Of Paint Sticks. As I already showed you, paint sticks is a great material for a DIY sunburst wall mirror.
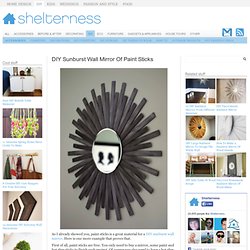
Here is one more example that proves that. First of all, paint sticks are free. You only need to buy a mirror, some paint and hot glue sticks to finish such project. Of course you also need to have a hot glue gun and a wire cutter at your home. Although if you are interested in making your own sunburst wall mirror you definitely should have such simple tools lying around. For full instructions for the project visit Our Humble Abowed.
Picture Hanging Hack - The Easy Way to Hang Pictures. The most annoying thing about hanging picture frames is trying to get the nail placement just right.
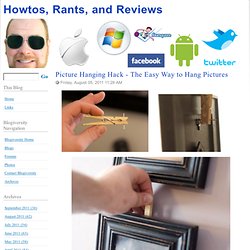
You have to measure the distance from the top and hope that you don't mess up the horizontal placement of the frame. With this clever tip you can hang picture frame quickly and easily without the need for a measuring tape. All you need is a clothespin and a nail. Drive the nail straight into the clothespin so that some of the nail sticks out on both sides. It's best to use a nail that has lip on the head so it catches the hanging loop better. This works with most frames that have a center loop and can really be made out of any piece of wood. This tip comes from Michele over at The Scrap Shoppe. Words from Styrafoam. Some months a go I shared the Love wall art template, along with that one I made this one, but unlike the previous one I wanted to make this word different and special, so no cardboard.
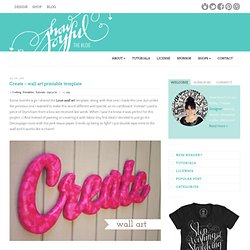
Instead I used a piece of Styrofoam from a box we received last week. When I saw it a knew it was perfect for this project =] And instead of painting or covering it with fabric (my first idea) I decided to just go the Decoupage route with hot pink tissue paper. It ends up being so light! I just double tape mine to the wall and it works like a charm!
**The download is a PDF format file, so you will need to have Abobe Reader installed on your PC or MAC. THE MATERIALS - 23×8 inches piece of Styrofoam (I just used one from a box but you can buy a piece at Michaels) - Tacky glue - 2 sheets of tissue Paper ripped unevenly with your hands - Sand paper - X-acto knife - Download the template below - Marker to trace template - Sponge brush [ Click on Images to enlarge] Anthro-Inspired Mirror. You all know we love a good Anthropologie knockoff around here – so a couple of days ago when I was browsing online I came across this mirror.
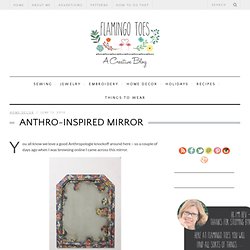
Oh I definitely need that. Hold the presses – did that say $498??? Huh. We can do better than that. :) So after scouring the thrift shops, cutting myself on mirror glass, and overcoming an unreasonable fear of Mod Podge, here is my version! (Bear with me here – taking a picture of a mirror is a bit tricky. Ready for the tutorial? You’ll need: A MirrorEasy Off Oven CleanerFabric (enough to cover the frame and the back of the mirror)Mod PodgeA Staple Gun or other framing tool I went searching for a method to removing silvering and came across a great tutorial at Mitzi’s Collectibles.
I started with a frame that I found at the thrift store. Obviously not clean. We actually had to ask on this one – because it just said 1951. $19.51 seemed way to high – and it was. Start by taking your mirror out of the frame. Gorgeous Mosaic Mirrors Made with Supplies. I mentioned one of these ruler mirrors in a roundup a few months ago but I had no idea that there were so many other amazing versions made with different supplies.
They are all made by the artist behind Mosaic Works and you can see all the beautiful “before and after” work she does on her blog . I would like to purchase the pink pencil mirror or the #2 pencil mirror. Which one is your favorite? Stumbleupon. Painted Wall Frames. Spoon Mirror TUTORIAL. Happy Monday, Crafters!

Hope you had a nice weekend. I’ve been working on decorating my breakfast nook {yes, we’ve lived here for over a year and i still have TONS of bare walls!} I made this totally awesome Spoon Mirror for the little corner in my kitchen and I am kind of in love with it! The color, the texture, and the price is right….it cost me only a couple dollars to make! Love a cheap, easy craft! When I told Davis I was making this spoon flower, he thought I was crazy. How to Make a Spoon Wreath Supplies: cardboard, hot glue gun, 3″ round mirror, spray paint, scissor, 78-80 clear plastic spoons, small piece of ribbon Skill Level: Beginner Instructions: Cut a 12″ circle from a cardboard box. Cut about a 4″ piece of ribbon, shape into a loop and hot glue to the back of the cardboard to use to hang it on the wall. Make Your Own Canvas Portrait!