
Fabric Tassle Bunting (No Sew!) This is an easy and gorgeous way to decorate a room or add some festivity to a celebration.
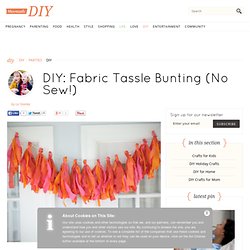
Using scraps of fabric makes it a nice cleanup for your sewing stash too! Keep reading to see how to make one yourself! Scraps of fabric ( or a few coordinating colors 1/4 yard wide) Scissors Thick twine I bought my fabric 1/4 inch wide which made it the perfect length for this project. With your scissors cut slits along the length of the whole piece 1/2- 1 inch wide (about 30 slits) Grab one end and rip! Do the same with your other colors. Now take 2 of the 1 inch strips you just ripped and cut it so it's half as long (still 1 inch wide). Grab two pieces of each color and hold them together so their ends line up approximately. Now hold one hand at each end of your stack and twist them together Now wrap it around the string Now take one of the small pieces of ripped fabric and tie it tights right under the string. DIY Flower Bottle Garland. Love ‘n Fresh Flowers is back to teach us how to make the adorable apothecary bottle hanging garland shown below from today’s photoshoot with Maggpie Vintage Rentals, Belovely Events, Maria Mack Photography and a dream team of vendors from Philly.
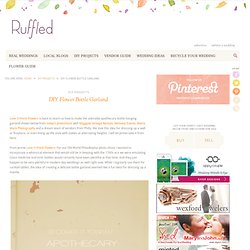
We love this idea for dressing up a wall or fireplace, or even lining up the aisle with stakes at alternating heights. I will let Jennie take it from here: From Jennie Love ‘n Fresh Flowers: For our Old World Philadelphia photo shoot, I wanted to incorporate a whimsical element that would still be in keeping with the 1700s era we were emulating. Glass medicine and tonic bottles would certainly have been plentiful at that time. And they just happen to be very plentiful in modern day weddings as well right now.
This bottle garland project is incredibly simple. Begin by looping the wire twice around the first bottle, being sure to leave a six to ten inch “tail” of wire on the end for hanging the garland. Yarn Pom Pom Garland. Ever since I featured this pomtastic wedding… I’ve been obsessed with yarn pom poms!

Photo by En Pointe Photography via Bridal Musings (see the whole wedding here) These little wooly balls have such retro charm, I bet most of you reading made them at school didn’t you? Or at home if you have a crafty Martha Stewart esque family member. Yes they are DIY by nature ~ you can make them using cardboard circles, forks or even your fingers but the thought of DIYing a whole garland full of pom poms or enough mini pom poms to use as confetti is exhausting! You could hold a craft night with your bridesmaids/friends/family and do a pom pom blitz or make a note on your wedding invite asking your guests to make a pom pom and send it to you. BUY Yarn Pom Poms Etsy is brimming with yarn pom poms, from garlands to cake toppers. Here are some of my favourites on Etsy: DIY Yarn Pom Poms You will need: Yarn (in a selection of your chosen colours) Scissors photo via Honestly WTF Yarn Pom Poms Wedding & Party Ideas.
Tassel Garland DIY. I've been really wanting to make some tassel garland.

I've seen it done for weddings and parties and it's just so cute I had to make some! Here's some inspiration from Pinterest: Since St. Patricks day is coming up, I thought I'd use the colors in from the Irish flag, well muted versions of those colors, green, gold, and white. I already had this fabric lying around, and I used some vintage lace to string the tassels. 1. 2. 3. 4. 5. 6. 7. 8. 9.
Can't wait for St. Dixie Cup Light Garland. Aug 10 Cuteness alert coming right at you, but how fun is this little DIY project, guys?
I found the original inspiration on Pinterest (the ‘lamp shades’ were covered in Hallowe’en hued paper) but figured I’d give it a go using my fave hues. Wouldn’t this garland be absolutely fabulous for a bridal shower, an outdoor wedding and or even the most perfect addition to a nursery in lieu of a night light? Check out the awesome step by step photos below shot by the always wonderful Jenna. Craft on, beauties! {Step 1} Carefully cut apart a Dixie cup and smooth it out so it is as flat as possible. {Step 2} Using double sided tape, adhere one end of a shade cover to a Dixie cup. Like so! {Step 3} Using a pencil (or you can just eyeball it) you’ll make an X on the bottoms of the Dixie cups. I only made a select number of shades for the purpose of the photos here but you get the idea. This little project was also shown over on The Loveliest Day; thanks Melis for sharing the love :)