
After Effects tutorials - 37 results, sorted by date / / (page 1) - 3dtotal.com. Blender tutorials - 51 results, sorted by date / / (page 1) - 3dtotal.com. Making maps with noise functions. One of the more popular pages on my site is about polygonal map generation.
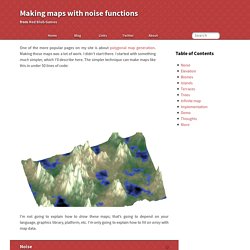
Making those maps was a lot of work. I didn’t start there. I started with something much simpler, which I’ll describe here. The simpler technique can make maps like this in under 50 lines of code: I’m not going to explain how to draw these maps; that’s going to depend on your language, graphics library, platform, etc. A common way to generate 2D maps is to use a bandwidth-limited noise function, such as Perlin or Simplex noise, as a building block. We assign each location on the map a number from 0.0 to 1.0.
For (int y = 0; y < height; y++) { for (int x = 0; x < width; x++) { double nx = x/width - 0.5, ny = y/height - 0.5; value[y][x] = noise(nx, ny); } } The loop will work the same in Javascript, Python, Haxe, C++, C#, Java, and most other popular languages, so I’ll show it in C-like syntax and you can convert it to the language you’re using. Noise by itself is just a bunch of numbers. Yes, that’s it. Frequency. Photoshop tutorials in Project Overview - 763 results, sorted by date / / (page 3) - 3dtotal.com. 3D Clothing, Hair, Shoes Creation - Character Creator. Export well-dressed 3D Characters with Body Motions & Facial Animations to 3rd Party Tools The powerful FBX export feature can now be directly accessed from Character Creator, allowing you to export your well-dressed characters to other 3D tools and make them come alive with your own custom and unique iMotions.
View Manual > In addition, you can also export .iMotionPlus files to FBX format, which contains all of your character’s body and facial morph data. Show off your animated characters complete with facial lip-sync and dynamic expressions all done in iClone, and retain the full original facial morphs and blend shapes for further editing down the road. All this exported data allows you full functionality when editing your characters in external 3D tools! *Note: 3DXchange Pipeline Edition is Required for FBX export. Marvelous Dress in iClone by Chuck Chen / Misc, iClone, Character Creator, tutorial from 3dtotal.com. Technical trainer Chuck Chen teaches how to use Marvelous Designer and Character Creator to create stunning clothing for iClone...
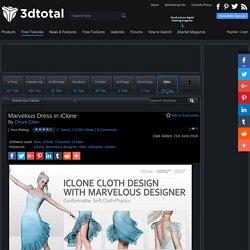
Reallusion are always on the lookout for fresh ways to integrate third party software with Character Creator and iClone. Lately they've set their sights on Marvelous Designer, impressed by the power of its physics simulation and intuitive interface. In this tutorial, Chuck Chen will demonstrate the advantage of combining MD's superior design environment with CC's powerful clothing system to create an animated flamenco inspired dress. Step 01: Prepare the Body Template First and foremost, export the female base body from Character Creator in OBJ format, without the eyes and teeth. Step 02: Design the Dress Once the template body is prepared, start to create the dress based on some reference pictures and images.
Step 03: Sculpting the Details Step 04: Retopology Step 05: Texture Projection in xNormal Step 06: Texture Editing Step 07: Preparing the Dress Related links. ZClassroom - Getting Started. BadKing » BadKing » This MatCap Materials Pack was created and generously donated by Adam Lewis.
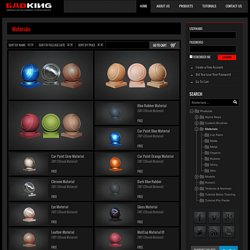
Materials are used to change the way lighting reacts with a surface to make it either smooth or rough, specular or matt, solid or transparent. This download contains 36 individual MatCap materials (.ZMT) that can also be downloaded individually from the Materials Product Section. The materials contained within this pack have a low specular level and smooth texture making it feel like you’re working with real clay. Created in ZBrush, this Materials Pack is compatible with versions from R4 to the most current. For more information regarding Adam Lewis, please visit his website: For more details regarding ZBrush MatCap Materials Click Here. Making of Assassin by Alexandra Magócsi / Maya, Photoshop, ZBrush, tutorial from 3dtotal.com. Alexandra Magócsi walks you through how she create her tribute to the new Assassin's Creed film in ZBrush...
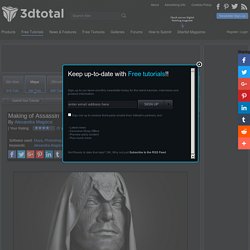
Creating portraits in ZBrush is very popular right now; sculpting a game or cinematic character has been something I have wanted to do for some time. When I saw the trailer for the upcoming Assassin's Creed movie I was very impressed and I decided to use it as a reference for my next personal project. Step 1: Blocking out basic shapes I sometimes do sketches and drawings before jumping into sculpting just to get an overall feel for the character.
I like to start assembling my models on the lowest subdivision level; I kept working at a low resolution until I had completed the basic shapes, this made it much easier to make changes. Base Head Step 2: Likeness I jumped to the 3rd subdivision level to block out secondary forms like eye bags and lower lip folds. Bringing a fantasy character to life by Dmitry Cheremisin (page 1 of 2) / 3ds Max, Photoshop, V-Ray, ZBrush, Misc, Project Overview, Lighting, Rendering, Modeling, Texturingtutorial from 3dtotal.com. Self-taught 3D artist Dmitry Cheremisin brings life to his beautiful Elf girl using ZBrush Hello everyone!
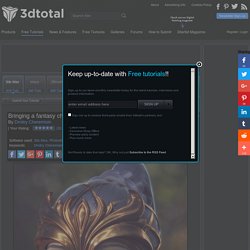
I'm going to share with you my workflow of my latest project. I'll show you my process creation of this Elf-girl (sculpting, texturing, shader setup and rendering) I hope it would be very interesting and you will find something new and helpful. Let's start! Sculpting When starting a new project I usually make a draft sculpt to get the base forms and proportions correct.
Stages of sculpting and refining the model.