
Arduino as wireless RC simulator dongle. Ever wanted to have wireless simulator dongle?
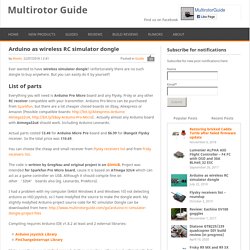
Unfortunately there are no such dongle to buy anywhere. But you can easily do it by yourself! List of parts Everything you will need is Arduino Pro Micro board and any Flysky, Frsky or any other RC receiver compatible with your transmitter. Arduino Pro Micro can be purchased from Sparkfun, but there are a lot cheaper cloned boards on Ebay, Aliexpress or Amazon (Possible compatible boards: . Actual parts costed $3.40 for Arduino Micro Pro board and $6.99 for iRangeX Flysky receiver. You can choose the cheap and small receiver from Flysky receivers list and from Frsky receivers list. The code is written by GregNau and original project is on GitHUB.
D8R II. FRSKY's CPPM at 27mSec - Firmware update with FT_Prog and FTDI cable. Introducing the Issue and the solution: We've talked about FRSky's CPPM signal on this other post that compares it with a standard PPM signal.
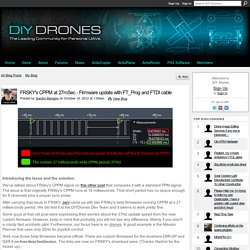
The issue is that originally FRSky's CPPM runs at 18 milliseconds. That short period has no space enough for 8 channels plus a proper sync pulse. After carrying that issue to FRSKY, Jani came up with two FRSky's beta firmwares running CPPM at a 27 milliseconds period. We did test it at the DIYDrones Dev Team and it seems to work pretty fine. Some guys at that old post were expressing their worries about the 37Hz update speed from the new custom firmware.
D8R II plus in PPM mode - openrcforums. D8R XP. Lipo voltage monitoring with FrSky D-Receivers without sensors. Here I’d like to share a simple Lipo voltage monitoring setup, that I’m using in my Bixler with an FrSky D8R-XP receiver.
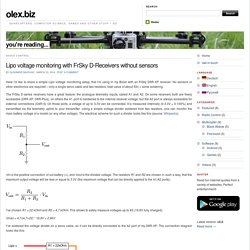
No sensors or other electronics are required – only a single servo cable and two resistors, total value of about 50c + some soldering. The FrSky D-series receivers have a great feature: the analogue telemetry inputs, called A1 and A2. On some receivers both are freely accessible (D8R-XP, D8R-Plus), on others the A1 port is hardwired to the internal receiver voltage, but the A2 port is always accessible for external connections (D4R-II). On those ports, a voltage of up to 3.3V can be connected. It is measured internally (0-3.3V = 0-100%) and transmitted via the telemetry uplink to your transmitter. Vin is the positive connection of out battery (+), and Vout is the divided voltage. I’ve chosen R1 = 22 kOhm and R2 = 4,7 kOhm. Vmax = 4,7/(4,7+22) * 16,8V = 2,96V. RC Stores/Services/Manufacturers. 893535796X318849X19. Easy Telemetry cable for 9xr Pro Frsky DJT module. : 9XR Mods. Hi All, Its very simple, thought could post it it may help some one.You all know that the 9xr pro needs a cable for telemetry.
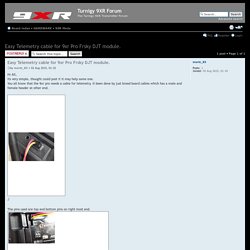
It been done by just bread board cables which has a male and female header at other end. The pins used are top and bottom pins on right most end. a1771150-75-IMAX_B6_LM35_Temp_Sensor_Wiring. Connecting Turnigy 9XR with Arduino ISP. Installing my usbASP drivers failed miserably on my PC, so I decided to use my Arduino Uno to flash OpenTX on my Turnigy 9XR radio controller.
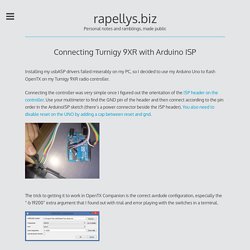
Connecting the controller was very simple once I figured out the orientation of the ISP header on the controller. Use your multimeter to find the GND pin of the header and then connect according to the pin order in the ArduinoISP sketch (there’s a power connector beside the ISP header). You also need to disable reset on the UNO by adding a cap between reset and gnd. The trick to getting it to work in OpenTX Companion is the correct avrdude configuration, especially the “-b 19200” extra argument that I found out with trial and error playing with the switches in a terminal. Before I added the extra argument I was getting the typical sync errors 0x00 and 0xe0. Seems to work OK now! Flashing a Turnigy 9x with an Arduino. Don't you think those programmable transmitters are really expensive ?
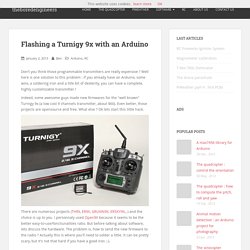
Well here is one solution to this problem : If you already have an Arduino, some wire, a soldering iron and a litle bit of dexterity, you can have a complete, highly customizable transmitter ! Indeed, some awesome guys made new firmwares for the "well known" Turnigy 9x (a low cost 9 channels transmitter, about $60). Even better, those projects are opensource and free. What else ? Ok lets start this little hack. There are numerous projects (TH9X, ER9X, GRUVIN9X, ERSKY9X,..) and the choice is up to you.
[important]If you purchased a "9XR" version, there is no need to to this hack since it's already done in factory ! Ok you said goodbye to your beloved radio ? You'll need 6 wires for the isp protocole : MISO (Master In Slave Out) known as PDO (Program Data Out) on the chipVcc (5v)SCK (clock signal)MOSI (Master Out Slave In) known as PDI (Program Data In) on the chipRST (Reset)GND Pretty easy, isn't it ?