
CSS and round corners: Borders with curves. In our previous CSS article, CSS and round corners: Boxes with curves, we outlined a method for creating boxes with rounded corners through the power of CSS.

A similar technique can be applied to making borders with round corners. We'll start by inserting our four corner curves as background images through the CSS: Lorem ipsum dolor sit amet consectetur adipisicing elit The HTML to achieve this effect is: <div class="bl"><div class="br"><div class="tl"><div class="tr"> Lorem ipsum dolor sit amet consectetur adipisicing elit </div></div></div></div> And the CSS that makes it all happen: If you're not sure how this works please consult the article, CSS and round corners: Boxes with curves for a full tutorial.
Assigning a border Many of you are probably familiar with the CSS border command, so let's place one around this box: Giving us: Hmm... that's not looking how it should... The solution: more background images Seeing that we can't use the CSS border command, we'll instead create a 1x1px image, News List. This is a styled unordered list, based partly on the method used in the CSS Teaser Box demo.

The list was designed to display links to recent news, but there are plenty of other uses for something like this. Each list item will expand vertically to contain any amount of text. It will take either an extremely large font size or a heading that is several lines long to break the effect. Increasing the height of the background image will let the heading grow taller before problems occur.
No extra markup is needed. Hover state? View source to see the XHTML and CSS. {*style:<ul>*} {*style:<li>*} {*style:<h3>*}{*style:<a href=' Item 1{*style:</a>*}{*style:</h3>*} {*style:<br>*}Nulla dictum. Mountaintop Corners. Either I’ve never bothered to try easier methods for creating rounded corners, or I am not afraid of having horrible eyesight in a mere five to eight years.

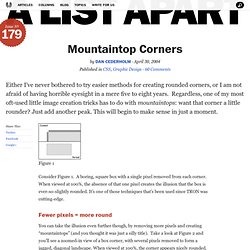
Regardless, one of my most oft-used little image creation tricks has to do with mountaintops: want that corner a little rounder? Just add another peak. This will begin to make sense in just a moment. Figure 1 Consider Figure 1. Fewer pixels = more round#section1 You can take the illusion even further though, by removing more pixels and creating “mountaintops” (and you thought it was just a silly title). Figure 2 For lighter backgrounds, you can remove yet a few more pixels to create an even more rounded effect. Figure 3 Transparent peaks#section2 At this point, you may be saying “Dan, this is a stupidly simple technique.” Because mountaintop corners utilize only two colors, we can set one of those colors as transparent, leaving the mountaintops the same color as the page background, thereby creating the rounded effect.
Mt. 29,035 feet.