
The super fast color palettes generator! Gallery - dark4. Gallery - dark4. Salpicaduras de pintura en alta resolución (High Resolution Paint Splashes. Descargar Coloridos Splash Resumen de diseño vectorial libre Resumen de vectores - vectores gratis.
Plantillas y vectores. Acciones. 30 Great Websites with Parallax Scrolling. The parallax effect has been around for years in classic video games, but it became a trend in the web design world relatively recently.

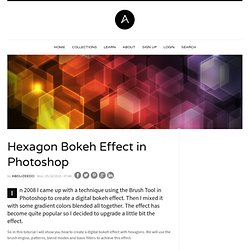
This cool effect is now commonly seen as part of the scrolling feature of a web page. It uses multiple backgrounds which seem to move at different speeds to create a sensation of depth (creating a faux-3D effect) and an interesting browsing experience. The term is derived from the Greek ?????????? (parallaxis), meaning "alteration". Nearby objects have a larger parallax than more distant objects when observed from different positions, so parallax scrolling can be used to determine distances. Fondos de madera curvada para descargar. Hexagon Bokeh Effect in Photoshop. In 2008 I came up with a technique using the Brush Tool in Photoshop to create a digital bokeh effect.

Then I mixed it with some gradient colors blended all together. The effect has become quite popular so I decided to upgrade a little bit the effect. So in this tutorial I will show you how to create a digital bokeh effect with hexagons. We will use the brush engine, patterns, blend modes and basic filters to achieve this effect. Step 1. Lumi - Your wardrobe is a blank canvas.