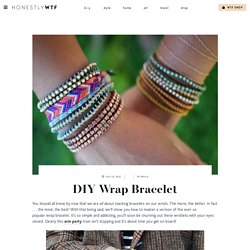

Craftgawker - StumbleUpon. DIY Wrap Bracelet - Honestly WTF - StumbleUpon. You should all know by now that we are all about stacking bracelets on our wrists.

The more, the better. In fact . . . the most, the best! With that being said, we’ll show you how to master a version of the ever so popular wrap bracelet. It’s so simple and addicting, you’ll soon be churning out these wristlets with your eyes closed. Clearly this arm party train isn’t stopping and it’s about time you get on board! You’ll need (for a double wrapped bracelet) :* Lengths will vary depending on the size of your wrist (see comments for suggestions). Fold the length of leather cording in half to form a loop. Place the ball chain along the leather cording with the end of the chain meeting the end of the wrap. DIY Friendship Bracelet - Honestly WTF - StumbleUpon. For several months now, we’ve been receiving emails requesting a friendship bracelet DIY.

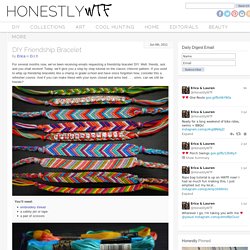
Well, friends, ask and you shall receive! Today, we’ll give you a step by step tutorial on the classic chevron pattern. If you used to whip up friendship bracelets like a champ in grade school and have since forgotten how, consider this a refresher course. And if you can make these with your eyes closed and arms tied . . . umm, can we still be friends? You’ll need:embroidery threada safety pin or tapea pair of scissors Start by cutting several strands of embroidery thread at about 24 inches each. Start on the left side with the outermost color (shown here in red) and make a forward knot by creating a 4-shape over the 2nd color, loop it under and back through the opening. Pull up and to the right to tighten.
DIY Braided Bead Bracelet - Honestly WTF - StumbleUpon. It’s been awhile since our last bracelet DIY.

I don’t know about you, but our wrists have been begging for another colorful addition for months now. 30 Fun DIY Crafts To Keep You and the Family Busy During the Holidays. How to make gift bags from newspaper. When I bought something at a store recently, the clerk handed me my purchase in a bag made from a newspaper.

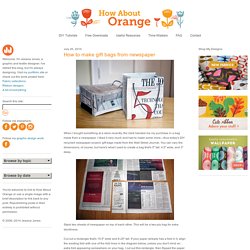
I liked it very much and had to make some more—thus today's DIY recycled newspaper project: gift bags made from the Wall Street Journal. You can vary the dimensions, of course, but here's what I used to create a bag that's 5" tall, 4.5" wide, and 3" deep. Stack two sheets of newspaper on top of each other. This will be a two-ply bag for extra sturdiness. Cut out a rectangle that's 15.5" wide and 8.25" tall. Fold a flap 1.25" down from the top. Cut two pieces of cardstock or chipboard to 4.25" x 1", then glue them on the widest two panels just under the top fold. Put glue on the outside of the 0.5" tab and bring the left-most panel over to form the body of the bag, aligning the cut edge of the panel with the folded edge of the flap.
PIN IT UP, GIRL - thebeautydepartment.com - StumbleUpon. Our email box is literally flooded with requests for updos so here’s a fun one to get us all going!

This is always a favorite for attending an event. This updo looks gorgeous on any hair color but particularly amazing with hilighted hair because it gives the hair lots of depth and dimension. For lack of a better word, I love the way it becomes “swirly”. Best thing is; it’s easy to do, gorgeous and keeps your hair out of your way for the night. I made this a printable tutorial, so all of the steps are next to the photos.
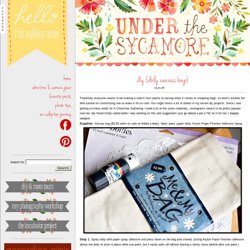
Tools you’ll need: curling iron (to prep the hair with waves), sectioning clips, teasing comb or brush, clear elastic rubber band, bobby pins, light to medium holding hairspray (to mist over at the end). Tags: bride, bridesmaid, date, hair, hair style, hair tutorial, how to, kristin ess, kristin ess hair, lauren conrad, prom, sister, special occasion hair, the beauty department, thebeautydepartment.com, tutorial, twisted, updo, wedding, wedding hairstyles Related posts: Doily canvas bag} & ashleyannphotography.com - StumbleUpon. Thankfully everyone seems to be making a switch from plastic to lasting when it comes to shopping bags, so here’s another fun little tutorial on customizing one to make it oh so cute.

You might notice a lot of doilies in my recent diy projects. Since I was getting so many ready for A Christmas Gathering I used a lot of the same materials…monograms seems to be pretty popular now too. My friend Cindy called while I was working on this and suggested I just go ahead a put a “W” on it for her, I happily obligied. Canvas bag ($2.00 when on sale at Hobby Lobby), fabric paint, paper doily, Krylon Paper Finishes Adhesive Spray : Spray doily with paper spray adhesive and press down on the bag (not shown) . : Gently paint over the holes – I recommend paint meant for fabric, not crafts. . : Peel back doily before paint dries. Bag after doily is removed.