
How to Apply a Tilt-Shift Effect to Your Photos in Photoshop. In this tutorial, I`m going to show you how to apply a very nice tilt-shift effect to your photos.

The result will give you the impression that the picture is just a miniature-scale model. This effect is very easily to achieve in Photoshop following just a few steps and combined with some simple image adjustments will deliver a high-quality miniature-faking outcome. Tilt-Shift photo effect can be achieved straight from your camera while taking photos, using tilt-shift lens, which simulates a shallow depth of field.
But if you don`t have the tilt-shift lens yet, don`t worry because you can create this effect using digital tools like the very popular Photoshop. Many people use the term of “Tilt-Shift” when referring to this type of effect, but more accurate is to use the term called “Miniature faking”. Miniature faking is a process in which a photograph of a life-size location or object is made to look like a photograph of a miniature scale model. It`s time to blur the photo now. Tilt-Shift Simulation in Lightroom. Lightroom Secrets is pleased to welcome guest blogger, Kim Dalmeijer, Kim Dalmeijer is a freelance photographer based in the Netherlands.
Favors portraits and studio work from glamour to commercial. A longtime Lightroom fan, but keen on applying as little gimmicks as possible to keep the photography real. Kim keeps track of his work (in Dutch) via his website (www.kidogo.nl) and via Twitter as @KidogoFoto. Just recently I was watching a program on dutch television where the cutscenes were shot as tilt-shift videos. The final result was this - it's a photo I took of the city streets of Paris way back in 2002.
Considering the original was like the one below, the end result is not bad at all, is it? The fun thing in Lightroom is that you can make a reusable preset of about anything, including all the settings you'll be applying in this tutorial. How you start and how you go about it is key with these simulated tilt-shifts. Now here's what to do, step by step.
Confusing, I know. Cours photographie et stages photo partout en France. Aujourd’hui, Mon Cours Photo invite une bloggueuse à la rédaction.
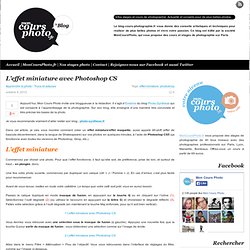
Il s’agit d’Emeline du blog Photo-Synthèse qui est consacré à l’apprentissage de la photographie. Sur son blog, elle enseigne d’une manière très conviviale et très précise les bases de la photo. Je vous recommande vraiment d’aller visiter son blog : photo-synthese.fr Dans cet article, je vais vous montrer comment créer un effet miniature/effet maquette, aussi appelé tilt-shift (effet de bascule-décentrement, dans la langue de Shakespeare) sur vos photos en quelques minutes, à l’aide de Photoshop CS5 (ça fonctionne avec toutes les versions de Photoshop, Gimp, etc.). Commencez par choisir une photo. Une fois votre photo ouverte, commencez par dupliquer son calque (ctrl + J / Pomme + J). Avant de vous lancer, mettez en route votre cafetière. Passez le calque dupliqué en mode masque de fusion, en appuyant sur la touche Q ou en cliquant sur l’icône (1).
Allez dans le menu Filtre > Atténuation > Flou de l’objectif. Bon à savoir.