
Adobe TV. Adobe Lightroom Adobe Photoshop Lightroom software is essential for today's digital photography workflow.
Quickly import, process, manage, and showcase your images, from one shot to an entire shoot. Lightroom 4.0 Resources « Lightroom Journal. Blogs.adobe.com Lightroom Journal Tips and advice straight from the Lightroom team.
Mastering Lightroom: How To Use the Basic Panel. Lightroom has many features that can easily confuse those who are new to it.
While the program offers plenty of different editing opportunities, in order to achieve the best results and user experience, it is important to understand the very basics of Lightroom. In the series of upcoming short articles, I will try to explain each of the most important Panels in Lightroom, so that in the end, you will find it to be a simple, quick and easy to use software for your post-processing needs. Lets start with the Basic Panel. Where to Find It. LR4 réglages de bases. Post-Processing Tips for Beginners. Home / Post-Processing Tips for Beginners Post-Processing Tips for Beginners Comments are closed This page contains a collection of our articles on Post-Processing for Beginners.
These beginner tips should hopefully help our readers to enhance their knowledge of photography and get the best out of their equipment. If you do not know the difference between Lightroom and Photoshop, see our Lightroom vs Photoshop article. Please see our subscription page in order to subscribe to our website via email or RSS. Understanding Sharping in Adobe Lightroom 3. Adobe Lightroom features a wealth of editing tools for the digital photographer, and for anyone concerned about optimizing their images output, understanding the sharpening options is one of the keys to making images sing.

Just like many aspects of Lightroom’s RAW editing suite, the sharpening adjustments feature enough simplicity for set-it-and-forget-it batch processing while also giving the user the fine-tuning that allows individual images reach their full potential. Instead of multiple approaches to sharpening as you might kind in Photoshop, Adobe Photoshop Lightroom takes a different approach with four sliders you can use to optimize your images. Let’s take a look at sharpening a single image and how Lightroom’s Amount, Radius, Detail, and Masking sliders work. Amount Slider The Amount slider is straight forward, controlling the blunt amount of sharpening that’s applied to the image.
La correction des objectifs. Tuto 53 fig Intro Jusqu’à présent, les logiciels Adobe accusaient un certain retard en ce qui concerne la correction des défauts des objectifs.
Corrections d’objectifs avec Lightroom 3.
Comprendre le format Raw - Première partie. Jui 24 2012 [NdLR : je vous propose une introduction au format Raw extraite (et légèrement adaptée pour le web) du début du deuxième chapitre de mon livre Le format Raw : développement et flux de production, paru aux Éditions Dunod.
Cette introduction est découpée en trois parties et dotée de liens de circulation des unes vers les autres. Voici la première partie, intitulée dans le livre De la lumière à l'image.] Pour comprendre le fonctionnement et percevoir tout l’intérêt du format Raw, il est important de connaître les principes fondamentaux de la capture et de la transformation du signal lumineux. Il ne s’agira toutefois pas d’entrer dans des détails sur la constitution et le fonctionnement interne d’un capteur imageur, sans intérêt dans le cadre de cet ouvrage.
Vibrance VS Saturation in Photoshop. To many Photoshop users, increasing both the Vibrance and the Saturation appears to boost the vividness of color, but what exactly is the difference between the two, and when should each be used?
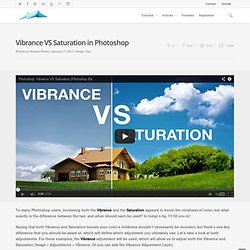
In today’s tip, I’ll fill you in! Saying that both Vibrance and Saturation boosts your color’s vividness wouldn’t necessarily be incorrect, but there’s one key difference that you should be aware of, which will define which adjustment you ultimately use. Let’s take a look at both adjustments. For these examples, the Vibrance adjustment will be used, which will allow us to adjust both the Vibrance and Saturation (Image > Adjustments > Vibrance. Or you can add the Vibrance Adjustment Layer). Saturation In the image below, you can see how the Saturation adjustment has increased the vividness of the colors in the image.
Vibrance Now, instead of increasing the Saturation, take a look at what increasing the Vibrance does to the image. Uh, Okay?
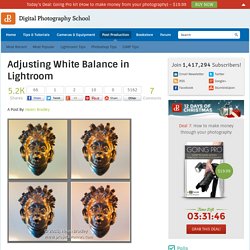
Courbe de tonalité / tone curve. Retouche locale. Edition dans PS. Instantanés/ copies virtuelles. How to Add an Opacity Slider to Lightroom Develop Presets with The Fader Plug-In. White balance. A Post By: Helen Bradley Lightroom has a set of tools that you can use to adjust white balance in your images.
To see these at work open an image in the Develop module. At the top of your Basic panel are the white balance adjustment tools. White Balance Options The dropdown list will show you some options for adjusting white balance – what is shown here will vary depending on how your images are captured. On the left are the options for a raw image and on the right those for a jpeg image. The Temperature and Tint sliders also have different units of measure depending on whether you’re working with jpgs or raw images. Kelvin is a measurement of the color of light – daylight is around 5,500 degrees Kelvin.