
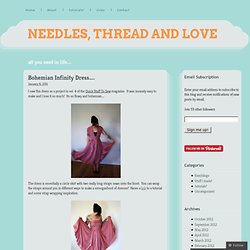
4th of July Star Headband. The 4th of July is always a big holiday celebration for us.

We usually go to my friend Patty’s house where they hold a neighborhood parade and raise money for CHOC Hospital. It’s so much fun. There are raffles, and prizes for the best decorated bike and helmets for the kids, root beer floats, BBQ, and loads of fireworks. It is truly a grand 4th of July celebration. So, I usually end up making something for the girls for the 4th. Here’s what you need: Old T-Shirts in Red, White, and Blue (Or you can purchase knit fabric if you don’t have any!)
Step 1: Cut the bottom section of the t-shirt off where it has been hemmed. Step 2: To begin wrapping the headband, hot glue the end of the t-shirt on the outside of the headband. Step 3: Turn the headband to the inside, and fold sides of the headband underneath and hot glue. Step 4: Wrap the headband evenly all the way to the other end. Step 5: Take a piece felt and fold it in half. Step 6: Cut out several 1 1/2″ circles of all 3 colors.
Fail AND REDEMPTION: BLEACHED SHORTS. This post should've come to you a long time ago but, it has taken a while to get over what I'm about to tell you.

Today I will tell you the most depressing story when it comes to crafting. We had big plans for those shorts up there. We had seen all the cute bleached shorts around the internet and thought... we should do this! So we went to Goodwill and got those shorts up there, brought them home, and followed a YouTube tutorial we had seen- STEP BY STEP. To continue with the story, I will tell you exactly what we did. Cut the bottom of the shorts in whatever way you want. Take an exacto knife, scissors and sand paper... And rough up the shorts where you'd like. Next we stuck the shorts in a bucket of bleach exactly as many tutorials told us to. When we got scared of how long the shorts had been sitting in the bleach, we put them out to dry in the bathtub.
Drying... That's right. Bohemian Infinity Dress… « Needles, Thread and Love. I saw this dress as a project in vol. 4 of the Quick Stuff To Sew magazine.
It was insanely easy to make and I love it so much! Its so flowy and bohemian… The dress is essentially a circle skirt with two really long straps sewn onto the front. You can wrap the straps around you in different ways to make a smorgasbord of dresses! Heres a link to a tutorial and some strap wrapping inspiration. Pearls & Scissors: Refashionista: Sweater into Skirt (tutorial) I'm a huge fan of upcycling and I love refashioning old garments.
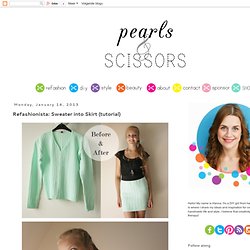
Sweaters are a fountain of ideas when it comes to refashioning - there are so many ways to repurpose and remake them. But this refashion is still my absolute favorite. The idea came to me about a year ago and I made several skirts for my shop back then. I shared this tutorial on Merrick's blog a couple of months ago, but I thought I'd share here as well, in case you missed it back then. The above two are versions I did for the shop. Get the tutorial after the jump! Here's how you can make one for yourself: You will need: 1) A sweater one/two sizes bigger than your usual size. Wanna make a dress?? I am PUMPED today!
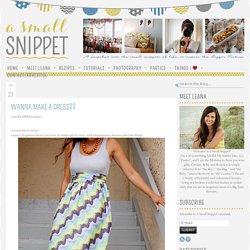
Wanna know why? Cause i’m gonna show you how to make quick, easy, and inexpensive dresses just like these! I know what y’all are thinking…no way that’s quick and easy. oh…you are SO wrong. it really is! I might even venture to say that its one of the easiest sewing projects i’ve ever done. go ahead…try it…and try to prove me wrong! I orginally found this brilliant idea here and was instantly motivated to try it. i did, however, change up some things along the way, such as making a long maxi dress, and one other thing in particular that will prevent a massive headache, so i’ll go ahead and post a tutorial here for you to see.
Fabric Transfer DIY. I recently posted a couple of old pictures that my dad took and I really wanted to integrate them into a new project.
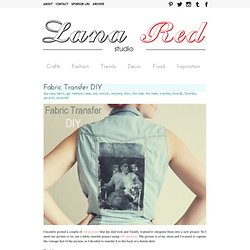
So I used one picture to try out a fabric transfer project using Gel medium. The picture is of my mom and I wanted to capture the vintage feel of the picture, so I decided to transfer it to the back of a denim shirt. Here's how: Supplies: Shirt/piece of fabric, laser printed image, Gel Medium 1. 2. 3. 4. The image transfer probably won't come out as perfect as the original image, but I think that it suits the style and makes it look more unique.