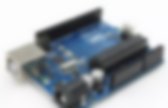
ATTINY programming failed after CLKPR (SOLVED) | AVR Freaks. USBASP V2.0 – warning: cannot set sck period, tosiek kodowanie znaków. Cheap USBASP programmer which you china buy on ebay, ali and others. Official project WebPage: JP1 – Supply Target – Choose between 5V and 3.3V.JP2 – Self Program – jumper on for self program, normally freeJP3 – Slow SCK – Jumper on only if the target clock is lower than 1.5 MHz.LED R – Programmer communicating with target deviceLED G – Power onIDC pinout: I will write how to solve: avrdude: warning: cannot set sck period. please check for usbasp firmware update You have to flash a new firmware version: usbasp.2011-05-28. I’ve got USBASP with Atmega8 so I will use usbasp.atmega8.2011-05-28.hex and Arduino UNO R3 as ISP to flash it.
First open ArduinoISP example in Arduino IDE 1.6.8 and upload the sketch (CTRL+U). USBASP Drivers on Windows 8, 8.1 and Windows 10 Read this: have to first disable check signed drivers on windows 8, 8.1 and 10! [Tutoriel] Avrdude en ligne de commande. Bonjour à tous ! Aujourd’hui je vous est préparé un tutoriel qui va vous faire froid dans le dos, nous allons utiliser … la console ! (*FX: cri strident*) La console n’est pas réservé aux « hackers », avec des lignes de caractères vert sur fond noir comme dans matrix. C’est un outil extrêmement puissant que toute personnes touchant à l’informatique moderne doit savoir maitriser.
Je ne vais pas vous faire un cour sur comment utiliser la console, ni même vous apprendre à faire des scripts shell/bash ou des « makefile », pour ce tutoriel nous allons nous concentrer sur un sujet bien plus intéressant d’un point de vu « DIY ». Nous allons utiliser la console en complément du logiciel avrdude pour programmer un micro-contrôleur (un ATmega1284p) avec un programme généré par l’IDE arduino (équivalent « bas niveau » de l’upload sur l’IDE arduino). L’intérêt de savoir programmer un µc sans utiliser l’IDE arduino ? Avant de commencer Le matériel Pourquoi cette carte et pas une carte arduino ? Avrdude. 005 - Un Stick USB Arduino pour 2€ Avec un simple USBASP à 2€, on a en fait entre les mains une plateforme développement compatible code Arduino, et permettant de gérer le USB en logiciel avec V-USB. C’est à dire ? C’est à dire qu’on peut utiliser un USBASP pour bien d’autres choses qu’un programmateur: Clavier USB, souris, Interface USB/Série ou USB/Midi, télécommande I/R… ça ouvre bien des possibilités, à un prix de folie.
Ce tuto est dans la série « USBASP ». Mon cheminement J’avais de prime abord acheté un programmateur USBASP pour récupérer un Arduino Nano briqué (mission accomplie!) Le bon modèle et les jumpers Voir l’article précédent pour choisir le bon modèle de stick, et lui souder ses jumpers JP2 et JP3. Compléter l’IDE Arduino Pour que l’environnement Arduino reconnaisse cette carte et ses possibilités, il faut ajouter une section au fichier « Boards.txt ». Une fois l’éditeur Arduino relancé, une nouvelle carte « USBASP V2 » est disponible dans le menu « Outils/Type de carte ». Programmer Le programmeur programmé… Martin’s Atelier: Arduino from the command line. Retirement 2013-05-19 : I've let this languish for too long, mainly because I don't do much with Arduinos now.
Happily Sudar Muthu has taken over maintainance of the code. His github repository is though by the magic of github, the old URL continues to work. Thanks to Sudar and everyone else who has helped for keeping this alive. Update News 2012-09-17 : After letting this languish for many months there’s now version 0.10.2 This: Supports the Leonardo board.Moves the board reset code to Perl (this means you’ll need the Device::SerialPort module).Has new path handling code. There are other small changes, for more details see the commit history.3 The new path calculations mean that: Few, if any, paths need to specified in project specific Makefiles.Paths can be grabbed from the environment e.g. from .bashrc.It should be easier to move projects between e.g.
However, you’ll need to set up some new variables to make this work: Github Introduction Building. Using makefile for compiling Arduino programs | Hardware Fun. One of the main reasons why Arduino is very popular with beginners is that it is completely self-contained which makes it very easy to use. Once you have an Arduino board, all you have to do is to download the software and within minutes you can make your first led blink.
The software has everything you need right from the IDE, to the compiler and even serial monitor to communicate with Arduino, all within one single package. While the Arduino IDE is very good for beginners, you might start to feel its limitations, once you start working with it regularly. I use vim for everything and always wished writing Arduino sketches in vim. I configured Arduino IDE, to use an external editor and started using vim to write code and then Arduino IDE to compile and upload. Makefile for Arduino My search landed me to a makefile created by Martin Oldfield. The makefile is quite mature now and in most cases, you can use it to replace the Arduino IDE.
Installation Install through package On Fedora: Setup. USBasp - USB programmer for Atmel AVR controllers - fischl.de. Official USBasp product by MSX A portion of each sale goes to this project! Incl. VAT excl. shipping Order USBasp now! USBasp is OpenSource, it's free! USBasp is a USB in-circuit programmer for Atmel AVR controllers. Features Works under multiple platforms. Download Firmware and circuit The following packages include circuit and firmware.usbasp.2011-05-28.tar.gz (519 kB) TPI support (upcoming release of avrdude will use it), supports programmers with ATMega88 and ATMega8.usbasp.2009-02-28.tar.gz (260 kB)usbasp.2007-10-23.tar.gz (172 kB)usbasp.2007-07-23.tar.gz (176 kB)usbasp.2006-12-29.tar.gz (118 kB) Supports programmers with ATMega48 and ATMega8.usbasp.2006-09-16.tar.gz (116 kB) New VID/PID!
Please refer to Readme.txt for details on building, installing and using USBasp. Drivers On Linux and MacOS X no kernel driver is needed. Successful setup on Windows 10): Zadig - USB driver installation made easy Software AVRDUDE supports USBasp since version 5.2. Hardware Schematic Partlist User PCB layouts. Interconnexion, Technologie, Domotique» Blog Archive » Arduino, avr-gcc et avrdude. Arduino. On ne le présente plus. C’est à la fois un package hardware et un package software. Il permet donc aux bidouilleurs de se mettre facilement au monde de l’embarqué, via un langage de programmation (processing) légèrement adapté. Oui, mais voilà, quand vous êtes déjà habitué par ce monde (aussi bien soft que hard), vous êtes vite un peu dépité par l’ide d’arduino. Vous avez envie de profiter du côté hardware de ce monde (cela reste des cartes d’évaluation, prototypage très bon marché)… Mais cela ne vous gène pas de garder votre bon vieux C… De garder votre éditeur préféré… Votre makefile maison qui automisera tout.
Bref, en gros, pour moi personnellement ça donne, « bref c beau on vient d’inventer l’arduino en 2005, mais je serais pas contre d’utiliser (directement) ce bon vieil avr-libc avec son compilo et ces lib, tout comme en 2001 avec mon AT90S8515. J’ai ajouté « directement » car au final l’IDE arduino s’appui sur cette chaine pour la compilation. First Step : Compilation en. AVR Programming with Arduino, AVRdude and AVR-gcc - All.
AVRDude Tutorial : Burning hex files using USBasp and AVRdude - Embedded Electronics Blog. AVRDude is excellent program for burning hex code into microcontroller. USBasp is awesome USB based programmer for the AVR. In this tutorial we will see how to use AVRdude for burning hex files into AVR microcontroller using USBasp. AVRdude is not readily available for windows installation. Windows version of AVRdude is bundled with WinAVR compiler. Before we start : Download WinAVR from here. Introduction: In order to program any microcontroller you need the .HEX file. After you finish the installation of WinAVR, AVRdude executables can be found at : <WinAVR Installation Directory>bin Complete documentation of AVRdude can be found at: <WinAVR Installation Directory>docavrdudeavrdude.pdf Connections: – Connect the USBasp to PC. – Connect SPI programming pins of USBasp to the AVR microcontroller.
. – Give +5V supply to the microcontroller. – VIMP: If you are burning a fresh microcontroller, close the Slow Serial Clock jumper of USBasp. Executing AVRdude: – Open the command prompt. D: memtype op. Utiliser WinAVR et MFile et AVRDUDE. Pour programmer un microcontrôleur Atmel AVR, on doit écrire du code source sur son ordinateur et le compiler pour le transformer en un programme pour AVR, puis le transférer dans le micro-contrôleur. Toutes ces étapes nécessitent une suite de logiciels différents (un éditeur de texte, un compilateur spécifique selon le langage choisi, et un logiciel de transfert, pour simplifier) plus tous les outils de vérification de code, d’optimisation de taille, etc... C’est ce que permet WinAVR, une suite d’outils pour AVR basé sur des outils libres (GNU) notamment le cross-compilateur avr-gcc.
Mais d’habitude, on installe tout et on se lance directement dans la programmation. Voyons cette fois tout ce qu’il y a dans WinAVR. Liste des logiciels Je vais présenter ci-dessous une traduction du manuel utilisateur de la version 2010-01-10 de WinAVR, disponible une fois installé dans le fichier "WinAVR-20100110/WinAVR-user-manual.html". Première compilation Puis y ajouter de nouveaux fichiers. Move from Arduino software to WinAVR with Programmers Notepad « insideGadgets.
So the Arduino software has been easy to use but I’m thinking about using V-USB in one of my projects. V-USB is an implementation of the USB protocol that can run on an Atmel AVR microcontroller but in order to integrate it into one of my projects it’s time to move away from the Arduino software. I’ll show you how we can create our own version of the ATtiny45/85 Blink without the Arduino software. We will use setup/timer functions from the internal Arduino wiring.c file because it’s easier to use something that works.
First thing we’ll do is download WinAVR from After installation, the default directory is C:\WinAVR-20100110. But before we start with WinAVR we need a starting template, so what I did was download AVR Studio 5 Beta and start a new blank project. Let’s create our main file called main.c and put the starting template code in it. Now we want to see the all the files/folders contained in our project. Now all the files are shown. Setup functions. WinAVR. AVRDUDE - AVR Downloader/UploaDEr. AVRDUDE is a utility to download/upload/manipulate the ROM and EEPROM contents of AVR microcontrollers using the in-system programming technique (ISP).
Documentation Documentation can be downloaded from the download area, or read online here. History AVRDUDE has once been started by Brian S. Dean as a private project of an in-system programmer for the Atmel AVR microcontroller series, as part of the Opensource and free software tools collection available for these controllers.
Due to the growing interest in porting the software to other operating systems, Brian decided to make the project publically accessible on savannah.nongnu.org. Main features The major features of AVRDUDE include: How to get help or report bugs To get support for AVRDUDE, or get in contact with other users of this tool, see the avr-chat mailing list. People who want to contribute in some way to the project can subscribe to the avrdude-dev mailing list, and get in contact with the developer team there. Utilisation d’AVRDude avec USBAsp sous GNU/Linux | Electronique Innovante.
Leonard:/home/olivier/avrdude-5.6# . /avrdude -C /etc/avrdude.conf -c usbasp -p m8 -B 1 -U flash:w:/home/olivier/Atmel-ATMega/CommandeRGB/RGB.hex -v -v avrdude: Version 5.6, compiled on Apr 27 2009 at 19:27:53 Copyright (c) 2000-2005 Brian Dean, System wide configuration file is "/etc/avrdude.conf" User configuration file is "/root/.avrduderc" User configuration file does not exist or is not a regular file, skipping Using Port : /dev/parport0 Using Programmer : usbasp Setting bit clk period : 1.0 AVR Part : ATMEGA8 Chip Erase delay : 10000 us RESET disposition : dedicated RETRY pulse : SCK serial program mode : yes parallel program mode : yes Timeout : 200 StabDelay : 100 CmdexeDelay : 25 SyncLoops : 32 ByteDelay : 0 PollIndex : 3 PollValue : 0x53 Memory Detail : Block Poll Page Polled Memory Type Mode Delay Size Indx Paged Size Size #Pages MinW MaxW ReadBack eeprom 4 20 128 0 no 512 0 0 9000 9000 0xff 0xff flash 33 10 64 0 yes 8192 64 128 4500 4500 0xff 0x00 Programmer Type : usbasp.
ISET LABOS ELECTRONIQUE J. LEPOT. 1- Définissez l'emplacement de avrdude.exe, le programme exécutable. 2- Choisissez le processeur installé sur la cible, l'ATmega168 n'est pas prédéfini, utilisez ATmega88. 3- Type de programmateur utilisé: USBASP , pas de port à définir car USB, laissez la valeur par défaut (lpt1). 4- Définissez l'emplacement du programme à charger dans la cible, il y a un programme TEST1.HEX dans le zip, cochez Write et Verify. Le format est Intel.hex ------- > Attention, vérifiez que aucune des cases de la zone Fuse n'est cochée. 5- Dans la fenêtre vous voyez la commande qui devrait être lancéecliquez Execute. La deuxième led doit s'alu mer pendant l'opération Des messages apparaissent dans la fenêtre inférieure, ils vous indiquent le résultat de l'opération.vous devriez lire un de ces messages: Une fois le montage réalisé, il faut connecter les signaux ISP du programmateur vers la cible,Un câble ISP comporte 6 signaux: Et les leds sur votre projet devraient clignoter.