Analog Comparator. Cannot program ATTINY13 any more at slow clock. Technoblogy - Programming the ATtiny10. 11th November 2017 This article describes how to program the ATtiny10, Microchip's diminuitive 6-pin processor, using the Arduino IDE. It's a great chip for building small gadgets and wearables, or designing interface logic for other projects, and it really lives up to its "tiny" name: The following sections explain how to program the ATtiny10 in C, and how to download programs using a low-cost ISP programmer. It also illustrates some simple applications with example programs. Introduction If, like me, you like using the simplest possible chip for each application, the ATtiny10 will appeal to you [1]; it's a 6-pin processor, about the same size as an 0805 SMD resistor, and it costs about 35p/35¢.
Internal 8MHz clock, by default prescaled to 1MHz.Three I/O lines.Two 16-bit PWM analogue outputs.Three 8-bit analogue inputs.An analogue comparator.A 16-bit timer with input capture and an event counter.A watchdog timer.1024 bytes of program memory, 32 bytes of RAM, and no EEPROM. Examples Blink. AVR Fuse Calculator.
Simple et pas cher docteur fusible pour Attiny. Lorsque vous travaillez avec Attiny comme le 85 Attiny ou le Attiny13, il est inévitable tôt ou tard : vous briquer votre Attiny.Je me suis confronté à elle tout en essayant de brûler une bootlaoder (i.e. définissant les fusibles correctes), que j’ai soudain eu le redoutable "Yikes ! Signature de périphérique non valide » message d’erreur. Comme je l’avais juste avec succès il brûla IDE1.06 et essayait maintenant sur IDE1.6.3, juste pour voir si j’ai installé tout va bien, je savais que la puce était OK et mon programmeur est OK.
En outre, une nouvelle puce Eh bien, quelque chose de sinistre doit être arrivé à ma puce. Serait-ce parce que mon ordinateur a eu quelques problèmes de mémoire au cours de la combustion??? Eh bien, pas beaucoup de choix que d’essayer et de réinitialiser mon Attiny85.Pour cela, il faut un programmeur série de tension élevée. J’ai utilisé le programme ci-dessous. Le programme démarre lorsque vous envoyez un caractère aléatoire au port série. 2 Questions. That relay board should work with the digispark as the optoisolator trigger means the digispark doesn't have to do much work.
However, it will probably consume the same amount of power as the servo when it's not doing anything. Have you tried measuring how much current the servo actually draws when it isn't being used? As a quick test, I just checked the idle power of a random hobby servo I had, and it was drawing ~6ma with no load on it. Compared to the ~30mA the digispark as drawing... that isn't anything to worry about! The power LED on the digispark draws between 2-3ma.
If you use the sleep code shown below in your own code, you'll get the standby power consumption of the digispark down from 30ma down to 18ma. For longer sleep periods like what you talking about, you would set the watchdog to it's maximum of 8 seconds, and then simply keep re-triggering the system_sleep for as many times as you need until the system should be active again. /* Sleepy blink code for the Digispark*/ Arrosage automatique solaire pour moins de 10€ | Domotic and stupid geek stuff. Nouvelle aventure, nouveau mini projet. Cette fois ci je veux fabriquer un mini système d’arrosage pour plantes. Il sera autonome en électricité et capable d’arroser tous les jours après que le soleil soit couché. Le tout pour un tout petit budget (moins de 10€) … Si c’est concluant je pourrais aussi l’utiliser pour arroser l’enclos de mes tortues et pour leur verser de l’eau régulièrement dans leur gamelle (aujourd’hui j’utilise un système de goûte à goûte avec une grosse bouteille et j’en suis pas 100% satisfait).
C’est encore en réflexion dans ma tête mais voici ce que quoi je suis partis : Matériel : ATiny85 pour le cerveau – 0.80€Mini pompe immergée pour les muscles – 2,83 EUR ( ref voir ici )Photorésistance 5mm GL5537 – 0.40€Panneau solaire 5V 200mA 1W Mini – 2,15€DIODE 1N4007 1000V 1A – 0.15€433Mhz RF Transmitter – 1€Relais 5V sortie 250 V/AC 10 A – 1€3 Accus 1.2v (recup) Schémas : Schemas Attiny85 arrosage automatique DIY Platine de test arrosage automatique. Basics: Serial communication with AVR microcontrollers. One of the distinguishing characteristics of beginner-friendly microcontroller platforms– Arduino, PICAXE, and a few dozen others– is that they neatly wrap up and hide the nuts-and-bolts details of interfacing with the hardware.
Like everything else, it’s a blessing and a curse. The benefits are clear: A new user who has just acquired an Arduino can plug it in, blink an LED, and have a working demonstration of two-way serial communication in just a few minutes. The drawbacks are a little harder to see. When you just use one line of initialization that calls a “library,” it’s easy to overlook exactly what’s involved: how many lines of code have invisibly been added to your program? What memory structures have been allocated? In what follows we discuss a minimal setup for serial communication with AVR microcontrollers, and give two example implementations, on an ATmega168 and on an ATtiny2313. Let’s look at the chips: Back to the serial ports. Arduino/TinyDebugSerial.h at master · mchr3k/arduino. Arduino for Beginners: Added TinyDebugSerial to attiny85. One of the challenges of 8-pins attiny85 is that we do not have Serial Monitor debugging after flashing the hex into the IC.
As per my previous blog, without debugging output, we cannot be sure what is happening when the attiny is up and running. While browsing the arduino forum, I came across this site that wrote about several methods to have serial communications to the attiny. Since I only have CSN & CE pins free when the nRF24L01 is not transmitting, I decide to go with the TinyDebugSerial method of serial output. This method will use the attiny85 PB3 pin and transmit to the Serial-TTL receiver or an Arduino. You can use a USB-Serial TTL module or an Arduino to receive the serial transmitted by the attiny and only use one pin on the attiny. Since I have an extra USB FTDI to Serial TTL breakout board, I will use this board and also power up the attiny and nRF24L01 using the on-board selectable 5V/3.3V regulator.
Choose 3.3V jumper as the nRF24L01 can only take up to 3.8V only. Easy Serial on the ATtiny. Introduction The Atmel tinyAVR MCU's are great little chips for projects but can prove difficult to debug. Some ATtiny chips do not have direct support for hardware based serial and therefore the Serial object is unavailable in your code, however, it is easy to add a SoftwareSerial object and view output in the Arduino IDE. The code in this article uses an ATtiny85 with an FTDI Serial TTL-232 USB Cable to send or receive information. A USB Serial TTL Cable can also be used since the CTR and RTS pins are not needed. NOTE: This cable is not used to program the AVR. Using the Software Serial Library The Software Serial library is straightforward to use. SoftwareSerial Serial(RX, TX); The rest of the sketch will contain standard Serial references in the same manner you are accustom to in your sketches on other Arduino boards. void setup() { Serial.begin(9600); Serial.println("Initializing...
"); } Connecting the USB to Serial Cable The Circuit Next, connect the Serial cable to the breadboard. Communication with Tiny's. When you use the Arduino with the Arduino IDE, you are used to use Serial.print and the serial monitor, when you want to get some debug information. Something like this: void setup() { Serial.begin(9600); } void loop() { Serial.println("Testing.. "); } If you are using one of the tiny's things are a bit different, but you also get more options. In the following text I will assume you are using this core: There are several options to get the same functionality as you are used to in the Arduino environment. 1. TinyDebugSerial This option is TX only, that is you can send serial information from the tiny to your computer, and not the other way, but for debug information this is also usually what you want. Using the sketch above your tiny will output on Attiny85 - PIN PB3 Attiny2313 - PIN PD1 Attiny84 -PIN PB0 Note there is no difference in the code from the Arduino code, and no library's needed.
In this picture I use a cheap USB/Serial converter from Ebay: Credits: ATtiny25/45/85 Datasheet, Pinout, Minimal Circuit, Maximum Frequency Calculator | avrProgrammers. The ATtinyx5 series looks to be ideal for motor or power control applications, having 4 ADC channels, and two high frequency PWM outputs with programmable dead time. With an INT0 interrupt, and a useful but less so PCINT0 interrupt one could make a pretty simple DC servo or RC-type servo control. Power Supply vs. Maximum Frequency The maximum clock frequency is dependent on the power supply voltage, and the calculator below can help you determine the maximum clock frequency at any power supply voltage. Maximum Frequency Calculator for ATtiny25/45/85 ATtiny25/45/85 Datasheet Link to ATtiny25/45/85 datasheet from Atmel's website.
ATtiny25/45/85 Pinout ATtiny25/45/85 "Minimal" Circuit Diagram The circuit below shows a programming port. Tinusaur / DS1307tiny. Working with DS1307 Real-time Clock and ATtiny85 using USITWIX Library | The Tinusaur. Working with the DS1307 Serial Real-Time Clock using the USITWIX library for I2C / TWI on Atmel ATtiny85 / Tinusaur. Let’s see how can we work with the DS1307 serial real-time clock using the USITWIX library for I2C / TWI on Atmel ATtiny85 / Tinusaur. Bellow is the testing setup. NOTE: We need the USB-to-Serial just for debugging – it isn’t essential part of the setup. There is no library yet to do that but with in the testing code there are few functions that could do the job. Here is brief a description of the functions: There are 2 additional functions that are used to convert data byte to and from BCD format. static uint8_t bcd2bin (uint8_t val)static uint8_t bin2bcd (uint8_t val) This is direct link to the source code of the testing program: Source code available at: More information about the library will be available at its own page: DS1307tiny Related In "Projects"
Untitled. Avr-libc: Modules. Programming an ATtiny w/ Arduino 1.6 (or 1.0) This tutorial shows you how to program an ATtiny45, ATtiny85, ATtiny44 or ATtiny84 microcontroller using the Arduino software. These are small, cheap ($2-3) microcontrollers that are convenient for running simple programs. The ATtiny45 and ATtiny85 have eight legs and are almost identical, except that the ATtiny85 has twice the memory of the ATtiny45 and can therefore hold more complex programs.
The ATtiny44 and ATtiny84 have 14-legs and more inputs and outputs. Thanks to Mark Sproul for his work on making the Arduino core portable across processors. ATtiny45/85 vs. an Arduino Board The ATtiny45 or 85 is a great option for running simple Arduino programs: it’s small, cheap and relatively easy to use. In short, then, if your project requires only a few simple inputs and/or outputs, you’re probably fine using an ATtiny. Materials and Tools For this tutorial, you’ll need: An in-system programmer (ISP), a piece of hardware used to load programs onto the ATtiny. Connecting the ATtiny Reference. [TUT] [C] Bit manipulation (AKA "Programming 101") The following text is a slightly reformatted version of a post made by Eric quite a while ago. It has been referred to by so many users (it's now the post for bit-manipulations), and has helped so many that I have reposted it here so it is more easily found. Programming 101 - By Eric Weddington To really understand what's going, it's best to learn C languages bit operators and about truth tables. | bit OR & bit AND ~ bit NOT ^ bit EXLUSIVE OR (XOR) << bit LEFT SHIFT >> bit RIGHT SHIFT These operators work on bits and not logical values.
A truth table helps to explain each operation. The OR operation truth table: The AND operation truth table: The XOR operation truth table: The NOT operator inverts the sense of the bit, so a 1 becomes a 0, and a 0 becomes a 1. So let's say I have a byte foo that is initialized to 0: To set bit 0 in foo and then store the result back into foo: Remember that we write the constants in hexadecimal because it's shorter than writing it in binary. To set a bit: Programmation AVR, premiers pas, partie 1 | rhaaa. Je programme occasionnellement sur avr (comprendre autre qu’arduino quoi), mais comme c’est très espacé dans le temps, à chaque fois j’ai l’impression de reprendre depuis le début.
Du coups, je me suis dit que ça pourrais être bien de faire un petit papier là-dessus, en expliquant un peu les points qui m’ont posé problème à un moment ou un autre. Je ne suis pas un très bon programmeur, donc il y aura peut être des erreurs ou imprécisions, n’hésitez pas à m’en faire part dans les commentaires si c’était le cas On va commencer par un truc simple : un ATtiny85, une LED, une résistance, et on veut faire clignoter notre led :). Déjà, premier truc à savoir, c’est qu’il y a plein de façons différentes de le faire, alors on va commencer par du « haut niveau », et on ira voir un peu plus loin ensuite. Brochage de l’attiny85 Le schéma nous indique les différents ports E/S. Le registre configurant la « direction » des données s’appelle DDRB, pour Port B Data Direction Register.
Le registre DDRB. Programmation Avr, seconde partie | rhaaa. Bon, j’espère que mon précédent billet vous aura permis de comprendre un peu comment fonctionnait la programmation avr.Il reste néanmoins encore de nombreux points qui pourraient êtres abordés, je voulais vous en présenter encore au moins 2 : les timers et les interruptions. Une fois ces deux points maîtrisés, vous serez capable déjà pas mal de petites choses avec vos microcontrolleurs. Comme son nom peut vous laisser le deviner, un timer sert à comptabiliser le temps écoulé. Son principal intéret réside dans le fait que son exécution se déroule en parallèle du programme principal. Votre timer ne sera donc pas affecté par le nombre de d’instructions de votre programme. Voyons maintenant ça en pratique : faire clignoter une led, mais sans utiliser les fonctions _delay_ms.
La datasheet nous indique que les bits permettant de régler le timer sont les bits CS00 à CS02, le tableau suivant nous expliquant les valeurs à donner en fonction de la configuration voulue. Programmation Avr, dernière partie | rhaaa. Ok, trois articles sur le sujet ça peut paraître court, mais ça constitue déjà une bonne introduction, qui devrais vous permettre d’envisager la suite par vous-même. Nous allons aujourd’hui nous pencher sur un autre élément essentiel de la programmation avr : Imaginez que vous êtes en train de souder un circuit quand tout à coups la sonnette de votre porte d’entrée résonne.
Vous pouvez arrêter ce que vous étiez en train de faire (mais rien ne vous y oblige), aller répondre, et revenir à vos soudures. Et c’est exactement comme ça que se passe une interruption dans le monde informatique, ici représentée par la sonnette. Les interruptions peuvent être matérielles (changement d’état d’une broche, timer qui arrive à une certaine valeur), ou logicielles, et le nombre d’interruption disponibles dépend du modèle d’avr. Vecteurs d’interruption Afin d’utiliser une interruption sur notre avr, nous avons besoin de faire 3 choses : Comme d’habitude, nous allons voir ensemble un petit exemple.
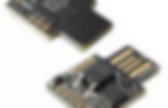
Pin Change Interrupts on ATtiny85 – The Wandering Engineer. Une clé USB qui saisit votre mot de passe pour moins de 3 Euros ! Product Finder Results. Atelier DIY #9 : ATtiny – simple et efficace | Brigade Neurale. [Tutoriel] Avrdude en ligne de commande. Fetch( ); decode( ); execute( );: Programming ATtiny85 MCUs using Usbasp programmer on Linux. Pratique : Des diagrammes de Pinout pour Arduino et ATMega. TUTO : Programmation des ATtiny avec un Arduino. ATtiny85 vs ATmega328. Programming an ATtiny w/ Arduino 1.6 (or 1.0) ATtiny85 vs ATmega328. Découverte de l’ATtiny85, un micro-controlleur plein de ressources ! Programmation d'un ATTiny85 avec Arduino. Attiny85 arduino modelisme naval. Lo Furòl - Programmer un ATtiny85 avec l'arduino MEGA 2560. TUTO : Programmation des ATtiny avec un Arduino.