
Bonjour a tous,J'aurais besoins de votre aide: Je cherche à passer un projet Arduino sur batterie, rechargée par un panneau solaire.
Le projet consomme environ une 30aine de mA pour 3.3v.Je pensait au départ utiliser une batterie LiPo 1s d'environ 500mA histoire d'avoir la marge niveau autonomie. Pour savoir quel panneau choisir, j'avais trouvé ce site: Si je me plante pas, mon arduino consomme donc 3.3*0,03= 0,1W disons que je prenne un panneau de 0,3W afin de pouvoir laisser un peu de puissance pour recharger la batterie même lorsque l'arduino est allumée: Mais je n'arrive pas à savoir si cela revient au même de prendre par exemple un panneau solaire de 3v 0,1A (=0,3W) ou 0,5V 0,6A (=0,3W)?
Choix batterie/Panneau pour recharge solaire. How Shunt Regulator TL431 Works, Datasheet, Application Circuits Explained. In this post we learn how a shunt regulator IC works typically in SMPS circuits.
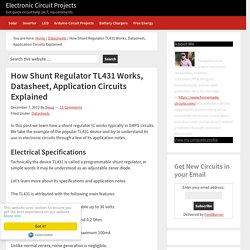
We take the example of the popular TL431 device and try to understand its use in electronic circuits through a few of its application notes. Technically the device TL431 is called a programmable shunt regulator, in simple words it may be understood as an adjustable zener diode. Let's learn more about its specifications and application notes. The TL431 is attributed with the following main features: Output voltage settable or programmable up to 36 volts.
Output Impedance low dynamic, around 0.2 Ohm. Sink current handling capacity up to maximum 100mA Unlike normal zeners, noise generation is negligible. Batteries motos toujours chargées par panneau solaire. Chargeur solaire de voyage - nutz thingz. Voyager, c'est bien.
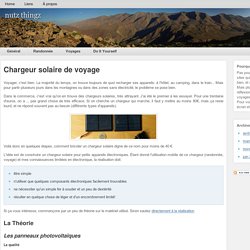
La majorité du temps, on trouve toujours de quoi recharger ses appareils: à l'hôtel, au camping, dans le train... Mais pour partir plusieurs jours dans les montagnes ou dans des zones sans électricité, le problème se pose bien. Dans le commerce, c'est vrai qu'on en trouve des chargeurs solaires, très attrayant. The Power Supply. ISET LABOS ELECTRONIQUE J. LEPOT. Schottky diode (1A) (smd alternative to 1N5819) MBRS140T3G, SS12, SS13, SS14, SK12, SK13, SK14 Schottky diode (3A) (smd alternative to 1N5820, 1N5821, 1N5822) MBRS320T3, MBRS330T3, MBRS340T3, SS32, SS33, SS34, SK32, SK33, SK34.
Régulateur de charge universel ~ Schema Electronique Net. NiMH battery technology, how to charge Nickel Metal Hydride Batteries tutorial for design engineers, as well as NiMH chargers. What does "NIMH" mean on batteries?

NiMH means "nickel-metal hydride. " A little history might be interesting. One of the most successful exotic batteries is the nickel-hydrogen battery. It uses the same nickel-hydroxide positive electrode and KOH electrolyte as the Nickel-Cadmium battery, but it uses hydrogen gas to replace the cadmium in the negative electrode. It needs a pressure vessel to hold the hydrogen gas. Solar Bling: 5 Steps. The circuit is pretty simple.
Attiny85 Microcontroller, Super Capacitor, a few LEDs. At first I just had a zenner diode protecting the super capacitor from over charging (past 2.5Volts) but the zenner bleeds! Next I used the attiny85 to control charging and turn on one or more LEDs as the charge approaches 2.5 volts. In the next couple of steps you can see how I etched the board. Solar Panel Charging Rechargeable Batteries. I made a weather station to continuously monitor daylight and temperature.
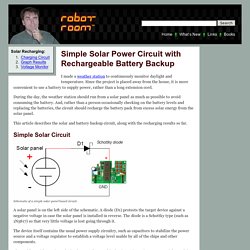
Since the project is placed away from the house, it is more convenient to use a battery to supply power, rather than a long extension cord. During the day, the weather station should run from a solar panel as much as possible to avoid consuming the battery. And, rather than a person occasionally checking on the battery levels and replacing the batteries, the circuit should recharge the battery pack from excess solar energy from the solar panel. This article describes the solar and battery backup circuit, along with the recharging results so far. Low Power ATTiny85 Experiment. I spent time on and off this summer trying to build a micro-controller-based circuit that would run on minimal power.
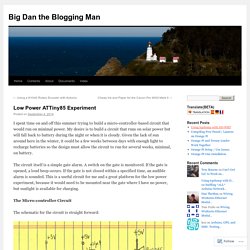
My desire is to build a circuit that runs on solar power but will fall back to battery during the night or when it is cloudy. Given the lack of sun around here in the winter, it could be a few weeks between days with enough light to recharge batteries so the design must allow the circuit to run for several weeks, minimal, on battery. The circuit itself is a simple gate alarm. A switch on the gate is monitored. If the gate is opened, a loud beep occurs. Building an ATtiny13 Solar Garden Light « insideGadgets. After seeing a few solar garden lights as a quick project I decided to make my own version using the ATtiny13A so it can be low cost but have decent functionality.
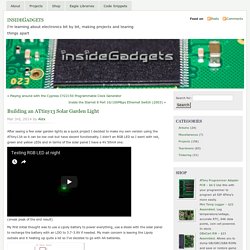
I didn’t an RGB LED so I went with red, green and yellow LEDs and in terms of the solar panel I have a 4V 50mA one. (sneak peak of the end result) Automatic Solar Garden Light. Automatic Solar Garden Lights with LEDs. Efficient automatic solar garder lights circuit with minimum components the best deal is that is completely auto and the Solar panel acts as a light detector.

Switches the Lamp off at Dawn, charges the battery during daytime and switches the LED lights ON at dusk providing 100 Lumens illumination during the night. The solar panel must provide 5.5V and 150mA. Assuming a 3.7V/1500mAh battery the charging will be complete in 8 hours at 200% capacity @ 180 mA. With 10 LEDs the power consumption would be 90 mA/hour providing a 10 hours illumination with light levels of 50 lumens to 60 lumens. With 20 LEDs the light intensity will be 100 to 120 lumens. SOLAR POWERED ARDUINO WEATHER STATION: 13 Steps (with Pictures)
The weather data does not change frequently.So we can take reading at an interval of 5mins.As we are taking readings at regular intervals, it is a fantastic way to save lots of power. A system with appropriate sleep schedules can run for several months on just two AA batteries.We are so lucky that Arduino has several sleep modes that can be used to reduce power consumption.
This is most useful for any sensor networks.You can use this tricks in any of your stand alone sensor project. After searching through the internet for using the sleep modes, I found a simple but powerful library by Rocket Scream has a Lightweight Low Power library supports all AVR power down modes. Each mode has an associated library method that lets you control sleep duration using the watchdog timer.For a novice programmer like me it is very simple and easy to use. How to use LowPower Library : Electronique - Realisations - Interrupteur automatique 003. > Olivier Gloton home page : Réalisations minutes - Intérupteur crépusculaire. Electronique - Realisations - Interrupteur crepusculaire 003. Using TP4056 for both battery charging control and load control. I have a TP4056 Lithium ion charging breakout board. I am just trying to use a single 3.7v 18650 battery which would power a small stepper motor and Arduino.
I have one of the TP4056 boards that has additional circuitry for (what I believe to be) load control, so in addition to +/- in and +/- battery on the board, there is +/- out. You can see a picture of the board here: There is also a helpful video at that reviews this board. I can get the board to charge the battery fine, when it is just the power input, the TP4056 board, and the battery. I can also get the battery to power the load (stepper + Uno board) fine, when it is just the battery + load, and also with the TP4056 in between the battery and load (although haven't run it down to test the undervoltage protection yet).
What I am struggling with is the relationship of the charging side with the load side. I did a search for TP4056 on the forum, but I was unable to find anything that discusses this. Électronique en amateur: Fabrication d'un petit traqueur solaire. Recharger des piles alcalines non rechargeables - Astuces Pratiques. Montage simple d’ un chargeur de batterie solaire – Zonetronik. GuidEnR PHOTOVOLTAÏQUE Site Map. GuidEnR PHOTOVOLTAÏQUES > Comment déterminer le point de fonctionnement d'un module photovoltaïque ? GuidEnR PHOTOVOLTAÏQUE > Point de fonctionnement électrique d'un module photovoltaïque. La puissance électrique délivrée par le module photovoltaïque est le produit de la tension et du courant qu'il génère. Ces deux grandeurs courant-tension délivrées par le module photovoltaïque dépendent des propriétés du module mais aussi de la charge aux bornes du module.
Dans cette partie du cours, nous étudierons les propriétés électriques d'un module photovoltaïque. Test comparatif de la consommation électrique à vide de diverses cartes Arduino et compatible. Solar Garden Light Hack - Make A Solar Battery Charger. Dollar Store Solar Path Light Hack Here is a simple solar garden light hack. Get four cheap dollar store path lights for this project. Using the original garden light parts, you can make a high speed solar battery charger for AA or AAA batteries. Depending on which model you get (you normally cannot tell from the outside) you will either have AA or AAA batteries and sockets inside the solar path light. Self Sufficient Arduino Board - All. Chargeur LiPo USB et Alimentation de Secours LiPo Rider Pro SeeedStudio. [Résolu] Recharge batterie lithium en solaire - Arduino by edouard62. Solar Battery Charger With LM317T.
A small solar panel makes an excellent battery charger for AA and AAA rechargeable batteries. Only a few components are required and construction is very simple making this a perfect first renewable energy project. Rechargeable AA and AAA batteries have a voltage of around 1.25 Volts when fully charged. Therefore 2 in series gives a total of 2.5 Volts, 4 in series 5.0 Volts. Therefore the common solar panel output voltages of 3 Volts and 6 volts, are perfect for charging 2 or 4 batteries respectively. CalSol - pvreseau. L'ensoleillement. PV potential estimation utility. Solar arduino - heliosoph. This page is a summary and a table of contents for my projects that deal with powering an arduino system with photovoltaic energy.
As these boards run on rather low power the arduino platform is a good choice when you want to create a PV-powered microcontroller system. Optimizing the system is the way to make the whole thing efficient in terms of resources and money. What Size Solar Panel and Battery Do I Need? - nicegear blog. Power - Powering Arduino with Solar Panels - Arduino Stack Exchange. SparkFun Energy Harvester Breakout - LTC3588 - BOB-09946. IntWithHW-PwrSup. Arduino - Guides. SOLAR POWERED ARDUINO WEATHER STATION. Passer un projet sur batterie. Solar Module for Arduino.