Crochet Seed Bead Bracelet. Free Crochet Pattern – Easy Laptop / iPhone Sleeve « Roses n Lilies. My man needed a sleeve for his new 11 inch netbook. After searching the net for a pattern, I came to the conclusion that there really isn’t much of a pattern to making a laptop sleeve, so I tried my hand at making one free hand. Of everything I’ve ever crocheted, this is one of the easiest things I’ve ever made! :) Yarn: Your choice. Hook: The right size for the yarn you’re using. Tension: Firm/tight. Stitches Required: Chain stitch For a video tutorial…click here.US Single Crochet (also called UK Double Crochet) What is this stitch and how do I do it? Row 1: Chain stitch until your row is as long as the short side of the laptop. Row 2: 1 Single crochet (sc) in second chain from hook, 1 sc in each stitch across, 2sc in last stitch. Row 3: (working around the corner and into the bottom side of the starting chain row) 2sc in first stitch, 1sc in each stitch across, 2sc in last stitch.
Note: I had a big battery to work around, so I decreased once at each end in the second last row. Vintage Vertical Stripe Crocheted Blanket Pattern. If you want to change colors in the middle of a row. I used 27 different colors, some more than others. Most of the yarn is and a few others that I've lost the wrappers for so I don't remember what they are.
At 250 chains, the blanket is 6' 9" long and the width will be a little over 4' wide when I'm done. I used a size "I" hook because that's what the yarn called for. (If you look at the wrapper around the yarn it will tell you the suggested hook size.) **There is a crochet-along group on Ravelry that is working on this afghan - be sure to check it out for more tips and camaraderie! To start, chain 250. Now for your first row, double crochet in each chain (your first double crochet will be in your 250th chain). When you get to the end of the row, cut your yarn and knot off by pulling the cut thread through the last loop on your hook. Next, choose your new yarn color and make a slip knot with it on your hook. With your hook through the space, make a single crochet, then chain two. The Granny Stripe :: ta-dah! Hello my friends, thank you so much for being here with me.
I 'm really happy that finally, finally, I've found a (relatively) quiet little spot in my busy-busy days to sit and whizz up a multi-coloured ta-dah post to share with you all. Pheww....for a while I thought it would never happen, I can't tell you how incredibly difficult it is at the moment for me to find time to sit and write. When I first made the decision to go with the acrylic for this blanket, there was quite a bit of uncertainty and I really wasn't at all sure whether it would work out or not. I purchased the yarn on a bit of a whim really, chose the colours quite quickly in a dimly lit shop one lunch time. Brought them home in a big squishy bag, tumbled them out onto the floor, arranged them in rows, stood back and took a long hard look at my blanket-to-be. A few dubious colours, but mostly yes I was happy with them and felt they would work up nicely into stripes. And oh-me-oh-my, I was not disappointed. Do you like it? Creating Crochet Rag Rugs. Creating crochet rag rugs with strips of fabric is not a project for someone just learning to crochet.
Fabric is much harder to work with than yarn, and it takes practice. Once you've learned to do it, and have the crochet supplies you need, you can create beautiful rag rugs that may become family heirlooms. Prepare Fabric to Crochet a Rag RugThe first step is to purchase and prepare the fabric. Your grandmother may have had to make quilts and rag rugs with what was left from old clothes, but today's crafter wants to buy fabrics that suit her style, home decor and budget. Have the fabric store cut all your fabric choices into one yard lengths. You want the strips to be as long as possible; the ideal is to cut each yard of fabric into one strip. If you have only one color or print, you may want to sew the strips together at their ends to make one long strip you can roll into a ball. Start the Crocheted Rag Rug The other crochet supply you need is a large crochet hook. Rag Rug Inspirations, How To’s and Patterns. Well as I’m busy waiting for lots new yarn to arrive I decided to start a new rag rug project that I think is going to be rather large.
I’m not sure how long it will take to complete but I am going to work on it for at least 2 hours everyday. In the meantime I thought I would share a few resources with you. For some visual inspiration why not visit flickr? Crochet Rag Rug Group - click here. Rag Rug Group - click here. Crocheting Rag Rugs Group - click here. Handmade Rugs Group - click here. Other good articles include:- Thrifty fun - Crochet Rag Rug Instructions - click here. Love To Know - Crochet Rag Rugs - click here. AboutCom - Oval Rag Rug Instructions. My Circular Rag Rug Instructions can be found here. You can find patterns for heart rag rug, ripple rag rug and granny style rag rug in both my Ravelry pattern store and my Etsy store. I will be posting photographs of my new rag rug in the coming days so that you can see my work in progress. How to Crochet a Rug out of T-Shirts.
May 31st, 2013 3092Email 471 users recommend It's easy to crochet a rag rug made from strips from old T-shirts. Cal Patch This is all you'll need to make your own upcycled rag rug. Begin cutting at the bottom hem of the shirt. Photo: Cal Patch It gives me a thrill to make something new, that's useful and beautiful, out of something old and unwanted. You will need: T-shirts (anywhere from two on up, depending on size rug desired), the bigger the betterScissorsGiant crochet hook (I used 15 mm) 1. When you reach the armpits, cut right across the seams until you reach the edge of the sleeves and can't cut continuously anymore. 2.
Overlap the two ends, lining up the holes, as shown. Now take the long tail of the strip whose end is on top, and pull it through both holes from underneath. Keep pulling until the entire strip has gone through the hole and give a final tug; you should have a join that feels nice and smooth and not like a knot. 3. View 6 member project galleries. Crochet Seed Bead Bracelet ∙ How To by EVEnl on Cut Out.
Crocheted Puffy Slouchy Hat Pattern. New Pattern ~ Crochet 3D Flower Purse « Crafts. (Update: To see more of my patterns, please visit my ONLINE SHOP!) Here’s the answer to the recent guessing game. The project I was working on turned out to be this Crochet 3D Flower Purse. Some time ago, I have already posted an article about this bag, but it’s just now that I’ve prepared a pattern for those of you who’d like to make it too. You can find the pattern and all the necessary information in my SHOP.
Enjoy! And have a wonderful new week! Love, Petra. Shell Edging- Free Crochet Pattern. Shell Edging has become quite popular and is used for everything from blankets to hats and clothes. This pattern is a great way to start learning how to do this type of edging. Materials: 1 ball of size 30 crochet cotton in the color of your choice and a size 10 steel crochet hook. Abbreviations: ch (chain) dc (double crochet) sk (skip) sl st (slip stitch) sc (single crochet) sp (space) Pattern: Work a row of sc around open end of fabric, sl st in first sc. Row 1: Ch 3, dc in next sc, * ch 11, sk 11 sc, dc in each of next 2 sc, repeat from * across, end with a sl st in top of ch 3.
Row 2: Ch 3, dc in next dc, * ch 11, dc in each of. next 2 sc, repeat from * across, sl st in top of ch 3. Row 3: Ch 3, 2 dc in first dc (at base of ch 3), ch 2, 3 dc in same dc, * sk 5 ch sts, (3 dc, ch 2, 3 dc) for a shell in next ch st, shell in next dc, repeat from * across, sl st in top of ch 3. Polka Dot Pineapple: Tutorial--T-Shirt Yarn. **This tutorial is intended for personal use only.** About 5 years ago, I prepared a tutorial with pictures showing how to create yarn from cotton t-shirts.
Wouldn't you know it, when I looked for it this morning to post to my blog, it was nowhere to be found. I want to apologize in advance for the quality of this new tutorial. T-shirt yarn is a very durable yarn. Okay, I will start off by saying that I have had these t-shirts sitting around my house for over 3 months just taking up space. Luckily the t-shirts that I have to work with are in a good array of colors so eventually it will give me a nice variety to work with. **Please note that only the unprinted, plain portions of the t-shirts are suitable to make into yarn.
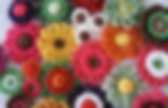
Start by placing a t-shirt onto a flat work surface. Using a sharp scissor or rotary cutter and ruler, cut away the bottom hem. Take the bottom of the tube (closed end) and fold it upward, leaving a 1-inch margin at the top. Unfold the strips. \ PINK ROSE CROCHET / Christina Lowry Designs: Crochet flower tutorial... Thanks for the lovely comments about the crochet flowers I've been making. Their purpose is a bit of a secret, but I thought I would share the pattern here with you so that you can use them as you wish.
Perhaps for pretty hair clips, a flowery garland or stitched to a blanket? Fiona's flowers I'm using bella baby layette bamboo and wool mix, which is an 8ply, and a 3.5mm steel crochet hook. Start by making 4 chain stitches. Slip stitch to form a loop. Chain 3 stitches, which will be counted as 1 double crochet. Slip stitch to join circle of double crochet stitches and bind off. Skipping next stitch, slip stitch into the top of the 2nd double crochet stitch, chain 3, skip next stitch and slip stitch into second stitch, continue until end. (So you are chaining three and anchoring your chains at every second stitch to make the gap that you will be working the petals into.) To make flower petals work into the gap and not the chain stitches.
(So 1 single, 3 double, 1 single = one petal. Crochet Geek - Free Instructions and Patterns. Tejiendo & Pensando: Flor de 2 capas de 6 petalos - Tutorial de tejido crochet. Mil y un motivos para recorrer la zona de las lanas | Weblog Mi Espacio | ESPACIO LIVING. Cuando Romi Goransky, quien me introdujo en el mundo del Furoshiki, me invitó a recorrer la zona de las lanas, no lo dudé ni un segundo. No tejo ni no tengo intenciones de hacerlo (no por ahora), pero muero por este material y todo lo que puede producir.
No quise perderme este paseo, lleno de colores y texturas, y de paso invité a Julieta, una joven emprendedora que está recién dando a conocer a sus tejidos Sospechosos. La zona de las lanas está principalmente enfocada sobre la Av. Scalabrini Ortiz entre la Av. Córdoba y Av. Nosotras entramos en varios lugares pero me quedé con un favorito, Lanas Naturales, no sólo porque me gustó la variedad y el orden de sus propuestas, sino porque además encontré una idea que puede servirles para replicar en casa. Son bastidores recubiertos en lana y lana enmarcada con un marco antiguo (una buena forma de recordar a la abuela tejedora sin usar una foto). El lugar es fantástico, cálido y muy luminoso gracias a sus amplios ventanales.
De labores - Pagina principal.