background preloader

Faves ❤

Facebook Twitter

Craft: Washi Tape Phone Cover. I recently got a new phone. 
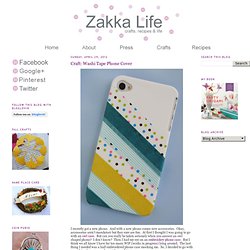
And with a new phone comes new accessories. Okay, accessories aren't mandatory but they sure are fun. At first I thought I was going to go with an owl case. But can you really be taken seriously when you answer an owl shaped phone? I don't know? Then I had my eye on an embroidery phone case. I started off with a basic white iPhone cover. DIY Gold Tube Bracelets. I have very vivid memories of walking into a bead store for the first time, almost 15 years ago, and being overwhelmed by the million and ten ideas that filled my mind. 
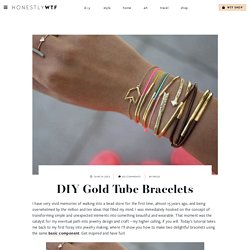
I was immediately hooked on the concept of transforming simple and unexpected elements into something beautiful and wearable. That moment was the catalyst for my eventual path into jewelry design and craft – my higher calling, if you will. Today’s tutorial takes me back to my first foray into jewelry making, where I’ll show you how to make two delightful bracelets using the same basic component.

Get inspired and have fun! For single, adjustable gold tube bracelets, you’ll need: Start by cutting the knotting cord into 2 12 inch pieces. And now, all that’s left is the sliding closure! . . . and bring the top cord under both the bottom and middle overlapping strands through the loop, into a knot. Repeat the same step on the right side. Continue to make 5-6 more knots. Trim away any excess cord. Layer and enjoy. Crayon. Pressing the ingredients into the crayon mold. 
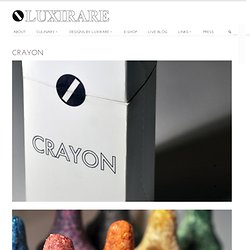
Processed nuts, sesame seeds…and moistened with melted marshmellow. The consistency should be somewhat dense and clump together with a squeeze. Another color set, processed corn, nuts, yellow fruity pebbles, bee pollen, super healthy.

Before it was powdered, here are the whole ingredients..I used freeze dried corn as well (this stuff is SO good as a snack…SO GOOD..better than popcorn..it tastes like real corn but just dried…but super light not like normal dried corn), I also used peanuts, bee pollen, dried bananas Each crayon was made with color divisions. This was the brown color, it had almonds, black sesami, wild sesame, and some other ingredients…You can use whatever you want, even prunes.. Bee pollen is really good for you as well. These were the green crayon ingredients, peas, green beans, dried kiwi, green fruity pebbles, dried pumpkin seeds. The purple and blue are least healthy, they have more candy and sugar in them haha. Check here. Studded Cotton and Leather Carry-All. Make a classically styled bag to carry your basics or current diy project!

Supplies and Equipment: - 2 skeins of sugar n’ cream cotton yarn – this is dyed by following the Ombre Dyed Yarn Tutorial - 16 metal studs – these are 3/8 inch pyramids - 12 inch zipper - 2 by 36 inches of leather - utility knife - size 6 US double pointed or round knitting needles - dull sewing needle - sharp sewing needle - sewing thread to match the zipper/yarn - pins - rulers This bag is about 12 by 14 inches, flat, and large enough for a wallet, book, bottle of water, and a few other basics.

If you want a larger bag add another skein of the sugar and cream, if you want a bag that is sturdier consider knitting it in linen stitch instead (linen stitch does use more yarn, so you’ll want at least 3 skeins.) My gauge was 20 stitches = 4 inches and 20 rows = 3 inches. I could have knit this then dip dyed it, but there are two reasons I’m glad I didn’t. Sew up the bottom and tie off the yarn tails securely. Stab Bound Journal. Make a hand bound journal with elaborate side stitching for yourself or as a gift.

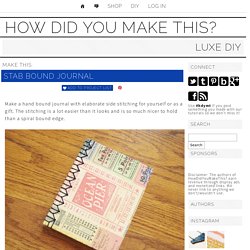
The stitching is a lot easier than it looks and is so much nicer to hold than a spiral bound edge. Supplies and Equipment – sharp utility knife and cutting surface BE VERY CAREFUL WITH THE SHARP BLADE – rulers – drill with 1/16th inch bit OR a small paper punch BE VERY CAREFUL WITH POWER TOOLS – fancy cover paper – I used Cavallini Vintage Tickets Wrapping Paper – 20″ x 28″ – 1 sheet of 8.5×11 for endpapers (this can be fancy or the same paper as your pages) – 10 sheets of 8.5×11 paper for pages – 3 yards of embroidery floss – mat board – I used Crescent No. 33 White & Cream Smooth Mat Board – Yes Stikflat Glue or other archival glue that leaves paper flat – heavy object to use as a weight – waxed paper – cutting/hole punch template – click here to download – thin cotton or linen fabric (optional) – needle with an eye large enough to fit embroidery floss – brush for glue Stitch down through the next hole.

DIY macaron coin purse. Geek Chic iPad Case. Hello, everybody! 
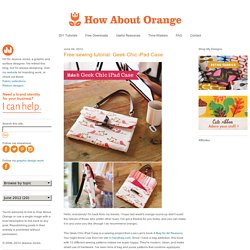
I'm back from my travels. I hope last week's orange round-up didn't scald the retinas of those who prefer other hues. I've got a freebie for you today, and you can make it in any color you like (though I do recommend orange). The Geek Chic iPad Case is a sewing project from Lisa Lam's book A Bag for All Reasons. Download the Geek Chic iPad Case tutorial here. If you dig it, you can purchase the whole book here. (Photos from A Bag for All Reasons.) Big Cuddly Bunny. My hometown has an agricultural fair every August that I rarely miss.

My brother watches the oxen pulls for hours and my mother lingers over the prize vegetables, but I always head straight for the rabbits! I totally love them: their blinky eyes, their fat bellies and their ridiculous ears. And so when it comes to Easter and its wonderful cast of characters, for me, the bunny wins. Our Big Cuddly Bunny gets its shape and inspiration from this winter's Big Snowy Owl. With a couple of key modifications a wide-eyed owl turns into a floppy-eared rabbit, full of sweet, earnest personality. The Materials Main Yarn: 6 skeins of Blue Sky's Bulky, 50% Alpaca and 50% Wool. The Pattern Gauge 2 1/2 stitches = 1 inch in stockinette Finished Size 15 inches from ground to top of head 38 inches in circumference The Bottom With the Main Yarn and the double pointed needles, cast on 8 stitches.

Place a stitch marker and join for working in the round, being careful to not twist your stitches. Round 2: Purl. The Body. :: DIY Humpback Whale Knitting Pattern :: vintage + modern design for kids and the home. Solid perfume pocket watch locket. Try as I might, I cannot seem to grasp even the most basic of feminine beauty rituals.

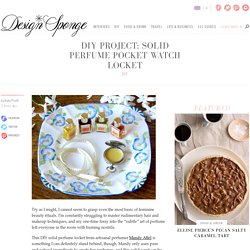
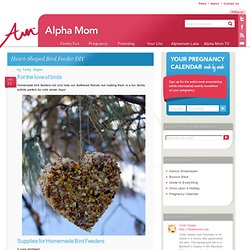
I’m constantly struggling to master rudimentary hair and makeup techniques, and my one-time foray into the “subtle” art of perfume left everyone in the room with burning nostrils. This DIY solid perfume locket from artisanal perfumer Mandy Aftel is something I can definitely stand behind, though. Mandy only uses pure and natural ingredients to create her perfumes, and this solid scent can be easily applied with no risk of over-dousing.

The old pocket watch appeals to my tomboy side, and I love its versatility; you can wear it as a necklace or pin, or simply tuck it into your pocket or purse. I can’t wait to make one and give my feminine sensibilities a little boost :) Thanks for sharing this tutorial with us, Mandy! — Kate Read the full how-to after the jump! Creating your own solid perfume is extremely satisfying. Materials Instructions 1. 2. 3. 4. 5. 6. Heart-Shaped Bird Feeder DIY. Jan13 by Cindy Hopper For the love of birds Homemade bird feeders not only help our feathered friends, but making them is a fun family activity perfect for cold winter days! Supplies for Homemade Bird Feeders 3 cups birdseed 2 – 1/4 ounce unflavored gelatin packet cookie cutters twine Sprinkle two packages of gelatin over 1/2 cup cold water.

Allow mixture to cool until gelatin is thick and coats all the birdseed. Wrap a piece of foil along the bottom and up the sides of a cookie cutter. Pack birdseed mixture inside cookie cutter. Allow mixture to harden and then remove from cookie cutter. Add a piece of twine for hanging. A perfect treat for the birds! Update: please see author’s (Cindy’s from Skip to My Lou) comments below on how to tackle any issues you may be having with this recipe. 
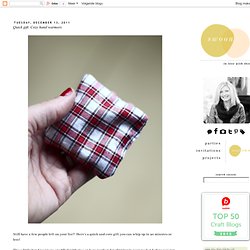
Quick gift: Cozy hand warmers. Still have a few people left on your list? Here's a quick and cute gift you can whip up in 20 minutes or less! These little hand warmers are filled with rice and are perfect for slipping in your pocket before you run out the door! I made a few extra for myself for those chilly late evening/early morning walks with my dog. Supply list: 4 pieces of 3"x3" cotton fabric (no blends) sewing machine/supplies uncooked rice To Make: Pin two pieces of fabric together, wrong side out Use your machine to sew around the edges, leaving at least an inch open Turn square right side out Fill square 3/4 of the way with rice (I used a spoon) Hand sew or machine stitch the pocket opening Package your hand warmers in a cute bag and be sure to include instructions for use (shown in third photo above).

Now you have more time for eggnog and mistletoe (you're welcome). Friendship Bracelets. Macraméd friendship bracelets were all the rage when I was growing up in the eighties. 
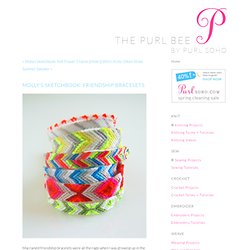
All the girls at my school would obsessively make them for one another in a dizzying variety of colors, widths, and patterns. It's amazing, thinking back, that such young girls could make such beautifully intricate accessories. I, of course, tried my hand at making them as well. I would ride my bike down to the five-and-dime store and pick out the most sophisticated color combinations of embroidery floss I could find, but when it came to the actual macramé I never got beyond plain stripes. Fast forward 20 years: Purl Soho started carrying DMC Cotton Embroidery Floss in every conceivable color (including fluorescents!

Making friendship bracelets is a surprisingly easy craft, and best of all, in the end you'll have a bunch of cute summer bracelets to give to your pals. Materials Since this is such a free form enterprise the amount of colors of DMC embroidery floss you get is really up to you. Beginning. DIY Friendship Necklace. As soon as Lauren and I saw this editorial in Flare Magazine, we knew we had to recreate these awesome, friendship bracelet-like necklaces. We promise they are super easy to make and the perfect way to pass the time during those long summer roadtrips.

To make a 2-tone necklace, cut a long piece of rope and wrap two different colors of embroidery thread around its own bobbin. Tie a starter knot along with the two colored threads you are using, leaving at least 3 inches of slack, Tape down the slack to a flat surface or safety pin it something that will help keep it in place (feeling nostalgic yet?). Lay the color that isn’t being used (shown here in purple) in your left hand, along with the rope, and hold them taut. Take the active color (shown here in red) in your right hand, pass it over the rope, loop it under and back through the opening. Pull up and to the right to tighten. Once you’re done knotting, add a few nuts and/or washers to the necklace.