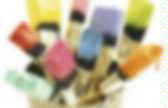
Doily Canvas Bag. Thankfully everyone seems to be making a switch from plastic to lasting when it comes to shopping bags, so here’s another fun little tutorial on customizing one to make it oh so cute.
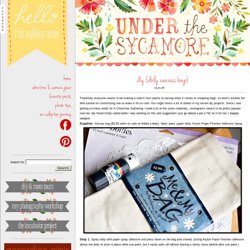
You might notice a lot of doilies in my recent diy projects. Since I was getting so many ready for A Christmas Gathering I used a lot of the same materials…monograms seems to be pretty popular now too. My friend Cindy called while I was working on this and suggested I just go ahead a put a “W” on it for her, I happily obligied. Canvas bag ($2.00 when on sale at Hobby Lobby), fabric paint, paper doily, Krylon Paper Finishes Adhesive Spray : Spray doily with paper spray adhesive and press down on the bag (not shown) . : Gently paint over the holes – I recommend paint meant for fabric, not crafts. . : Peel back doily before paint dries. Bag after doily is removed I traced on my letter and filled it in with paint. For a cook: fill it with cooking supplies For a gardner: fill it with gardening supplies. Laura Thoughts: Make-up Magnet Board.
We all know with craft blogs that original ideas are often hard to come by, we find ideas we love and make them our own but we didn't come up with the idea ourselves.
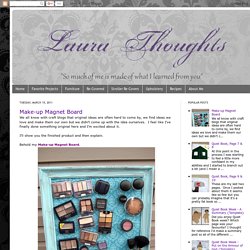
I feel like I've finally done something original here and I'm excited about it. I'll show you the finished product and then explain. Behold my Make-up Magnet Board. I have a friend who is beautiful and stylish and has always loved make-up but recently took a course that intensified her love. Her renewed interest has worn off on me and it made me remember eye shadows I'd hidden away that were gathering dust.
The basket was a mess and I was overwhelmed with all my choices never knowing what to use, digging through to see what I had and find what I wanted was a pain. I painted it (The hard way, with a brush instead of spray paint. I went to the hardware store and picked up some metal and had them cut it to fit inside my frame. Here comes the brilliant part though. Next I wanted a place to store my brushes and liners though. Cake Postcard. Supplies Materials needed to make two cake postcards: 1 large sponge (yellow paints the best)Serrated knifeX-Acto or utility knifeSpray paint (brown, yellow, pink or white)1 tube acrylic latex caulk (brown, cream or white)Spray adhesive (3M Super 77 works great!)
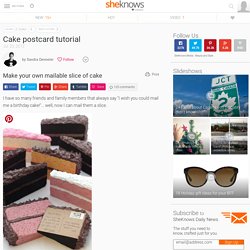
Cardboard, kraft paper or scrapbook paper Instructions Cut sponge into wedge shape With a serrated knife, using a sawing motion, cut a sponge into two, cake wedge shapes. Cut a center groove into sponge Using an X-Acto or utility knife, cut a section of foam from the center of the sponge. Paint the sponge wedges in desired color.
Trace the slice of cake When the sponge wedges are dry, trace around them on a piece of cardboard, kraft paper or colorful scrapbook paper. Honestly WTF.