
Handmade jewellery. Hugs and Kisses Beaded Bracelet Tutorial Link(img heavy) - JEWELRY AND TRINKETS. This bracelet tutorial matched the ring tutorial that I posted last week.
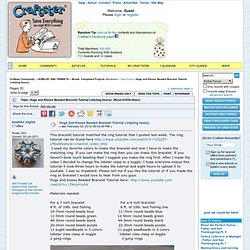
The ring tutorial can be found here I used my favorite colors to make this bracelet and now I have to make the matching ring. If you can make the ring then you can make this bracelet. If you haven't done much beading then I suggest you make the ring first. After I made the video I decided to change the lobster clasp to a toggle. I hope everyone enjoys this tutorial it took three hours to make the tutorial and eight hours to upload it to youtube. Tutorials « Studiodax's Blog. Like many women, I loooove hoops!
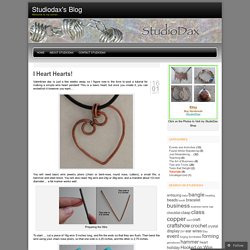
I make quite a few, in different shapes and weights, and although some designs can get a bit complex, the basic “one piece of wire” hoop style is quite easy to make. It’s been a while since I posted a new tutorial (sorry!) , so tonight it’s a “how-to” on making hoops! You’ll need the basic jewelry tools (chain nose pliers, cutters, and round nose pliers), as well as some metal smithing tools (steel block, chasing hammer, and a steel ring mandrel). But if you don’t have all of the metal smithing tools items, you can still practice all the basic steps without hammering… How to grasp the wire First, we cut 2 pieces of 20g dead soft round wire, each 3 1/4 inch long, and file/sand the ends flus.
TECHNIQUE TIP: The closer the wire is to the tip of the pliers, the smaller the loop. Rotate the wire - create the loop Now, while holding the pliers firm, rotate the wire around one of the jaws to create a loop. Centering the loop Flatten the loops.... a little bit! Learn how to make your own precious jewelry - FREE tutorials, lessons & articles! Lots of Free Jewelry Making Tutorials & Lessons: Jewelry Making Tips: Wire sizes, gauges and diameters. Learn to make Wire Wrapped Jewelry - Tutorials for Bracelets, Pendants, Rings, Earrings and more. Although my personal style is bold and dramatic, you can certainly adapt the techniques from these tutorials to your own personal style by using softer colors and smaller stones for a more classic, feminine look.
I work with a variety of materials such as wire, gemstones, fused glass, PMC and polymer clay. I have been inspired by some of today’s’ greatest jewelry artists. Artist such as Eni Oken, Sharilyn Miller, Iza Malczyk, Connie Fox and others. I’ve learned thru classes and private sessions, as well as being self-taught thru experimenting, books and tutorials and playing with friends. I’ve been selling my tutorials for several years, and have sold literally hundreds and hundreds.
The tutorials are very detailed, with step-by-step instructions and photos for each step. Presently, most of my tutorials are for wire wrapping techniques, but I have plans to soon add tutorials for wire weaving, wire connections, cold connections, polymer clay and silversmith techniques. My first tutorial! Wire wrapped pendant. - Lampwork Etc. This is my first tutorial ever and I know it needs alot of work but I hope you can have fun with it.
This tutorial is for a wire wrapped pendant that I made. You have all help me in in some way or other and I want to give you all something in return. Thank you for being here for me. You can download it here. Thank you Patty! Supplies: .Ruler .file .round nose pliers .chain nose pliers .flat nose pliers .tweezers .dental pick .chasing hammer .anvil or steel block .sharpie marker . 2 dowel rods. .8 inches of 18 gauge copper or sterling silver wire(dead soft) for smaller pendant and 9 inches for the larger pendant. 73 inches of 26 gauge copper or sterling silver wire (dead soft) for smaller pendant and 84 inches for larger pendant. JewlieBeadsWirePendant.pdf (application/pdf-objekt) Gsakowskistudio by gsakowskistudio.
Charming jewerly « Cheeky Magpie. It dawned on me that I haven’t made any Easter or spring crafts yet this year.
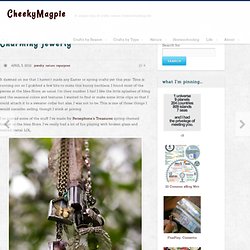
Time is running out so I grabbed a few bits to make this bunny necklace. I found most of the pieces at the Idea Store, as usual. I’m their number 1 fan! I like the little splashes of bling and the seasonal colors and textures. I wanted to find or make some little clips so that I could attach it to a sweater collar but alas, I was not to be. I’ve posted some of the stuff I’ve made for Persephone’s Treasures spring-themed bazaar at the Idea Store. As I wait for more supplies to come in I finally got around to making things with the bits and pieces. These are probably my favorite thing I’ve made. This is a soldered piece I made using a microscope slide I cut down to a house shape. I really like this one, too. Today we are decorating Easter eggs and making some spring themed projects. Have a great day!
You will find this project on WIP Monday! Dyeing Pearls.