background preloader

Crafty

Facebook Twitter

34 Things You Can Improve With A Sharpie. Speed Painting Online Painting Lessons Preview painting water www.timgagnon.com. DIY Macrame Bracelet. Growing up by the beach in Southern California, the ability to knot a macrame bracelet was practically a right of passage. Although those days are long behind us, we’ve never forgotten the ever-so-simple square knot technique. This time, however, we’re replacing hemp and wooden beads for more updated elements like colorful nylon cord and glossy metal charms. Happy knotting! You’ll need: Start by cutting the knotting cord into two 30 inch, two 20 inch and one 10 inch lengths. Fold the 20 inch piece in half, pull the loop through the ring, fold it over the ring, and pull the rest of the cord through the loop.

Center the 30 inch cord under the two middle strands. Pull tightly and slide the knot up to the top. Finish the 2nd half of the square knot by folding the left cord over the middle strands and under the right cord. Pull tightly and repeat the steps – left, right, left, right . . . Repeat the same step on the other cord. After sewing up both knotting cords, trim away any excess. DIY Woven Chain Collar Necklace. Earlier this month Lauren and I escaped city life with our dear friend Grace, of Stripes & Sequins, for a weekend chock-full of sun and DIY. With an abundant supply of rhinestone and brass curb chain, we decided to try weaving the components together to make our own collar necklaces. It was fun to see how wonderfully different the pieces turned out - each so fabulous in their own unique way! Honestly, isn’t that the best part about DIYing with friends? You’ll need: Start by laying two pieces of curb chain side by side.

Tie on 4 feet of embroidery floss into a double knot to the end of the left chain, leaving at least a foot of extra slack. Thread the floss through the top of the first link of the right chain. Thread the floss under the first link on the left side and through the top of the 2nd link on the right side. Continue this weaving pattern.

Tie a knot at the end. Using a different color flow, weave the floss around the first few links – again leaving about a foot of extra slack. All Natural Lip Balm. The week leading up to the new year wasn't exactly how I had pictured it. It was the last week of the boys winter break. I had envisioned walks around downtown looking at the lights, taking down the Christmas tree together, continuing our holiday baking marathon and maybe even a little post Christmas mall browsing. But alas, none of those things happened. The flu happened. Or rather, what I guess must have been the flu.

Whatever it was took whatever energy (and appetite) I had left to give 2011. Thankfully, I had made a big batch of lip balm the week before Christmas to give as little handmade gifts to my girlfriends. This recipe is super simple. The recipe came from this blog last year and I tweaked it a bit and she grabbed it from this book where she had tweaked it a bit. Sweet Orange Lip Balm Place oil, beeswax and honey in a double boiler (or heatproof bowl resting on top of a small saucepan of simmering water). Remove mixture from heat, and add peppermint oil and lipstick. 39 DIY Gifts You'd Actually Want To Receive. Gift Ideas for Poor Creative Souls (13) Posted by: Cathy on Jun 11, 2012 Tagged in: Untagged Painting stones has to be one of the cheapest forms of art and a wonderful way to give someone an inexpensive but thoughtful gift. I have collated a great selection here which I hope you will like and will feel inspired by.

Painted stones also make great paper weights or you could use them as place settings for a wedding party. All you need to do is collect a few pebbles, get out your acrylic paints and then varnish your stones to protect them. Have fun! For tutorials on how to market yourself online, please go here. Fun with Foam Printing - Easy Tutorial. I loved this idea because not only can you recycle these horrid polystyrene containers, but the process is really simple. 
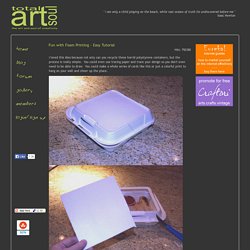
You could even use tracing paper and trace your design so you don't even need to be able to draw. You could make a whole series of cards like this or just a colorful print to hang on your wall and cheer up the place.

Materials needed: Foam or polystyrene container pencil paint or ink small roller 1. Cut a large section of foam from your container. 2. 3. 4. 5. Happy printing! Original image courtesy of themetapicture. Stacked End Table Shelf. Simple Ideas That Are Borderline Genius - 28 Pics. Fallen Princesses by Dina Goldstein. Great photo series titled “Fallen Princesses” by Dina Goldstein… Dina Goldstein Superbe série de photos intitulée “Fallen Princesses” par Dina Goldstein… Dina Goldstein. Stenciling with Bleach. So here’s tutorial #3 in the bleach series! It’s an easy way to customize a shirt, fabric by removing color instead of adding it. For my first project I used a $1 doily as my stencil. I placed it on a navy t-shirt and sprayed a mist of bleach over top: I moved the stencil to another location and sprayed again. Navy….turning to a dark pink/purple: Finished: You can also use vinyl or freezer paper stencils.

I used a sponge to dab the bleach around the stencil and I used a spray bottle to mist around it: Once the shirt began to change colors, I sprayed the back of the shirt with bleach. Bleach stenciling is an easy way to add lettering to a shirt too. Finished! Visit the other two projects from this week by clicking the images below: DIY String Art. Hi guys! Dina here from Honey & Fitz back with another tutorial. This time I’m showing you how to make some string art for your little one’s room! Rather than deal with hammers and cutting wood, I decided to do this project using cork tiles.

Not only are they easy to find and inexpensive, they’re also very light weight so you don’t have to worry about them falling off the wall and hurting anyone. Here are the supplies you’ll need: Cork tiles // Linoleum Nails // 3M Hanging Strips // Contact Cement Stack the cork tiles on top of each other and use your contact cement to glue them together. I really wanted the look of a white background for my string art so I decided to paint the cork. Once the paint has dried, flip your cork tile over and apply your hanging strips. Create your template using whatever font you like. When you’ve traced the entire template, carefully remove the paper.

Tie your string in a double knot onto your first nail now, and start weaving in a back and forth fashion. Art 1. Optical Design. Tumbleweed Tiny House Company - StumbleUpon. 25 Handmade Gifts Under $5. If your gift list is long and your budget is small here are some great Handmade Gifts that you can make.

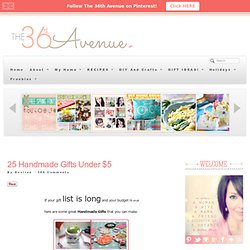
Keep in mind that handmade items are not just beautiful but special… I love to give them and I love to receive them. In my opinion they are the best! Jersey Knit Bracelet Lovely! This would make a perfect gift for any of your girlfriends. You can choose the colors and recycle t-shirts that you have around the house. Cheap and cute! Tutorial Paper Clip Earrings Tutorial This is a brilliant idea… and the possibilities are endless. Love it! Printed Candles Who doesn’t love a candle? Think about how many different stamps you could use to customize this project. tutorial Hot Chocolate Art! What a great gift for neighbors and teachers… I am personally a hot chocolate lover so this would make a great gift for me tutorial Tile Coaster You can buy these plain tiles at Home Depot for under a dollar.

I’ve seen them with family pictures also… Way cute! Tutorial Bow Belt I was amazed how easy this tutorial was. So Pretty! Homemade Deodorant! Yep I said it! This might sound really weird and I’m not some kind of hippie. But have you ever read the back label of commercial deodorant? My theory is if you can’t pronounce it or it doesn’t look familiar you probably shouldn’t be putting it in or on your body. I have been on a quest, pretty much since getting married, to live a more natural lifestyle. This includes food, body products, and cleaning products. Which has brought me to homemade deodorant. I was pretty reluctant at first about it but I am usually willing to try things like this so I made it (especially since its cheap). One thing though, is this does not contain aluminum which is an antiperspirant.

Homemade Deodorant 1/4 cup baking soda1/4 cup corn starch or arrowroot5-6 Tbs coconut oil (I buy the 32 oz container in the cooking oil section. Combine baking soda and corn starch. So not only will this save you money, it will also help you be healthier and more natural! Ever made your own face mask? Whip up these budget-friendly beauty treatments to get glowing the natural way (no Birkenstocks required!) You guys are getting to know me. You probably realize by now that I’m a health nut and I go bananas over any and all natural beauty products—as long as they work. (Just had to clarify that, because as we know, some natural prodz don’t live up to their claims. Tom’s of Maine deodorant—we’re lookin’ at you). Something you don’t know, however, is that I’m thrifty. Yes, I’ll blow my budget on Dr. When I lived in L.A., I’d spend hours perusing the beauty departments at Barneys and Neimans (a.k.a. beauty heaven—and home to zillions of fab products I couldn’t afford).

Facial masks and scrubs are one category I like to save on. Ever since high school I’ve been a big fan of raiding the kitchen to concoct masks and play around with ingredients. Most derms recommend using a mask once a week (but frequency of use will also depend on your skin type). Avocado, Banana and Honey Face Mask: This mask is super-moisturizing! Tomato Mask: I love this one! Be careful with these if you have sensitive skin! Homemade Moisturizing Body Scrub. 25 Beauty Products You Can Make in Your Kitchen. By Jaime Morrison Curtis | . These 25 Beauty Products You Can Make in Your Kitchen are filled with ingredients you may already have at home. So this Mother’s Day hand the kids on over and take time to do something special for yourself, like whipping up an instant salt scrub or relaxing with a chocolate facial. Make an extra batch and surprise your mom to thank her for the great job she did raising you.

Get in the kitchen and start spoiling yourself with these 25 Beauty Products You Can Make in Your Kitchen… nggallery id=’122682′ Chocolate Facial There is nothing sweeter than a chocolate facial. Coffee Scrub Why just use coffee for drinking? Makeup Remover After a long day of wearing makeup it's nice to take it off with something gentle and natural. Like Jaime on Facebook Follow Jaime on Twitter Fill Your Heart in Jordan: Top 15 Things Families Should Do in Jordan Breakfast in Bed + Love Note = A Perfect Mother’s Day DIY Sitting Pretty: 25 Perfect DIY Pouf Tutorials 25 Fun an Flirty Spring Nails.

Pinterest Challenge: AZ Love / Nail and String Tribute to the Grand Canyon State. So I found Curiously Wrought's work through her Etsy on Pinterest the other day--how cute are these?! 
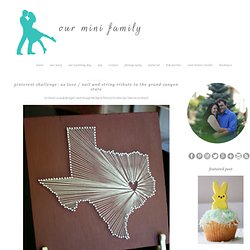
Click through the link below to check out my step-by-step tutorial: So although mine isn't PERFECT like hers are, I seriously love how it came out! I chose to go with an orange backdrop keeping the Grand Canyon in mind and how much I love those vibrant, orange sunsets! Which of the states would you make? And then it made it to my wall next to my desk! The finished product: Bath and Body Stocking Stuffer Round Up - DIY Ideas for Christmas Stocking Fillers that Scream "You Will Be Pampered!"

I am generally stumped as to what to put in someone’s stocking that isn’t just candy and boring everyday toiletries. Not to mention, small but meaningful gifts are sometimes often hard to find since, in this case, size is an issue. What I do like to put into Christmas stockings however, are not just silly trinkets, but things that a person can use and get enjoyment from. So I always LOVE to include bath and body and spa themed products as part of the stuffing for Christmas stockings. Here are a few great ideas I’ve found for making your own bath and beauty products for stocking stuffers this Christmas. Make them in bulk and distribute a stocking to all those you know and love and no one will fill left out.

Holiday Candle Travel Tins! Let’s face it. Sugar scrubs are great year round, but they’re even more necessary in the winter as our skin tends to be drier in response to the drier air. Looking for other sugar scrub recipe ideas? Handmade soaps are a joy to make and to use. Most gawked all-time - page 2. DIY Braided Bead Bracelet. It’s been awhile since our last bracelet DIY. I don’t know about you, but our wrists have been begging for another colorful addition for months now. So after playing with some materials that were already on hand, we’ve created a tutorial for a braided bead bracelet, which is a not so distant cousin of the hex nut and wrap bracelet. Because honestly, you can never have too many . . . You’ll need: Cut the waxed linen cord into a 26″ and 19″ piece.

Tie a knot about half an inch down from the loops. Start braiding the strands. Push the bead against the base of the braid, and cross the left strand over the middle. Keep a finger at the base of the braid, holding the beads in their place and keeping the braid tight. Finish the bracelet with another inch of braided cord, measuring it against the wrist. Thread on a two hole button – two strands through one hole and one strand through another. Trim the end. Your bracelet is finished!

(all images by HonestlyWTF) Vibrant Knife Painting. Packing Tape Image Transfers.