
8 Photoshop tutorials to create spectacular text effects. Halftone Dots and Linear Light Tutorial. Back to Tutorials Halftone Dots and Linear Light Tutorial Step 1.
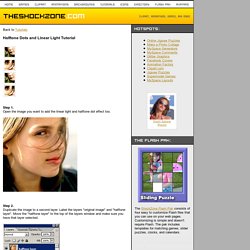
Open the image you want to add the linear light and halftone dot effect too. Digital Pixel Effect. Written by Steve Patterson.
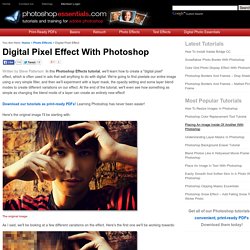
In this Photoshop Effects tutorial, we'll learn how to create a "digital pixel" effect, which is often used in ads that sell anything to do with digital. We're going to first pixelate our entire image using a very simple filter, and then we'll experiment with a layer mask, the opacity setting and some layer blend modes to create different variations on our effect. At the end of the tutorial, we'll even see how something as simple as changing the blend mode of a layer can create an entirely new effect! Here's the original image I'll be starting with: The original image. As I said, we'll be looking at a few different variations on the effect. One of the effects we'll be creating in this tutorial.
Here's the second one: Free Photoshop Tutorials @ PinkZAP.com » How to Make Circle Pixels (Pop-art Style) Open the image you want to edit in photoshop. You can size it to whatever you’d like, even if it gets a little pixely, or has artifacts. Next, apply the filter at Filter > Pixelate > Mosaic. The cell size is your choice. Experiment with different sizes if you’d like. Since I like all the different color detail in my picture, I made it relatively small.
Now create a new document, with the height and width of your mosiac cells. How to fake a chalkboard effect in Photoshop. Resources: How to Spiff Up Your Hand Lettering in PhotoshopFree Downloadable Chalkboard Backgrounds Hey look…a new Foolish file!
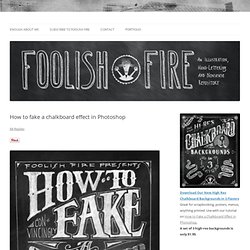
Hi-Res Chalkboard backgrounds in 3 flavors! By popular demand we’ve added a set of high-res backgrounds for just a buck ninety-nine. These will work a lot better for anything you intend to print at 8.5×11 and smaller. The Tutorial Every once in a while it’s fun to go off the reservation and display your work with a different look and feel. TIP: To really get that “chalky” effect, I do my original lettering in pencil as opposed to ink. Save some time and grief by either downloading the free chalkboard background file in the previous post or obtain one of seventeen gagillion stock photos of a chalkboard from iStockphoto.com, 123RF.com or the stock photo source of your choice. NOTE: Starting with a 72 dpi file just gives you a more manageable file for posting your artwork quickly, but the final product will look pretty bad if you try to print it. Photoshop For Beginners: 6 techniques to extract anything from its background.
This is the second of a series of tutorials thought for Photoshop beginners.

I’ll explain in depth those features that can result difficult to understand for a newbi. Today I’ll show you 6 techniques you can use to extract a person/object from its background. From now on extraction won’t have secrets for you! Extraction is one of the worst enemies for those who start using Photoshop. Create a Stunning Liquid Text Effect in Photoshop. To sort of wrap up our series on using liquid effects for design, today, we will look at how to use liquid photostocks to create a gorgeous and stunning liquid text effect in Photoshop.

By using some clever techniques, we can warp liquids into a variety of shapes to meet our needs. In this case, you’ll learn how to create letters from liquids, and then add in some extra effects for a dynamic composition. All you need is Photoshop and some free stock images, so let’s get started! You’ll absolutely love this PS text effect! Also, don’t forget to suggest tutorials in the comments! Tools used: Adobe Photoshop Various stock images Final Image Preview: Step 1: Document creation and water stock selection.
How to Create Custom Smoke Brushes in Adobe Photoshop. Smoke trails are elegant, beautiful, and amazing to watch.
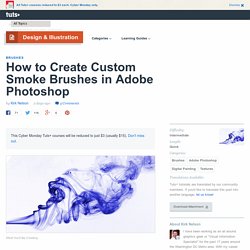
Thin wisps of smoke dancing through the air reveal just how fluid our atmosphere really is. The effect is deceptively simple, and the dynamics of it are dizzyingly complex. Recreating believable smoke in a digital environment is no easy task. However, capturing the practical effect is a much easier prospect. Photoshop Tutorial - Blend Modes. Create Photoshop Brushes for Coffee Stains and Splatters. Photoshop Brushes Photoshop comes with many brushes already built in, and you can go to sites such as deviantart.com or brusheezy.com to find freebies that users have submitted, however in this tutorial we are going to look into designing our own set of brushes.
Coffee and Grunge, Two of my Favorite Things Coffee stains and grunge splatters have become staples in much of grunge design. The great part about a grunge theme is that there are no rules! This gives the designer a ton of freedom. Brew Up Some Coffee and Let’s Get Started Put on the Maxwell House (my fav) and brew up a cupFind some paper, preferably textured paper (it makes more interesting stains).Grab some different sized mugs, and a strawThis is the fun part! Scanning and Preparing the Image Scan the image in at a nice high resolution.Bring the image into photoshop and desaturate it.
Select Your Brush. Typography Portrait Tutorial. Photoshop CS6: How to Make an Editable TEXT Portrait from a Photo. Blue Lightning TV.