
Grunge wallpaper « Jumbojet's Photoshoptutors. Graphic Design 1 & 2Solano Community College - Graphic Design 1. FUNDAMENTALS OF Adobe CS. Homework | Week 1 Register as a user of this blog.

Photography Light and Shadow. “It’s all about the light.”
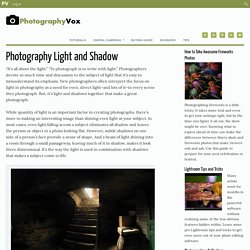
“To photograph is to write with light.” Photographers devote so much time and discussion to the subject of light that it’s easy to misunderstand its emphasis. The place to learn Photography and Photoshop. Trends in de fotografie: Bewegend landschap. Photo Impressionism: How to Use Your Camera as a Digital Paintbrush. Article and photos: © 2014 Sanders.
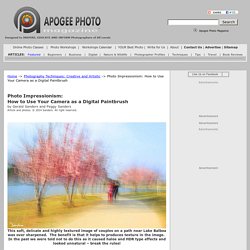
All right reserved. This soft, delicate and highly textured image of couples on a path near Lake Balboa wasover sharpened. The benefit is that it helps to produces texture in the image. In the past we were told not to do this as it caused halos and HDR type effects and looked unnatural – break the rules! Although the art of intentional camera movement has been in existence for decades, each individual photo artist has their own unique approach to creating their impressionistic visions of the world I have long admired the feelings, techniques and emotions that are evoked by Monet, Cezanne, Degas, Manet and others of the French Impressionist Period.
Introduction and Basic Explanation. The concept of white balance (WB) in photography can be difficult to understand at first, but it is an important part of photography that helps you take better photos with more accurate colors.

Our eyes are remarkable because they can adapt to changing light conditions and allow us to determine neutral colors and white color fairly quickly and without conscious effort. Our cameras, however, are not as sophisticated, and although there is an auto mode for white balance adjustment (Auto WB), there are a good number of situations where you want to use one of the WB presets or dial it in yourself. The idea with correcting for white balance is to remove false color casts, where the wrong white balance may result in an orange, blue, or even green color cast. White Balance and Color Temperature Color temperature, measured in Kelvins (K), describes the light’s color radiation emitted from an ideal “blackbody” radiator at a specific surface temperature.
100+ Creative Photography Ideas: Techniques, Compositions and Mixed Media Approaches. Students taking high school photography qualifications such as A Level Photography or NCEA Level 3 Photography often search the internet looking for tips, ideas and inspiration.
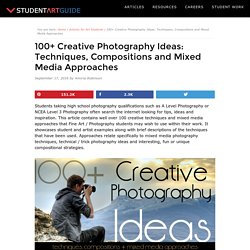
This article contains well over 100 creative techniques and mixed media approaches that Fine Art / Photography students may wish to use within their work. It showcases student and artist examples along with brief descriptions of the techniques that have been used. Approaches relate specifically to mixed media photography techniques, technical / trick photography ideas and interesting, fun or unique compositional strategies. MorgueFile free photos. The Rule Of Thirds And The Golden Mean One of the most commonly talked-about rules in photography is the rule of thirds.
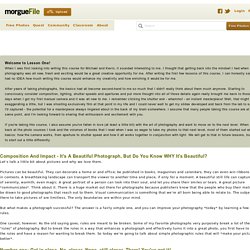
The concept is best explained by taking your canvas and dividing it up into thirds, both vertically and horizontally, so that you essentially wind up with a tic-tac-toe board. The rule of thirds should be used as a guideline for when you have vertical or horizontal lines in your image. You will probably hear more about this photographic "rule" than any other, so I'll explain it fairly in depth here and try to give you an understanding of why it is so effective. The rule of thirds is derived from another rule called the "Golden Mean" that says that the main subjects of an image should be placed at the intersecting points created (roughly) by the lines mentioned above, thusly: So if you are composing a photograph of a sunset, try placing that horizon line one-third of the way from the top or bottom of your image, to include either more foreground or more sky.
Kleur, resolutie en meer. Werken met kleurruimten; sRGB, AdobeRGB en ProPhotoRGB. René Damkot schreef op vrijdag 12 november 2010 om 21:38 Oh ja.
My Mother in Law and the Family of Angles (an Intro) Some time ago I wrote about taking art images for my mother in law.

Since I don’t have my dream lens yet, I had to compromise on the lens and use the great (but not ideal for this task) Nikon 18-70 lens. (The image to the lest if one of the original paintings) I got a few mails and comments about the issue of getting closer to the pictures to make the picture fill a wider part of the frame. Cadrez-moi - RendezVousCreation - Nicolas Esposito. Color Grid Photo Display Effect With Photoshop. Written by Steve Patterson.
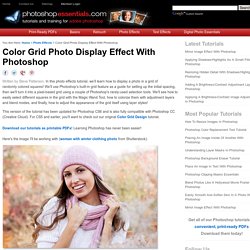
In this photo effects tutorial, we’ll learn how to display a photo in a grid of randomly colored squares! We’ll use Photoshop’s built-in grid feature as a guide for setting up the initial spacing, then we'll turn it into a pixel-based grid using a couple of Photoshop's rarely-used selection tools. We’ll see how to easily select different squares in the grid with the Magic Wand Tool, how to colorize them with adjustment layers and blend modes, and finally, how to adjust the appearance of the grid itself using layer styles! Photoshop vs Lightroom. Whenever Lola and I post images on our website and the Facebook fan page, we get plenty of requests on post-processing from our readers.
One question that keeps coming back all the time is about Lightroom vs Photoshop – many beginners do not know differences between Lightroom and Photoshop and have a hard time choosing which one to get first. In this article, I will show the main differences between these two software packages from Adobe, what they are used for and what you can do in Photoshop that you cannot in Lightroom.
Most of this article will also apply for Aperture vs Photoshop discussion, because Aperture and Lightroom share very similar functionality. 1) What is Photoshop? Photoshop was originally created as a tool for simple image editing, which since 1990 has grown into a monster software suite with many functions and capabilities to accommodate graphic designers, architects, animators, publishers, photographers and even 3D artists.
100+ Creative Photography Ideas: Techniques, Compositions and Mixed Media Approaches. Tutorial - Download ISSUU site articles to PDF. Using a Gray Card for Setting White Balance in Adobe Photoshop Camera Raw. In this article, we’ll show you how to set your white balance accurately using a gray card. A gray card is just what it sounds like, a card that’s 18% gray that we use to help us set a really accurate white balance. These cards are so handy that I include a perforated tear-out gray card in both my Adobe Photoshop Book for Digital Photographers and Adobe Photoshop Lightroom 5 Book for Digital Photographers books, so if you have either of those books, go tear out your gray card.
If you don’t have either of those books, you can pick up a gray card from just about any local photo store or online. USING A GRAY CARD Once you get your lighting set, you’ll need to take one photo with the gray card clearly visible in the scene. History of Photoshop: Journey from Photoshop 1.0 to Photoshop CS5. ‘Photoshop’, today is the most popular and profitable application that supports layers, filters, brushes, text, 3D objects, videos, etc. Photoshop is mainly used for bitmap image and to do image manipulation tasks effectively. At the beginning, Photoshop was known as “Display” to show grayscale images on a monochrome display.
In 1987, Thomas Knoll, a PhD student at the University of Michigan, found out that his new Mac Plus (third model of computer in Macintosh line) failed to display grayscale images on its 1-bit black and white display. To crack this disadvantage of Mac Plus, Thomas began coding a program that could solve the problem. Story Photograpy: History of Photoshop. From Darkroom to Desktop—How Photoshop Came to Light by Derrick Story Feb. 18, 2000 Ten years ago this month, Adobe shipped Photoshop 1.0. Fantastic photomontage and its possible influences, 1857 - 2007 : a timeline. Definition of Photomontage. Cut And Paste: Introduction. Street Photography Composition Lesson #6: Framing. All photos included in this article are copyrighted by their respective photographers. For today’s street photography lesson, I want to talk about framing. Framing itself is a pretty basic compositional technique, something I am sure we all learned when we first started.
But let us delve deeper into framing.
Get Inspired Archives - Page 5 of 7 - Visual News. If you’re going to get away from it all, this is one great way to do it. In 1992, Wayne Adams and Catherine King began building a floating home about half an hour by boat off the coast of tiny Tofino, British Columbia. Mastering the Art of Intentional Camera Movement. Home -> Photography Techniques: Creative and Artistic -> Mastering the Art of Intentional Camera Movement by Juergen Roth All text & photos: © Juergen Roth.
All rights reserved. © 2008 Juergen Roth. All Rights Reserved. Biography « Fred Eerdekens. Non-Destructive Dodge and Burn in Photoshop. Written by Steve Patterson. It may be hard to believe these days, but there was a time not so long ago when cameras were not digital, and photo developing was done in a lab, not on your computer. Camera sensor sizes explained: what you need to know about Four Thirds, 1/1.7, full-frame and APS-C format.
How to create a world inside an egg yolk in Photoshop, part 1. Download all the files you need for this tutorial Download and open the free image of earth from Nasa Visible Earth. Go to the Toolbar and find the Elliptical Marquee tool (Ctrl/right-click on the Rectangular Marquee tool for more options). Multimedia. Comment découper une image. Ce tutoriel vous montre comment découper une image et en extraire une partie en utilisant les propriétés des calques et des couches.Ceci n'est qu'un exemple, à vous de laisser libre cours à votre imagination. 1°) Redimensionner la zone de travail Pour redimensionner la zone de travail sélectionner dans le menu Image / Taille de la zone de travail. J'ai augmenté la taille de la zone de travail de 2 autour de l'image. 2°) Sélection de la bordure Sélectionner la bordure avec l'outil baguette magique ou avec l'outil de sélection dans le cas ou l'image aurait des bords blancs car dans ce cas, la baguette magique ne permet pas de sélectionner la totalité de l'image.
Inverser la sélection en utilisant l'option du menu Sélection / Intervertir. Get Surreal With Oil and Water Photos. 100+ Creative Photography Ideas: Techniques, Compositions and Mixed Media Approaches.