
Papercircuits. Circuitos con plastilina. Paper Circuitry at Home: Electric Origami. This little LED-lit cube is much more than just a paper lantern: It’s a translucent and flexible thin-film electronic circuit that hooks up a battery to an LED, limber enough to be folded into an origami box. And the coolest thing about circuits like these? You can make them at home. In what follows, we combine basic electronics (an LED Throwie) and papercraft (a traditional origami balloon) to make what might be called an “LED Foldie.” The circuitry consists of aluminum foil traces, ironed onto adhesive paper such as freezer paper, photo mounting paper, or even a laser printed pattern. Something constructed this way can then be folded so fit an LED and battery to complete the circuit. Besides the throwies themselves, this was inspired in part by the beautiful LED Floaties [via Make].
The first step in designing a three-dimensional circuit like this is to see where the parts go. To get started, we first folded an origami balloon, and then inserted the components where we wanted them. The Fine Art of Electronics {under construction} This tutorial shows you how to make a paper battery holder for coin cell batteries (CR2032 and CR2016).
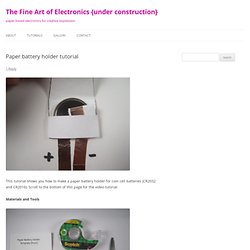
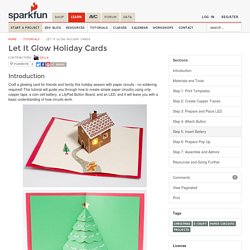
Scroll to the bottom of this page for the video tutorial. Materials and Tools battery holder template printed on cardstock (download PDF here) conductive copper tape (available at digikey and sparkfun)regular tape (e.g. scotch tape or masking tape)scissorssurface mount LEDs (White, Green, Blue, Red, Yellow)3V coin cell battery (CR2032 or the thinner CR2016) Steps. 6th Grade Students Illuminate Poetry with Paper Circuitry. A MiddleWeb Blog There was a shout from the far corner of the room.
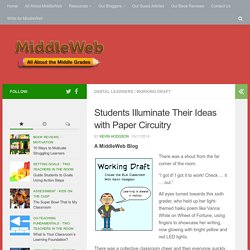
“I got it! I got it to work! Check … it … out.” All eyes turned towards this sixth grader, who held up her light-themed haiku poem like Vanna White on Wheel of Fortune, using fingers to showcase her writing, now glowing with bright yellow and red LED lights. There was a collective classroom cheer and then everyone quickly turned back to their own poetry projects, carefully running copper conductive tape along paths on paper so that they, too, could light up their words and pictures.
Soon enough, others were celebrating their own successes, with calls of “My poem is lit” and “That is soooo cool.” Digital Is. As a professional artist, deepening the ways in which seemingly disparate objects and processes are interconnected through locating, and mapping their intersections has been one of the main elements of my studio practice.
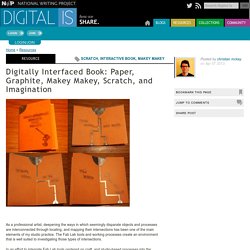
The Fab Lab tools and working processes create an environment that is well suited to investigating those types of intersections. In an effort to integrate Fab Lab tools centered on craft, and studio-based processes into the classroom, I have been working to implement a Mobile MakerCart at a project-based K-8 charter school. In addition to introducing craft-based physical computing projects to the children, a guiding principle behind the MakerCart is to give teachers the opportunity to develop familiarity with the MakerCart’s tools and processes in order to be able to envision the ways in which they might be able to develop their own curriculum for use in the classroom. Fig. 1 Fig. 2 Fig.3 Fig. 4. Pop Up Circuit Card.
We found a project like this on make.com and added a switch to the circuit to make it our own.
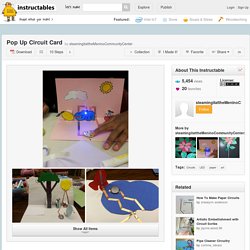
We have had so much fun making this with all ages at our community center here in Boston and would highly recommend making them. It is so much fun and you also learn about circuits and get a chance to be creative, inventive and practice troubleshooting. Please feel free to contact us if you have any questions.
Light-Up Paper Helicopter - chibitronics. LED Nametag - All. Learn - chibitronics. Introduction Beginner tutorials to help you get started with paper circuits!
Each tutorial comes with free a downloadable template for classroom use. Learn the difference between conductive vs. non-conductive adhesive tapes and how to “draw” with copper tape Turn on one LED. Turn on Multiple LEDs with one battery. Getting Started with Copper Tape - chibitronics. Paper circuits w/ copper tape. You can quickly create circuits on paper using copper tape, clear tape, and some simple electronics.
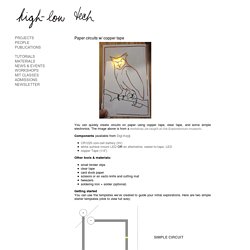
The image above is from a workshop Jie taught at the Exploratorium museum. Components (available from Digi-Key): Other tools & materials: small binder clipsclear tapecard stock paperscissors or an xacto knife and cutting mattweezerssoldering iron + solder (optional) Getting started You can use the templates we’ve created to guide your initial explorations. Electrical connections. Paper Circuits. A more intricate project: a light-up model of the Bay Bridge Another more complex project: a folded origami swan with LED eyes LED lights make this fastball really fly!
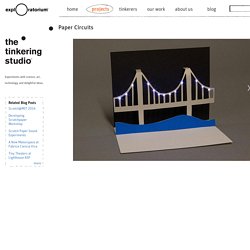
At the touch of a switch the girl blushes through the paper A classic interpretation of a birthday cake spiced up with some LEDs As the dolphin jumps through the hoop, it lights up! The moon is a switch, turning on the fireflies in the jar Of course San Francisco gets its share of love. The Fine Art of Electronics {under construction} Let It Glow Holiday Cards. Favorited Favorite 4.
Paper Circuits & LED Projects. Squishy Circuits. LED'S. Circuits and electricity. Electricity and Magnetism. Circuits. Squishy. Squishy_Circuits.pdf. Electric Play Dough . Activities for Kids: Adventures In Learning . PBS Parents. Looking to amp up the fun and have the kids learn something about electricity?

Give this electric play dough experiment a try. It’s simple, hands-on and the kids will l-o-v-e it! In this episode of Adventures in Learning, the kids have a blast with a cool project developed by AnneMarie Thomas of the St. Thomas Lab at the University of St. Thomas. Pin It Want to give it a try? What You’ll Need conductive dough (click here for recipe)insulating dough (click here for recipe)battery packbatterieslight emitting diodes/LEDS You can find the last three items on the list at an electronics store or you can order a kit online at squishycircuitsstore.com.
If you’re assembling everything yourself, pick up some spade terminals while you’re at the store and crimp them to the end of the wires. Squishy Circuits. Circuiti di carta. Paper Circuits & LED Projects. Squishy Circuits – Color Mixing with Light. A color-mixing squishy circuit.
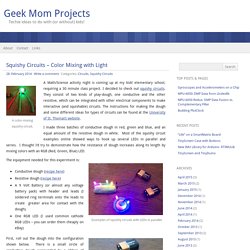
A Math/Science activity night is coming up at my kids’ elementary school, requiring a 30 minute class project. I decided to check out squishy circuits. They consist of two kinds of play-dough, one conductive and the other resistive, which can be integrated with other electrical components to make interactive (and squishable) circuits. The instructions for making the dough and some different ideas for types of circuits can be found at the University of St. Thomas’s website. I made three batches of conductive dough in red, green and blue, and an equal amount of the resistive dough in white.
Examples of squishy circuits with LEDs in parallel. Example of Squishy Circuit with LEDs in series. The equipment needed for this experiment is: First, roll out the dough into the configuration shown below. Detail of the circuit showing the RGB LED placed with one leg in the circle, and one leg in each of the red, green and blue “arms”. The color mixing squishy circuit. Make Paper Circuit LED Lanterns - Tinker Crate Project Instructions.