
Chromium Auto Refresh. Raspberry Pi Kiosk Screen Tutorial - Dan Purdy. For a few years now we’ve had a screen above our Reception area at work to inform musicians which studio they are working in that day by displaying session details.
The original system I created was a small webpage and a couple of XML files that we would edit for the weeks sessions and then the webpage would refresh itself every 30 minutes and display whatever was in at the time. There was no network access to the computer available at the time and physically it was located under a staircase. As you can imagine trying to get to it to do anything or to update the XML files was a nightmare. Not to mention the only computer we had available to use at the time was an old Mac Pro which meant we were pretty much using the equivalent of a one megaton nuclear warhead to crack a nut, a complete waste of energy.
The solution? One of the reasons I built the studio backup system was to alleviate this problem. The Raspberry Pi Kiosk Screen So I’m going to explain the steps I took to manage this. Digital Signage on RaspPi3. Dividuum wrote:Any hints on how to get 1080p60?

Have not looked into that deep yet. dividuum wrote:I took a completely different approach for video walls: Every Pi works independent but plays its content synced by the wall clock. We will be implementing this also, mostly for syncing non-video/image content across Players that are not part of a video wall and just want media synchronization. If it works good, it could also be used for the Video Wall as well. Generally, we want to allow our video wall setup to handle any type of content. Dividuum wrote:For that I render the video in a GL texture that can then be freely transformed. 1080p30 is possible that way. I remember from another one of your posts that this had inherent restrictions. Yodeck - Digital Signage on the Raspberry PiFree Raspberry Pi 3 Player for all screens on Annual Plan. Raspbian for ppt presentation.
Creating a Yodeck Player - Yodeck User Documentation - Yodeck Documentation. Create your own Yodeck player!
If you need to create your own Player, then you are on the right spot. Keep in mind though that this process requires some basic IT skills. FREE Players Keep in mind that we provide ready-to-use Players for FREE with our Annual Subscriptions for all your screens! No tech stuff required, just place your order.
Make sure that you have everything you need: Some extra stuff you might need. Raspberry Pi 4 and Digital Signage with Yodeck – Yodeck. The Raspberry Pi 4 is a game changer.
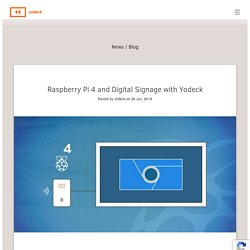
Up until the previous generation, there were doubts. No more. The brand new Raspberry Pi 4 just came in with a “bang” in the digital signage world. Before the Raspberry Pi 4, a lot of people did not see this innovative hardware platform as the little, but almighty, computer we saw back in 2014. They only considered it a DIY toy or an educational tool for schools. Dual-screen Digital Signage The Raspberry Pi 4 has two HDMI outputs. An interesting setup made possible with the dual HDMI ports is cross-linking 2 screens to Raspberry Pi 4 units. Additionally, you can move media from one screen to another without interrupting playback.
Full Support for 4K Most screens out there are 1080p. The new Raspberry Pi 4 provides full 4K support. Decent CPU Although it is not what you would call blazingly-fast, still the Raspberry Pi 4 has a decent 4 core CPU clocked at 1.5GHz. More Memory. WordPress.com : Créer un site ou un blog gratuitement. How to password protect screenly? – Screenly Support. Can I use a WiFi-adapter with Screenly Pro? – Screenly Support. Absolutely.

We do however still recommend that you use a wired connection for production deployments. If you still want to use WiFi, this is how you do it. Here is what you need to do to get started: Download the Screenly Pro disk image (version 2015-11-23 or later)Write out the disk image to the SD card you’ll useConfigure the networking settings as per “Usage” below Supported devicesBefore you get started, it is important that you’re using a supported WiFi dongle. The official USB WiFi Dongle from the Raspberry Pi FoundationThe built-in WiFi in the Raspberry Pi 3 Model BEdimax N150 Wi-Fi Nano USB Adapter UsageTo configure WiFi for Screenly Pro is much like configuring a device with a Static IP.
Once you have generated the configuration file, save it to the boot partition of your SD card. Alternatively, you can create a file called network.ini on the boot partition (or just copy the existing sample file). [wlan0] ssid=NameOfYourNetwork passphrase=YourNetworkPassword. Digital Signage for Education: K-12, College and Universities.