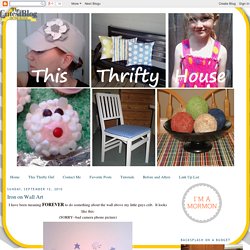

Iron on Wall Art. I have been meaning FOREVER to do something about the wall above my little guys crib.

It looks like this: (SORRY--bad camera phone picture) What is so bad about this you might ask? Well NOTHING--if your name is LANDON--not COLTON. BUT if you are COLTON and this is YOUR bed--and you are now over 2 years old and your older brother LANDON is now 4 and hasn't occupied this room or this bed for 2 years--then THERE MIGHT BE A PROBLEM WITH THIS WALL!! So the story goes like this: I wanted to do COLTON'S name on the wall--but I frankly didn't want to spend the $ to buy any more wood letters that I would have to paint or mod podge or something. Well it did.
I found THIS gal (at the Brassy Apple) doing THIS (Heat-n-Bond WALL ART). I was BLOWN AWAY by the AWESOMENESS and BRILLIANCE of her idea. So I went online to a free font website and downloaded a fun font for Colton's name. I figured out the size I wanted and printed each letter out. Next I got out the Heat-n-bond. So here I am tracing my letters. How to make gift bags from newspaper. When I bought something at a store recently, the clerk handed me my purchase in a bag made from a newspaper.

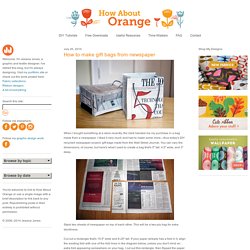
I liked it very much and had to make some more—thus today's DIY recycled newspaper project: gift bags made from the Wall Street Journal. You can vary the dimensions, of course, but here's what I used to create a bag that's 5" tall, 4.5" wide, and 3" deep. Stack two sheets of newspaper on top of each other. This will be a two-ply bag for extra sturdiness. Cut out a rectangle that's 15.5" wide and 8.25" tall. Fold a flap 1.25" down from the top.
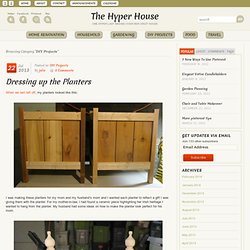
Cut two pieces of cardstock or chipboard to 4.25" x 1", then glue them on the widest two panels just under the top fold. Put glue on the outside of the 0.5" tab and bring the left-most panel over to form the body of the bag, aligning the cut edge of the panel with the folded edge of the flap. Upend the bag so the 2" flap is now up. Put glue on both flaps and fold them inward to form the bottom of the bag. Crafted Love: DIY. Welcome to SaiFou – Inspiring images. The Hyper House. Browsing Category "DIY Projects" When we last left off, my planters looked like this: I was making these planters for my mom and my husband’s mom and I wanted each planter to reflect a gift I was giving them with the planter.

For my mother-in-law, I had found a ceramic piece highlighting her Irish heritage I wanted to hang from the planter. My husband had some ideas on how to make the planter look perfect for his mom. We attached spindles to the planter and placed finials on top for a decorative accent. I then painted the planter white (do not use spray paint, trust me on this) and added a stenciled phrase and a hook. For my mom, I know she loves hummingbirds and I had luck finding a beautiful garden piece at one of my favorite local shops (The White Hare) with some hummingbirds on it. Now you might be wondering how these planters can hold plants. My brother bought my mom the flowers for this planter. These two planters were my first real woodworking project. For the project you need: Brassy Apple. DIY String Art Tutorial.