
Plain to Pretty {A Shoe Makeover} Salut everyone!

Are you ready for spring as much as I am? Are you digging out your summer shoes already? All those pretty cork wedges, platforms, slingbacks, sandals….. Are you ready to slip your feet into something spectacular? Well, there is some work involved though- and you have to love ruffles…. Before/After: You will need: - A pair of denim wedge sandals. . - Mod Podge - Fabric (white & flowers) - Rickrack or Ribbon - Felt Steps: 1. 2.-4. 5. 6. 7. 8. 9. Cut rickrack to the right length, glue it in place, on top of the ruffle. 10. Make a fabric flower and attach it to one buckle. 11. To get more inspiration, head over to Fat Girl Gets Dressed and see, that neon pom poms look awesome on high heels!
Go peacock and polcadot! Go glamour! Henley tee reconstruction – photo tutorial. This is a quick way to give a plain tee or tank a little upgrade!
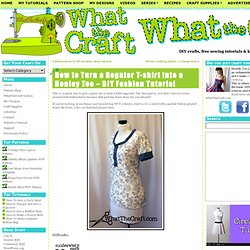
The best part is, you don’t have to screw around with buttonholes because that part has been done for you already! If you’re looking at me funny and wondering WTF a henley shirt is, it’s a shirt with a partial button placket down the front. Like our finished project here: Difficulty: Things you’ll need for this tutorial: scissorssewing machine (or needle and thread, if you’re old school and mega patient like that)a t-shirt or tank (you can make your own, if you like)the button placket from another shirt Step 1 Gather your materials. I happened to have a a henley shirt that I cut up a while ago to make a pattern. If you don’t have a henley style shirt, you can use a button placket from any shirt, really. If you’ve searched your closets high and low and don’t have a button placket handy, there’s a really great tutorial for making a henley tee here.
Step 1 Step 2 Cut out the button placket, leaving your preferred seam allowance. How to Make a Gathered Skirt with Knit Waistband. Knee-length skirt with 4" (10 cm) knit waistband (shown folded over) and gathered cotton voile skirt body.
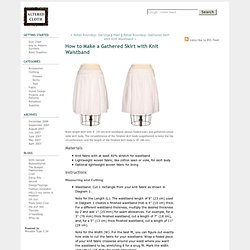
The circumference of the finished skirt body (ungathered) is twice the hip circumference, and the length of the finished skirt body is 18" (46 cm). Knit fabric with at least 40% stretch for waistband Lightweight woven fabric, like cotton lawn or voile, for skirt body Optional lightweight woven fabric for lining Waistband: Cut 1 rectangle from your knit fabric as shown in Diagram 1. Note for the Length (L): The waistband length of 9" (23 cm) used in Diagram 1 creates a finished waistband that is 4" (10 cm) thick.
For a different waistband thickness, multiply the desired thickness by 2 and add 1" (25 mm) for seam allowances. For example, for a 3" (76 mm) thick finished waistband, cut a length of 7" (18 cm), and, for a 5" (13 cm) thick finished waistband, cut a length of 11" (28 cm). Skirt Body: Cut 2 rectangles from your woven fabric as shown in Diagram 1. Duct-Tape Dress Form #2. David Coffin Photo: David Coffin by David Coffinfrom Threads #75, p. 39 Leah Crain, a dressmaker and costumer from Cincinnati, OH, has another take on the duct-tape version of form making.

You can find her complete directions, including stand ideas, photos, plus comments and questions from other sewers, on the Internet (www.leanna.com). Leah's forms look remarkably like their prior "inmates. " Here are the highlights: You'll start with a similarly underclad wrappee, but Leah suggests cutting off one sleeve from a second T-shirt and basting it onto the first to form a neck cover. A strong wooden hanger placed inside before stuffing is the start of either a hanging form or a simple stand.