

Apartment diy. Little glass box: From Sad to Sassy. Recently on the ol' blog, I talked about declaring my room back (from life's stuff, moving boxes, and my little tail wagging friends) in this post...
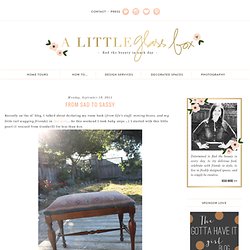
So this weekend I took baby steps ;.) I started with this little pearl (I rescued from Goodwill) for less than $10. She was looking a wee bit tired and unloved, so I made sure and put some purple pep back into her life. Hand-Crafted Etched Glass Bottles - Home for the Holidays. Some glass bottles are just too pretty and colorful to toss into the recycling bin. Instead of discarding them, I "etch" them for my own use and to give away as gifts. They're beautiful with flower stems tucked inside, and they make handy containers for bath salts and infused oils or vinegars. Materials: Contact paper—clear or light color Glass bottles or jars, washed, rinsed and completely dried Sharpie-type marker Craft knife such as X-acto Knife with new blade Wooden spoon Soft bristle brush Goggles or safety glasses An old long-sleeved shirt Rubber gloves or medical gloves.
Lace candle holder. I love candles and candle holders.
They are what you call in Dutch ‘gezellig’ (cosy). The simple glass ones are really cheap and you can find a lot of them in thrift stores. MAGIC Decal Transfer Tutorial with Free Printables! Some of you may remember, a little while back I posted a tutorial for DIY waterslide decals.
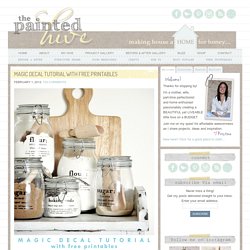
Among other things, I mentioned how awesome they are for creating custom embellishments without the need for any fancy-pants equipment. Yep, waterslide decal paper is a truly fab product, though as great as it is, there is one drawback – although it’s somewhat tough it’s not especially durable. So, whilst it’s perfect for ornamental purposes, it’s not ideal for more practical applications…until now that is!
Magic decal coating paper is a product designed to be used in conjunction with standard decal paper to make the finished transfers super durable – yes, even dishwasher resistant! If you’re already familiar with magic decal coating paper then please excuse my tardy excitement, though for everyone else who is just getting to the party now too, feel free to start throwing the streamers! 1 Image to transfer. Use anything you like. 2 Printer.
DIY Woven Chain Bracelet. Chain link bracelets, with colorful threads woven through them, have been popping up here and there.
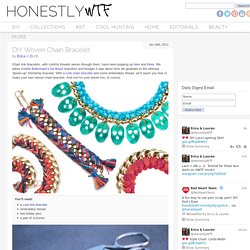
We adore Aurèlie Bidermann‘s Do Brazil bracelets and thought it was about time we graduate to the ultimate “grown-up” friendship bracelet. With a curb chain bracelet and some embroidery thread, we’ll teach you how to make your own woven chain bracelet. And one for your bestie too, of course. You’ll need:a curb link braceletembroidery threadtwo bobby pinsa pair of scissors Cut 2 sets of 15 strands of embroidery thread, with each strand measuring four times the length of the bracelet. Lay the second color (blue) over the first color (coral). Repeat the steps until you reach the end of the bracelet. (top images from here and here, rest of images by Honestly…WTF) McLaughlin Designs · Headband Love. How to make pretty lights... Ambient light in 5 minutes flat!
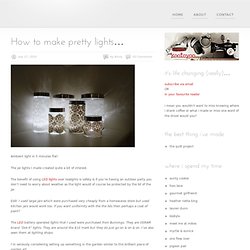
The jar lights I made created quite a bit of interest. The benefit of using LED lights over tealights is safety & if you’re having an outdoor party you don’t need to worry about weather as the light would of course be protected by the lid of the jar. Edit: I used large jars which were purchased very cheaply from a homewares store but used kitchen jars would work too. If you want uniformity with the the lids then perhaps a coat of paint? The LED battery operated lights that I used were purchased from Bunnings. I’m seriously considering setting up something in the garden similar to this brilliant piece of garden art… freshly installed& 3 months later which was inspired by Margie’s project here. No-interfacing Storage Basket Tutorial. As promised, a recipe for making washable stand-up storage baskets: You'll need to cut 2 of each of these pieces (click on the pic to enlarge it to a readable size).
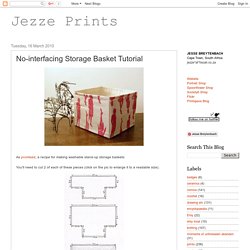
The measurements are in centimetres because that's the way I was brought up (sorry). A seam allowance of 1cm is included in these measurements. This basket's base is 15cm wide, but you could make any size using this slightly haphazard formula, where x is the width of the base and y is the height of the basket. And 2 is cm and seam allowance. Pieces cut, sew right sides together along these seams: Sew the boxed corners of the linings by folding the pieces open, matching the side seams with the bottom seams, and stitching across: Zig-zag the top edge of the smaller lining piece. Hem the bottom edge of the outer sleeve piece, turning up 1cm all round and stitching it down.
Turn the lining pieces so that their right side faces out, and slide the outer sleeve over. Almost done, except for the fiddly part! A cluster of gleeful jam jars... how-to. Yes indeedy!
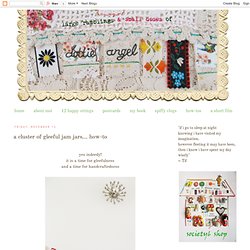
It is a time for gleefulness and a time for handcraftedness now before we begin i must tell you several things, thing #1: this cluster of gleeful jams jars how-to, is perfectly suited to any random sized jar you have lurking around your nests. i found some in the back of my fridge, saved some as they became empty, others i decanted the contents so i could continue uninterrupted in my need to clothe little glass jars in warm jackets. indeed the more different sizes you have going on, the peachier it will look. thing #3: the only material i used in this gleeful cluster that has not been used and loved before is the cream yarn.