Web Monitored Water Depth Sensor using Arduino WEMOS D1 and Pressure Sensor MPX 2010. Water Level Sensor with Arduino Ethernet – brelovich. This project implements a network connected water level sensor, measuring the level in the sump pit of my house. It’s connected to the home network and reports the water level by broadcasting UDP packets so that any computer can receive it and take action, such as sending out an alert or storing statistics. Important note Before we go any further, let me just point out that the pressure sensor, MPX2010DP, used in this project exists in another version, MPX5010DP, that has an output voltage interval much better suited for this project.
If only I had checked that I wouldn’t have needed to build any circuits or use any extra components at all. The pressure sensor MPX2010DP measures the pressure difference between two inputs, from 0 to 10 kPa and outputs between 0 and 25 mV on it’s two output pins. (The MPX5010DP gives you between 0 and 4.7 V output, ideal for direct connection to the analog inputs on Arduino.) Circuits and PCBs Bottom layer of PCB with pads, as PDF Eagle files Arduino Sketch. Capteur de pression (MPX5700GP) [Arduino] Utilisation d’un MPXV4115V (capteur de pression négative)
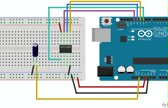
Bonjour tout le monde ! Ça fait déjà quelques temps que je n’ai pas fait de sketch arduino, alors aujourd’hui je rattrape le coup en vous proposant un petit code arduino bien sympa Aujourd’hui je vous propose de faire mumuse avec un MPXV4115V ! Il s’agit d’un capteur de pression différentielle négatif (il mesure donc une aspiration) compensé en température. Le gros avantage c’est qu’il renvoi une tension proportionnel à la pression mesuré, il est donc trés facile à mettre en œuvre ! Première étape, le câblage ! Rien de plus simple, 3 broches, VCC (+5v, sur la broche 2), GND (sur la broche 3), OUT sur la broche 4). Remarque: la broche 1 est repéré par un petit angle « cassé », c’est assez difficile de le voir (même sur la photo).
Un morceau de protoboard, un peu de soudure, un connecteur, et tout est prêt pour commencer ! Enfin, presque … Il nous faut aussi une seringue, histoire de pouvoir faire une différence de pression, sinon on ne pourra pas tester notre systéme Étape 2 : faire des math …