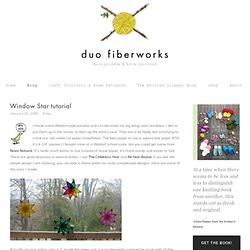

Window Star tutorial. I made some Waldorf-style window stars to decorate our big living room windows.

I like to put them up in the winter, to liven up the wintry view. They are a bit fiddly, but satisfying to crank out, not unlike cut paper snowflakes. The best paper to use is square kite paper (ETA- it's 6 1/4" square.) I bought mine at a Waldorf school store, but you could get some from Nova Natural. It's really much better to use instead of tissue paper, it's more sturdy and easier to fold. Actually, my son Julian, who is 7, made the green one, I was pleasently suprised he stuck with all the steps! Use the white paper as a work surface, it's easier to see what you are doing. Then fold it in half and crease well. Then fold the pieces each in half crosswise and cut. Next, open them out so you have a rectangle with a crease running down the center. See my not-quite tidy edge? Now on one end only, fold in the sides to meet at the middle. So after you've done that with all eight pieces, you will have this:
Origami Magic Ball (Dragon's Egg by Yuri Shumakov) Paper Flowers – Anyone Can Do That. Japanese Kusudama, this tutorial is featured on Craftuts Anyone can do that, I assure you.

The proof: I can, just take a quick look at my result below. And, believe me, I am neither meticulous nor particularly patient. You could even say I’m the opposite. Below you can see my very first attempt to create paper flowers. What you will need to make your own Kusudama paper ball? 1. 3. 4. (optionally) I prefer torn paper instead of cut. You have to start with a single petal. Now you have to glue your 5 petals into a flower. Apply the glue to only one side of each petal, except for the last one, in this case cover both sides with glue. Your first flower is done. Don’t glue every petal right after you make it. Starstruck at Christmas « Kate's Creative Space. Regular followers will know of my obsession with all things paper, and with projects which take very little time or specialist skill.

As Christmas draws ever closer, I’ve been experimenting with different types of festive stars and bring you some simple projects to try today. My usual reassuring criteria apply; these had to be things I could a) get right the first time – or very occasionally the second; b) could do in front of the TV, merlot in hand, and c) look far more elegant and skilled than the actual labour would suggest. I hope you’ll agree! Below you’ll find my instructions on how to make each of these stars; the classic 5-point Amish barn stars, 6-point folding stars and concertina or snowflake stars, which look beautiful hung in windows.
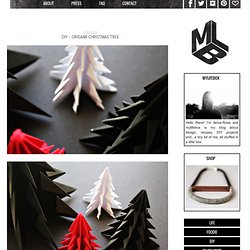
Once you’ve got the hang of it, each of these are really simple to make and look beautiful when clustered together on a tree, or hung on a staircase - or even just gathered in a large bowl on the table. They make gorgeous gift-toppers too…. Origami Christmas Tree. And finally I managed to post this origami tree tutorial...for those who follow me on instagram, you know I've made these last week.

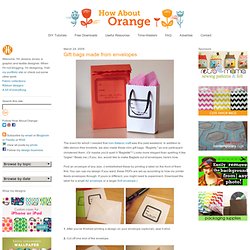
Gift bags made from envelopes. The event for which I needed that non-Satanic craft was this past weekend.

In addition to little demon-free booklets, we also made these mini gift bags. "Baglets," as one participant christened them. (Or maybe you'd spell it "Baglette"? Looks more elegant than spelling it like "piglet. " Beats me.) Find an envelope of any size. Gói quà dễ thương chỉ trong 5' Túi quà nhỏ xinh này trông nữ tính quá!

Đựng những món quà nhỏ vào bên trong là hết ý luôn nha! Cổ điển mà đẹp "thôi rồi"! Mình có thể thay kẹo bằng bánh quy đựng cũng rất yêu nhé! Một gợi ý gói quà rất hay ho cho mùa chia tay cuối cấp đó nghen. LE MAITRE EN ORIGAMI.