
Sound Activated - Light Up Bras - Women's - Neon Nancy. Nasty Gal Blog. Friday, May 10, 2013 Lessons From The Pros: Bathing Beauties We’re not really the full-layer-of-makeup-on-the-beach type, but we can still admit that getting that perfect beach babe look isn’t as easy—or nearly as effortless—as it seems. Dewy (but not greasy) skin, salty (but not briny) hair and the ever-prescient threat of sunburn—the whole thing’s a bit precarious.
And while our newly in-stock collection of bright zinc sunblock can spare you from the latter, we had to call in the big guns, that’s Bumble and bumble’s Jordan M, to tell us a thing or two about perfect beach hair. We grabbed photographer Brandon Harman and fav Kiwi blogger Ponyhunter and hop, skip, jumped over to Santa Monica to show you what’s what. All together, we’ve got you covered, whether you’ve spent the day surfing the waves… or the Internet. How To Get Easy Breezy Beach Waves 1. For Sexy Definition “When hair is dry, add more Grooming Crème. Tutorials. I don't create tutorials for every manicure I do, but if I have, this is where you'll find them!
Explore the manicures and tutorials attached with them by clicking on the images below! If you try it out, let me know, I'd love to see your recreations. Sea of Shoes: HAIR HOW-TO. I am sometimes asked how I style my hair, and while my method is far from perfect, I thought I'd show you how!
My hair is pretty straight and fine naturally and I always let it air dry. Since I go about three days between washes, I like to curl it on the first day and let it mellow out into some nice waves over the next two. Let's get started! If your hair doesn't hold curl very well then you may want to put a palmful of curling mousse in it when it is halfway dry. First I comb out all of the tangles and apply a liberal amount CHI Iron Guard Protection Spray to prep my hair.
(though I want to upgrade to one of the fancy new ones from Sultra soon!) Which Naturals Are Backed By Serious Science? How To Style Maiden Braids. Last month I did a makeover story with Kelsie and had many requests for a maiden braid tutorial.

Yesterday she came in and we photographed these simple step by steps. Kelsie has extremely long and thick hair, but anyone with shoulder length or longer can do these braids (see my photo below for an example). Steps 1-2: Braid two strands on each side of a center part. Steps 3-5: Wrap braids around the crown of your head and pin in place with one pin each. Step 6: Arrange braids so that they cover the front of your head like a headband. The Beauty Department: Your Daily Dose of Pretty. Post + photography + graphic design by Norah Curlee So, it’s post-dinner and about that time where the sweet cravings kick into high gear.
The Ben & Jerry’s carton is basically knocking down the freezer door trying to make its way into your bowl. How to make your own pore strips. Inexpensive Way to Whiten your Teeth at Home. Post from: beautytips4her.com You want to keep updated?
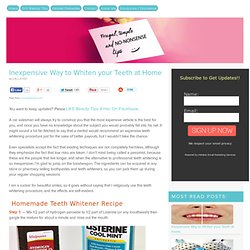
Please LIKE Beauty Tips 4 Her On Facebook. A car salesman will always try to convince you that the most expensive vehicle is the best for you, and since you have no knowledge about the subject you would probably fall into his net. It might sound a bit far-fetched to say that a dentist would recommend an expensive teeth whitening procedure just for the sake of better payouts, but I wouldn’t take the chance. Even specialists accept the fact that existing techniques are not completely harmless, although they emphasize the fact that low risks are taken. DIY Hair Treatments. 17 Easy Ways To Make Your Lips Look Perfect. How to Make Your Own Beauty Products from Scratch.
Let's keep things simple this week.

When it comes to personal-care products, we are big believers in streamlining what you use—see "Eight Products You Think You Need But Don't" for a refresher—buying less in general, and getting creative. We have both always loved experimenting in our kitchens and our bathrooms, checking ingredients in products we love, isolating the main ones, and then trying them on their own. Sometimes it works: A favorite hair leave-in contained aloe, for example, so one day we tried aloe alone and found that, lo and behold, it worked just fine on its own. And sometimes it didn't. Over the years we have tried dozens of DIY beauty recipes to find ones we like—and that work. Simple body scrub Honey face wash We already told you about our new favorite homemade face wash last week but here's the recipe: In the palm of your hand, combine a tablespoon of raw, unfiltered honey with a half a tablespoon of baking soda, mix it together, and apply to damp skin.
Perfume Shave oil. How To: Hair Bow. A few weeks ago I posted a picture of a hair bow I did on a bride.

After I posted the picture I got a lot of emails requesting a step-by-step for it. So I made one! 1. Begin by taking one small section of hair from each side of your head. The bigger the sections, the bigger the bow. 2. 3. 4. 5.