
Index of Fashion Doll Shoes Tutorials. Back This is a list of the Fashion Doll Shoes Tutorials in YouTube, organized according to the subject.
Under the headings, the videos are listed in the order they were uploaded. Some videos may appear under more than one heading as they discuss several subjects. I will try to update this list regularly, but the latest videos at the end of the playlist may be missing. Using sealer to prevent staining and fraying and to secure stickers. Fashion Doll Stylist: Princess Diaries. When the weather is nice in Paris, the city positively sparkles.
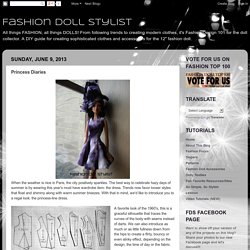
The best way to celebrate hazy days of summer is by wearing this year's must have wardrobe item: the dress. Trends now favor looser styles that float and shimmy along with warm summer breezes. Fashion Doll Shoes. The basis for these shoes were plaster castings I had made some time ago.
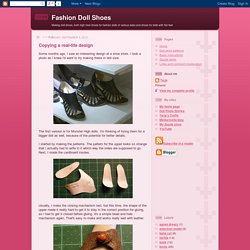
I glued the platform toe parts to cardboard soles that had 3 layers of cardboard glued in shape. Next, I covered the sides of the toe parts with leather and filled gaps with leftover pieces to make sure that the outer soles would stay even when glued in place. Then I covered the plaster casting heels with leather and glued them in place. Usually the heels are the last part to be glued, but I wanted to try a different method this time.
Then I covered with leather the edges that still had cardboard visible. For the closing mechanism I decided to try hook and eye, which turned out to be a bad idea as you can see later. The straps are made of leather and the decorations are actually sticker strips with transparent background. Arte e croche: barbie. Crochet fashion doll tank dress - Maz Kwok's Designs. My first crochet design for Ms.
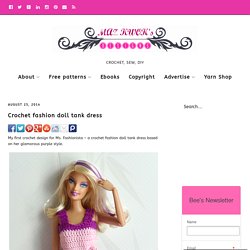
Fashionista – a crochet fashion doll tank dress based on her glamorous purple style. Click here to <3 this pattern on Ravelry Materials: ( I used ) 2mm crochet hook Cotton crochet thread: pink and purple Needle Scissors Abbreviations Note: I used chainless starting dc/tr for every first dc/tr of each round instead of ch 3/ch 4. Special stitch used: 2dc- V stitch ( 2 dc, ch 2, 2 dc into same stitch ) 3tr- V stitch ( 3 tr, ch 2, 3 tr into same stitch ) Gauge: 8 double crochet stitches approximately 1 inch.
Dress: start with color A yarn, ch 40, sl into 1st chain to join. Belt: using color A yarn Crochet a chain of your desirable length, dc into 3rd chain from hook, dc across ( fasten off, weave in end ) Attach to the back of the dress. Here’s the full set You can get the patterns of this Pink and Purple glam set in this ad-free, instant download pdf file: Pink & Purple Fashion ( There’s an itsy bitsy fee for it, thanks for your support ) Enjoy making doll outfits. ThreadDough: Part VI: The Collar. Now, slip stitch all the way around until you get to about two chains before the straight button placket starts to turn into the curved collar edge.
(Please see next photo. ) Here is Penelope wearing the collar up so you can see where we are talking about. I drew a box around the area: In the next chain to be worked, make one Half Double Crochet. In the next chain to be worked, make one more Half Double Crochet. Fashion Doll Stylist: Patterns. Broderie couture papier et.......................... - Inside the Fashion Doll Studio. Toys from Trash.
Snow Storm in a Jar. Are you looking for a fun and educational activity for the kids this winter?
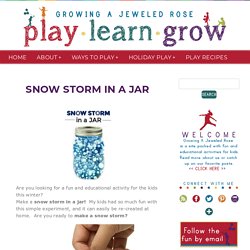
Make a snow storm in a jar! My kids had so much fun with this simple experiment, and it can easily be re-created at home. Are you ready to make a snow storm? Materials Method Fill the jar 3/4 of the way with baby oil. In a bowl combine one teaspoon of white paint with one cup of water. Once mixed pour the "white water" into the jar leaving a little room at the top. Once the water is settled it is time to make the snow storm! WOW! Rosie and Jewel were in awe! And again and again..... Rock Candy Experiment. Making rock candy at home is really easy and lots of fun!

This activity is a beautiful Science experiment and a yummy treat all in one. My kids LOVED checking on their jars each day to see if the rock crystals had grown. Here is an easy tutorial for how we conducted our rock candy experiment. Sand Foam...two ingredients for super, sensory fun. 191k Shares We sure do love us some sand activities here at Paging Fun Mums!
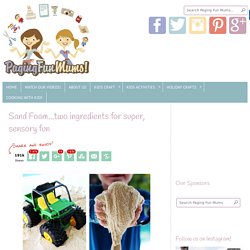
We’ve done Magic Aqua Sand, DIY Coloured Sand , DIY Sand Imprints & plenty more! This Sand Foam has such a smooth, slimy, grainy texture that makes for a great sensory activity that my kids love! We live by the beach and they still want me to get this recipe out again and again! The best part is, it’s very inexpensive AND easy to make!
To make your own you will need: Sand – approximately 3 cups Shaving Foam – x 1 can 250g (approximately)