
Improving HTML5 Canvas Performance. Introduction HTML5 canvas, which started as an experiment from Apple, is the most widely supported standard for 2D immediate mode graphics on the web.

Many developers now rely on it for a wide variety of multimedia projects, visualizations, and games. However, as the applications we build increase in complexity, developers inadvertently hit the performance wall. There’s a lot of disconnected wisdom about optimizing canvas performance. This article aims to consolidate some of this body into a more readily digestible resource for developers. Note that this article does not go into usage of HTML5 canvas. Performance testing To address the quickly changing world of HTML5 canvas, JSPerf (jsperf.com) tests verify that every proposed optimization still works.
Visitors to a JSPerf performance test page can run the test on their browser, and let JSPerf store the normalized test results on Browserscope (browserscope.org). Pre-render to an off-screen canvas no pre-rendering: pre-rendering: Canvas Cheat Sheet. Examples/halma.js. Canvas. You are here: Home Dive Into HTML5 Diving In HTML 5 defines the <canvas> element as “a resolution-dependent bitmap canvas which can be used for rendering graphs, game graphics, or other visual images on the fly.”
Optimize HTML5 canvas rendering with layering. Introduction Often, in 2D games or when rendering HTML5 canvas, optimization is performed so multiple layers are used to build a composite scene.
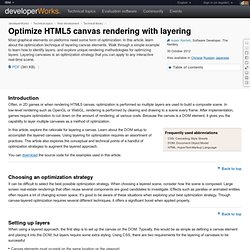
In low-level rendering such as OpenGL or WebGL, rendering is performed by clearing and drawing to a scene every frame. After implementation, games require optimization to cut down on the amount of rendering, at various costs. Because the canvas is a DOM element, it gives you the capability to layer multiple canvases as a method of optimization. In this article, explore the rationale for layering a canvas. You can download the source code for the examples used in this article.
Back to top Choosing an optimization strategy It can be difficult to select the best possible optimization strategy. Setting up layers When using a layered approach, the first step is to set up the canvas on the DOM. Canvas elements must co-exist on the same location on the viewport.Each canvas must be visible underneath another canvas. HTML5 Canvas: You don’t always have to clear the entire thing.
When I first started working with the HTML5 canvas element, the one thing I found a bit frustrating was the fact that you had to clear the canvas and then redraw it.
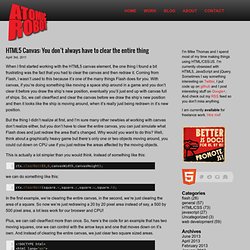
Coming from Flash, I wasn’t used to this because it’s one of the many things Flash does for you. With canvas, if you’re doing something like moving a space ship around in a game and you don’t clear it before you draw the ship’s new position, eventually you’ll just end up with canvas full of ships. So, we call clearRect and clear the canvas before we draw the ship’s new position and then it looks like the ship is moving around, when it’s really just being redrawn in it’s new position. But the thing I didn’t realize at first, and I’m sure many other newbies at working with canvas don’t realize either, but you don’t have to clear the entire canvas, you can just simulate what Flash does and just redraw the area that’s changed.
Why would you want to do this? This is actually a lot simpler than you would think. Partial image manipulation with canvas and webworkers. In my previous article I showed how to use box2d-web and deviceorientation to rol around a set of circles using standard HTML5 APIs.
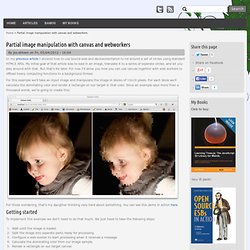
My initial goal of that article was to load in an image, translate it to a series of seperate circles, and let you play around with that. But that's for later. For now I'll show you how you can use canvas together with web workers to offload heavy computing functions to a background thread. For this example we'll take an input image and manipulate the image in blocks of 10x10 pixels.
For each block we'll calculate the dominating color and render a rectangle on our target in that color. For those wondering, that's my daugther thinking very hard about something. Getting started To implement this example we don't need to do that much. Let's begin simple, and look at the image loading code. Wait for image to be loaded Before we start processing the image we have to make sure it is completely loaded. // start processing when the document is loaded.
Using this: