
Fatquartershop. Fatquartershop. Fatquartershop. Fatquartershop. Fatquartershop. Fatquartershop. Baby Quilt Fabric, Children & Nursery Fabric. Fatquartershop. How to do the Chain Stitch: Free Tutorial on Craftsy. The chain stitch is a fun and versatile embroidery stitch that can be used for outlining, adding a border, or filling hand embroidery designs.
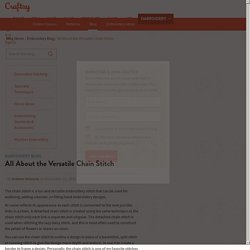
Its name reflects its appearance as each stitch is connected to the next just like links in a chain. A detached chain stitch is created using the same technique as the chain stitch only each link is separate and singular. The detached chain stitch is used when stitching the lazy daisy stitch, and this is most often used to construct the petals of flowers or leaves on vines. You can use the chain stitch to outline a design in place of a backstitch, split stitch or running stitch to give the design more depth and texture, or use it to create a border to frame a design. Personally, the chain stitch is one of my favorite stitches to use for outlining, filling and lettering in hand embroidery. How to do the chain stitch Step 1: Start by pulling the floss and needle up through the underside of the fabric in the hoop.
How-To: the EASIEST Chain Stitch! A student in one of my classes pulled me aside and said, almost guiltily: "do you want to see how I work chain stitches?
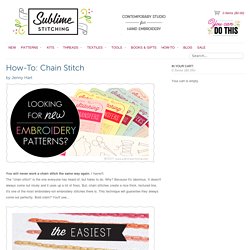
" My jaw dropped. So has the jaw of every other person I've shared this with since then. I told her I'd love to share it with my readers and she gave her blessing! This is her chain stitch technique: Step 1: Make a small stitch. Step 2: Come up a short distance away from the end of the stitch, and pass the tip of your needle through it. Step 3: Pull your floss all the way through. Relaxing, Therapeutic Neck Pillows-A Fan Favorite! These little bow-tie shaped neck pillows are super for proppin' up your noggin as you watch TV or read in bed, as well as for supporting your neck while sleeping.
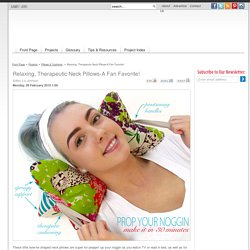
This is one of our original designs and remains a perennial favorite. They are simply the perfect shape and softness to cradle your head and neck in comfort. In fact, this project comes with a warning: once you make one and share it with friends and family, no one will want to give it up. You'll be on the hook to make many, many more. Good thing you can finish one in under an hour. Reactions are likely to run the gamut from love it to get your own to gentle snoring. We've made countless of these as gifts, and use them ourselves every night. Fabrics-store.com: Linen fabric - Discount linen fabric - Wholesale linen fabric. Make It Handmade: Threading Your Serger or Overlocker. I'm so excited for our first Serger Series post!

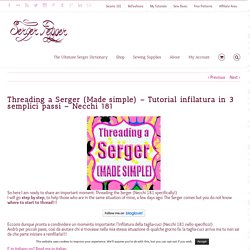
The first session is the hardest in any relationship counseling. This week, we are getting into the nitty gritty of threading your serger or overlocker. It may not be glamorous, but knowing how to thread your serger correctly is the basis for a long and happy life together. Along the way I'll share a few frustration saving tips and tricks. Click the link below to get started! Ok, let's jump in! One caveat-- I'm trying to be as detailed as possible, especially when it comes to threading those pesky loopers. Thread & Tension Guides Threading your serger starts with your thread! Pull your thread through the fully extended thread tree and the thread guides above the tension disks. Pull your threads through tension disks making sure they are well seated between the disks.
I've labeled the looper and needle threads in the picture above. 1) Upper looper 2) Lower looper 3) Right needle 4) Left needle Threading out of order will cause thread jams. Threading a Serger (Made simple) - Tutorial infilatura in 3 semplici passi - Necchi 181 - Serger Pepper. So here I am ready to share an important moment: Threading the Serger (Necchi 181 specifically!)
I will go step by step, to help those who are in the same situation of mine, a few days ago: The Serger comes but you do not know where to start to thread!!! Eccomi dunque pronta a condividere un momento importante: l’infilatura della taglia-cuci (Necchi 181 nello specifico!) Andrò per piccoli passi, così da aiutare chi si trovasse nella mia stessa situazione di qualche giorno fa: la taglia-cuci arriva ma tu non sai da che parte iniziare a reinfilarla!!! How to Draft a Basic Bodice: Tutorial - welcometothemousehouse.com. Hi there!
It looks like this if your first time visiting. I would LURVE for you to sign up for my newsletter to get exclusive discounts and updates. And while you're at it, why not follow me on Bloglovin'? If you follow me over at Facebook, you would know that I have several sewing patterns soon to be released, so this guest post from Ledys of From the Sunnyside is perfect! Sailrite Ultrafeed LSZ-1 PREMIUM Walking Foot Sewing Machine. The Sailrite Ultrafeed LSZ-1 PREMIUM Sewing Machine package features our powerful, portable, straight stitch/zigzag walking foot sewing machine loaded up with all of our best accessories.

This package is perfect for someone who needs an easily portable, heavy-duty machine, for boat owners looking to sew heavy canvas or sails, or for the sewer who wants all the bells and whistles. The Ultrafeed LSZ-1 Premium Package features the Ultrafeed LSZ-1 Sewing Machine (Patent #6499415) in the Deluxe Carrying Case and all these great accessories: Monster II Balance Wheel1” Swing Away BinderEZ Set Stitch Length PlateIntegrated Thread StandFlex20 LightDeluxe Magnetic Sewing GuideKickstandLeft Roping Zipper FootCording Foot Set for Large WeltingNeedle Assortment Pack The Ultrafeed LSZ-1 Sewing Machine excels in performance and versatility, sewing in both straight and zigzag stitches. Double the Power. Flowers - Daffodils, Tulips & Bells - Embroidery Designs.