Recycling the Old and Dry into Liquid Gold. I started looking at other art teachers' blogs about a year ago to help me get more project ideas and other nifty suggestions.

One thing that I have run across most recently is a way to 'make paint' using old markers. Initially I thought it was a crock. However, its the end of the year and I'm sorting through materials to toss so I decided to put this theory to the test. Can one really make liquid watercolor paint out of old crusty dried out markers?
I did the following to find out: 1. 2. 3. 4. I'm quite excited to find a really green and cheap way to make liquid watercolors. In summation, I answer the question above with a victorious Yes! Stenciled Watercolors Tutorial. At the suggestion of a friend, I am posting a tutorial on how to make a nice watercolor painting using plastic stencils!
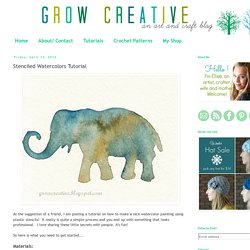
It really is quite a simple process and you end up with something that looks professional. I love sharing these little secrets with people. It's fun! So here is what you need to get started... Materials: watercolor paints paintbrush plastic stencils (I found some cheap ones at the dollar store) watercolor paper Step 1: Pick out the stencil you want to use and place it on top of your paper. Step 2: Hold the stencil down tightly with one hand. Step 3: To give it a varied look, add several different colors in random areas of the stencil. Step 4: Fill in the entire area of the stencil and ever so carefully lift the stencil away from the paper.
Step 5: Let your painting dry completely and there you have it... your own mini artwork! Tips and Tricks:If you notice that your watercolors are bleeding around the edges of the stencil you can try mixing less water with the paints. Watercolour Pencils. Would ya look at that?
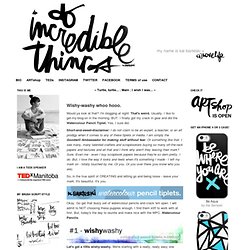
I'm blogging at night. That's weird. Usually, I like to get-my-blog-on in the morning. BUT. I finally got my crack in gear and did the Watercolour Pencil Tiplet. Short-and-sweet-disclaimer: I do not claim to be an expert, a teacher, or an art prodigy when it comes to any of these tiplets or media.
So, in the true spirit of CREATING and letting go and being loose - leave your mark. Okay. Let's get a little wishy-washy. You need a few things to get started here. The Watercolour Pencils. Alright - rip a page out of your sketchbook (you don't have to!) Throw down some colours. Spray it. NOTE from COMMENTS: I just let it air dry. Look at how beautiful that is. This is a scan of the finished product.
Watercolor Cards. If you have been loving the watercolor and ombre trend recently, you are going to LOVE this amazing DIY Sarah is bringing us today!
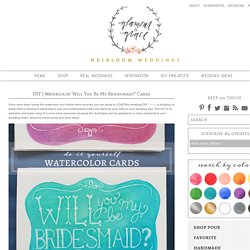
She is sharing a sweet way to ask your bridesmaids if they will stand by your side on your wedding day. This DIY is so adorable and super easy! It is even more awesome because this technique can be applied to so many elements in your wedding (hello, fabulous escort cards and favor tags!) It’s DIY time again, lovely readers! This time I have a super “artsy” project for you! Materials Watercolor paper cut into 9″x6.25″ rectangles, folded into cards(size A6: 4.5″x6.25″), 1 per bridesmaidWatercolor paints (the cheap Crayola one will work just fine!)
Helpful hints: Using a bone folder to fold the paper is very helpful, since watercolor paper tends to be thicker than printer or scrapbooking paper. Step 1: Cut all of the paper (watercolor and scrapbook) to the sizes indicated above. Share: