
DIY Glitter Tights. DIY CHLOE INSPIRED SCALLOPED BIKINI. 12th June 2013 Ever since I saw the Chloe version a few years ago I’ve yearned for a scalloped bikini – to me they seem like the perfect (ultra feminine) beach attire.
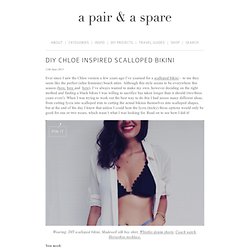
Although this style seems to be everywhere this season (here, here and here), I’ve always wanted to make my own, however deciding on the right method and finding a black bikini I was willing to sacrifice has taken longer than it should (two/three years even!). DIY STRAPPED BRA TOP. 16th October 2013 I’ve been obsessing over strapped swimwear and bras for ages now, and recently took a moment to create a style of my own.
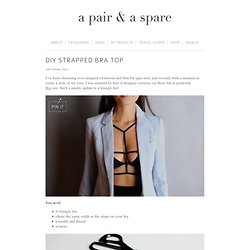
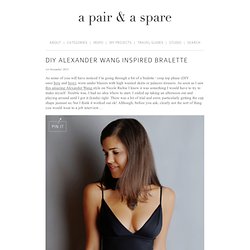
I was inspired by lots of designer versions out there but in particular this one. Such a simple update to a triangle bra! Pin It You need: A triangle braelastic the same width as the straps on your braa needle and threadscissors 1. 2. 3. 4. DIY ALEXANDER WANG INSPIRED BRALETTE. 1st November 2013.
DIY Macramé Back Bra. Pretty DIY Fabric Feathers Dishtowel. Fashion Friday - DIY - Adorable Buttons - Mashia Crafts. Fabric Transfer DIY. I recently posted a couple of old pictures that my dad took and I really wanted to integrate them into a new project.
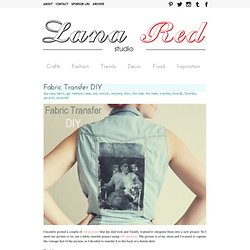
So I used one picture to try out a fabric transfer project using Gel medium. The picture is of my mom and I wanted to capture the vintage feel of the picture, so I decided to transfer it to the back of a denim shirt. Here's how: Supplies: Shirt/piece of fabric, laser printed image, Gel Medium 1. 2. 3. 4. The image transfer probably won't come out as perfect as the original image, but I think that it suits the style and makes it look more unique. DIY Shibori. Today marks HonestlyWTF’s four year anniversary.

Four years! To celebrate, we’re revisiting the very first tutorial we ever featured on the site: shibori tie dye. Lauren and I first discovered shibori after discovering an old photo on the web. The idea of recreating an ancient Japanese dyeing technique inspired us to spend an entire weekend experimenting with our favorite deep blue, indigo. After dyeing just about every white article of clothing in sight, our blue stained fingers excitedly uploaded the tutorial – we couldn’t wait to share it with our 30 readers. You’ll need:an indigo dye kitnatural fiber clothing or fabric2 5 gallon bucketsrubber glovessmall wood squaresrubber bandstwinea PVC pipea long wooden sticka drop clothrubber glovesscissors When choosing fabric or clothing, it’s important that made of natural fibers. Itajime shibori is known as the shape-resist technique. Fold it again in the other direction – again, like an accordion. Wrap the twine around the fabric.
How to Dye Clothes with Coffee. We all know from unfortunate experience that coffee is great at staining our clothes.
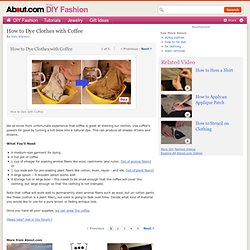
Use coffee’s powers for good by turning a hot brew into a natural dye. This can produce all shades of tans and browns. What You’ll Need: A medium-size garment for dying A hot pot of coffee 1 cup of vinegar for soaking animal fibers like wool, cashmere- and nylon. [list of animal fibers] or 1 cup soda ash for pre-soaking plant fibers like cotton, linen, rayon - and silk. Note that coffee will work well to permanently stain animal fibers such as wool, but on cotton pants like these (cotton is a plant fiber), our color is going to fade over time. Once you have all your supplies, we can brew the coffee. (Need help? Fashion Essentials for The Everygirl.
Dresses. Pants. Shorts. Skirts. Shirts. Shoes. Accesories. Costume Ideas. Sewing Tips. Ooooh, okay, so many more of you told me that you received a new sewing machine for Christmas.
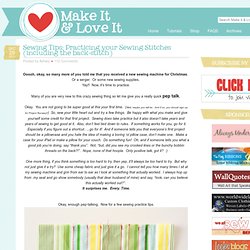
Or a serger. Or some new sewing supplies. Yay!! Now, it’s time to practice. Many of you are very new to this crazy sewing thing so let me give you a really quick pep talk. Okay. One more thing, if you think something is too hard to try, then yep, it’ll always be too hard to try. It surprises me. Okay, enough pep-talking. I know this first tip is so lame and you already know it……but practice. You may not be perfect your first time revving up your machine……but you will get better, I promise. Okay, first real lesson: the Back-Stitch A back-stitch is how you secure the beginning and end of your stitch. Now, sew a few stitches forward, stop, push your back-stitch button (it will be some sort of knob/button/lever) and hold it down and then start sewing again. Now, continue sewing right over that row of stitches and continue on the path that you were wanting to sew.
Hand Stitching. One of my favorite crafts is hand stitching-- it's fun, addictive, expressive and relaxing :) Over the next few weeks, I'm going to share easy ways to make your own patterns for hand stitching along with some tips and ideas :) These are some samples of my past projects-- I like to draw patterns freehand and use my handwriting.

However, sometimes I adapt clipart type images to make a more complicated pattern, like the sewing machine or I just stitch the outline of an image I love, like the Goonies "Hey You Guys" silhouette :) I use a Back Stitch for all my hand stitching because it's very versatile and I like the look but you can use any combination of stitches for your projects... there's lots of fun ones! Today, we're going to start with handwriting & transferring your pattern :) Embroidery. Stitches. Pretty leaf stitch.