
A ModernTake on the Doily - $850 Lamp for less than $50. A Modern Take on the Doily $850 Lamp for less than $50?

Yes Please! Hello Pretty people! We are so excited to share a project we did this past weekend. A few months ago, I came across a ceiling lamp, I absolutely loved. It was $850, and I just couldn’t justify the spend, being it was simply made of doilies. To get started, you are going to need a few things to make this project successful. Corn starchballoon (we used a 40” blown up until completely round, as pictured)upholstery thread (but any thread will do)twinedrop clothschool gluecheap paintbrushpetroleum jellylamp kit24+ doiliesstiff stuff We sewed the doilies around the balloon with the upholstery thread, very carefully. Make sure to create a space to place your bulb socket. Once you have sewn about ¾ of your balloon, stop and do the last ¼ separately. Lay down your tarp and hang your balloon from some twine above the tarp. Rub the balloon down with the petroleum jelly. It should look something like the image above!
I am Lana. Craftaholics Anonymous. Learn how to turn old t-shirts into pom poms!
T-shirt Pom Poms are so much more durable than tissue paper ones. And I think they look loads better! Got an old tee or two {or 20!} That you don’t wear anymore? Turn them into *pretty little pom poms! Supplies t-shirts, 1 per pom pomscissorscardboard use round objects to trace circles onto cardboard to make 2 templates like those shown above. i used a roll of tape and my camera lens cap…. the diameter of the outer circle is 6.5″ and the diameter of the inner circle is 2.5″. you can play around with different template sizes to get different sized pom poms. cut your t-shirt into 1/2″ strips. i only used from the arm pits down on each shirt. . take one strip and one template and place strips as shown close to the inner circle. sandwich the strip by putting the other template on top. take a fabric strip and place on cardboard with the end even with the outer edge. continue winding the strips around the template until you reach the other side.
Page corner bookmarks. This project comes to you at the request of Twitterer @GCcapitalM.
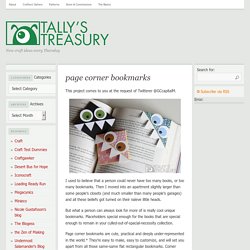
I used to believe that a person could never have too many books, or too many bookmarks. Then I moved into an apartment slightly larger than some people’s closets (and much smaller than many people’s garages) and all these beliefs got turned on their naïeve little heads. But what a person can always look for more of is really cool unique bookmarks. Placeholders special enough for the books that are special enough to remain in your culled-out-of-spacial-necessity collection. Page corner bookmarks are cute, practical and deeply under-represented in the world.* They’re easy to make, easy to customize, and will set you apart from all those same-same flat rectangular bookmarks. If you like this tutorial, here are a couple others that might be up your alley. For the monster-loving adults in the room, try some googly-eyed paper monster wine charms. What you’ll need: Putting it all together: 1) Follow steps 2 and 3 from above.