
Domotique : Construire son propre système. Posted in DIY, Domotique on 1st avr 2013 | 7 comments Hello tout le monde, voici quelques temps que je prépare cet article qui n’en finit pas de s’allonger !
Afin de ne pas vous faire plus attendre j’ai décider de le découper et d’en faire plutôt une série autour d’un thème qui me tient à coeur : la domotique ! Quels objectifs ? Pour rentrer dans le vif du sujet, j’avais plusieurs exigences pour la réalisation de mon système domotique. L’idée derrière ce projet est de gagner en confort, ainsi que de réaliser des économies d’énergie (et donc d’argent). Suivi : Suivre ma consommation électrique de manière détailléeSuivre la température et l’humidité de chacune de mes piècesAlerte en cas de détection de fumée Action : Piloter l’éclairage du salon et en faire varier l’intensitéPiloter le chauffage dans chaque pièce de manière indépendantePiloter l’allumage extinction du chauffe-eau Planification : Ce dernier point est très important car il va permettre d’économiser l’énergie.
Le cahier des charges.
Howto. These are the steps you need to follow in order to be up and running: Get an Arduino board Download the Arduino environment Install the USB drivers Connect the board Upload a program 1 | Get an Arduino board The Arduino i/o board is a simple circuit featuring the ATmega8 processor from Atmel.
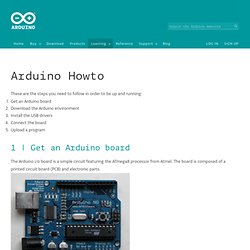
The board is composed of a printed circuit board (PCB) and electronic parts. Nrf24L01. Raspberry Pi helps with 2.4GHz home automation. NRF24L01+ transmitting from Raspberry pi to Arduino. 21 May In order to switch on that relay on the new garage box, I have to make it do something when it receives something.
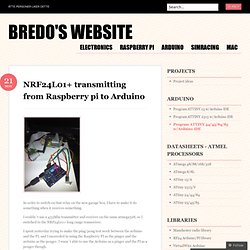
I couldn´t use a 433Mhz transmitter and receiver on the same atmega328, so I switched to the NRF24L01+ long range transceiver. I spent yesterday trying to make the ping/pong test work between the arduino and the PI, and I succeeded in using the Raspberry PI as the pinger and the arduino as the ponger.
I wasn´t able to use the Arduino as a pinger and the PI as a ponger though. So after struggling for a few hours I gave up and wrote a couple of test programs. I used this fork of maniacbug´s library for both the PI and the Arduino: The code isn`t very exciting yet, but this is what I have so far: and the Arduino: Like this: Like Loading... Raspberry pi: nRF24L01 and TCP. This time I will describe how I got a Raspberry pi (Wheezy) to work as a Python server that controls a RF-transmitter (nRF24L01).
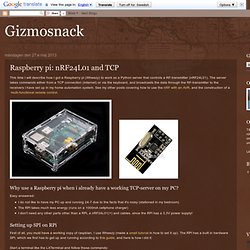
The server takes commands either from a TCP connection (internet) or via the keyboard, and broadcasts the data through the RF-transmitter to the receivers i have set up in my home automation system. See my other posts covering how to use the nRF with an AVR, and the construction of a multi-functional remote control. Why use a Raspberry pi when i already have a working TCP-server on my PC? Easy answered:I do not like to have my PC up and running 24-7 due to the facts that it's noisy (stationed in my bedroom)The RPi takes much less energy (runs on a 1000mA cellphone charger)I don't need any other parts other than a RPi, a nRF24L01(+) and cables, since the RPi has a 3,3V power supply!
Setting up SPI on RPi First of all, you must have a working copy of raspbian, I use Wheezy (made a small tutorial in how to set it up). Quick2Wire Python 3 Setting up the hardware. Arduino and Raspberry Pi communicating over 2.4GHz with cheap nRF24L01+ modules. I've had a lot of fun over the past year messing with wireless comms.
The 433Mhz/434MHz dirt-cheap modules are fantastic for Arduino, particularly when used with the VirtualWire library which makes them trivial to setup. I've been able to send sensor data and RC car commands using them with just a few lines of code. However, there isn't a version of VirtualWire for RaspberryPi and I don't have the time/skills to port the Arduino one. I've also mentioned multiple projects using those HC05/HC06 serial Bluetooth modules. Again, dead easy to use and they connect Arduinos to PCs, Raspberry Pis and mobile phones. My latest experiments involve the Nordic Semiconductor nRF24L01+ modules. However I spent nearly all of last weekend trying to get a Raspberry Pi talking to an Arduino using instructions in some blogposts.
To avoid you going down the same rabbit hole, this is what you need to do to get Arduino talking to RPi over nRF24L01+.
Gooseberry. Raspberry PI.