
Decoración práctica, ideas y consejos de decoración - CasaDiez. Paso a paso - Una caja para infusiones. Decoración, diseño e interiorismo. Macetero de barro decorado con letras. Diy projects. Hidden jewelry box. Grace mentioned to me that jewelry storage is a hot topic for a lot of readers, so i set to work brainstorming some possibilities!
I realized that there are basically two camps: people who like their jewelry on display (neatly of course), and people who like to hide it away (also neatly). so i am going to do two diys for jewelry storage that can satisfy both camps. the first is an attempt at hidden storage, which in this case is a mega top-secret, ninja-spy, behind-the-painting deal. i’ve always loved the idea of secret hiding places in fat old books, under rugs, and behind old paintings. this is pretty easy to rig up, especially if you have an old painting with a nice wood frame, but really any picture with a relatively wide wood frame will do fine. if you feel like you have too much jewelry to fit, this can also be a great way to store keys and mail by the entryway. or you could pair it with a nice leather bound book with a secret cutout container. have fun! – kate materials: 15. saw. Diy wednesdays: fabric envelopes. We’re always making all sorts of stuff out of fabric, but can never bring ourselves to toss any scraps. this project is an easy and smart way to repurpose even the tiniest leftovers. by using one of our favorite sewing materials—fusible webbing—you can whip up a whole set of these no-sew envelopes in a flash. they’re great places to store favorite documents, photos, or business cards, and can even be used as a special gift wrap. have fun!

Derek & lauren ps: we’re about to embark on a bunch of exciting (and time consuming) projects, which unfortunately means we need to take a brief hiatus from our weekly diy posts here on design*sponge. we plan on contributing fun stuff every now and again, but until then you can keep track of us over at smartsandcrafts.com CLICK HERE for the full project after the jump! Here’s what you’ll need: 2. layer your fabrics with fusible webbing in the center, and fuse with a hot iron. 3. trace template onto fabric and cut out. Pure + simple side table. Finding a simple, modular piece of furniture that is reasonably priced but also well made can be hard sometimes.
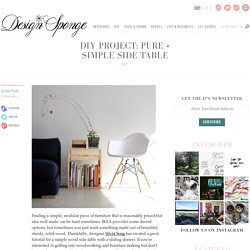
IKEA provides some decent options, but sometimes you just want something made out of beautiful, sturdy, solid wood. Thankfully, designer Silvia Song has created a great tutorial for a simple wood side table with a sliding drawer. If you’re interested in getting into woodworking and furniture making but don’t know where to start, this is the tutorial for you. She’s made a lovely piece with clean lines and a basic form that requires only a few tools. If you want a fun building project for a fall weekend, you should definitely try it out. Have a DIY project you’d like to share? Read the full how-to after the jump! I chose this project as an exercise to see if I could design and build a simple drawer unit in the spirit of Enzo Mari’s Autoprogettazione (self-design).
Materials Instructions 1. . (6) — 1” x 2” x 11” corner supports (for lateral support) (4) — 1” x 6″ x 20” side panel 2. Hanging vintage thermos display shelf. I’m not usually anxious for fall weather, but the extreme heat this year has me ready to snuggle under a blanket with hot chocolate.

When fall approaches, I like to get out my growing collection of vintage thermoses. The plaid designs feel very academic and seem to celebrate the start of another school year. Typically, they are just displayed on my kitchen table. This year, I wanted a more substantial display that I wouldn’t have to move each time we sit down for dinner. With the addition of a few evergreen sprigs, my kitchen is beginning to feel very much like autumn. Read the full how-to after the jump! Materials wood plank (I used a rough cut piece of red oak 18.5 x 5″ x 1 1/4″)4 thermosesleather strips (mine came as 36″ x 1/2″ strips)swag hookswood sealer and/or stain2 nails with large heads Tools hand drilljigsawmeasuring tapepencilpalm sandersandpaper (grit will depend on the roughness of the wood)hammer2 clothespinsleather punch with 1/4″ hole Instructions 1. 2.
Manualidades. Creando un pequeño Caballete « manualidades. Creando candeleros y macetas « manualidades. Marzo 3, 2011 Encontré esta propuesta muy simpática!
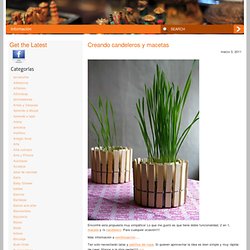
Lo que me gustó es que tiene doble funcionalidad, 2 en 1, maceta y /o candelero. Para cualquier ocasión!!!! Más información a continuación…. Tan solo necesitarán latas y palillos de ropa.
Costura.