
Tutorial: This Mama’s Fab Travel Chair. This fabric “high chair” is perfect for away from home dining. It’s no 5-point harness, but it helps secure them in the chair. This one was made from an old thrifted, quilted ottoman cover Gather materials: Quilted fabric for outer*, cotton broadcloth or similar for lining, Velcro. *Batting combined with broadcloth can also be used. For this one, I used a thrifted bedspread and bed sheet. Step 1 – Make pattern pieces. All measurements include 3/8″ seam allowance. Step 2 – Add markings 2 1/4″ apart at center of each piece as shown in picture. These markings will help you place the connector piece. Step 3 – Using a single layer of lining and a single layer of quilted fabric, cut each piece out together. Curve the corners of velcro pieces so there are no sharp points. Step 4 – With right sides together, sew connector pieces together along long edges. (3/8″ seam allowance) Step 7 – Turn all pieces right side out and press.
Step 8 – Top stitch connector piece 1/4″ from edge along sewn edges. You’re done! Plastic Spoon Laurel Wreath. Awesome Paper Cone Wreath Tutorial. Today I am going to give you a very detailed, step by step tutorial on how to make this wreath.
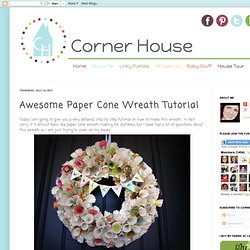
In fact sorry if it almost feels like paper cone wreath making for dumbies, but I have had a lot of questions about this wreath so I am just trying to cover all my bases. Let's get started... First gather your supplies. You will want -5 or 6 double sided scrapbook papers. I picked 5 different papers from this wreath, but you could do 5 of the same if you wanted. -Printed pages. Now lets talk about the wreath base. To make your own you are going to want a newspaper and tape. Then roll them up making a long tube of newspaper. Then start wrapping it with more newspaper so it gets a better shape and firmness. I think most all projects have a "looks really crappy" stage. Alrighty, so now you have a newspaper circle. Now lets move on to the paper part of this. You should be able to cut 2 pieces of the thick scrapbook paper at a time. Don't throw away your paper scraps, you may want them later. Magazine Christmas Tree. Given that this DIY project has far and away been my most popular tutorial, I decided to update the post with a video of the magazine tree making process to help clear up a few questions that we’ve received from readers.
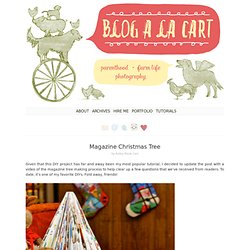
To date, it’s one of my favorite DIYs. Fold away, friends! My favorite DIY projects are always those that involve minimal expense and materials. The best of the best DIY projects require recycled (read: FREE) materials, and little else but some time and crafty gumption. Enter the DIY Magazine Christmas Tree. Materials: Magazine(s) Seriously, that’s it. Directions: 1. 2. 3. 4. Photos: Courtesy of Ashley Weeks Cart. DIY Party Animal Candles. Hi there, it’s Jenny from Hank + Hunt with a fun and super easy diy today!
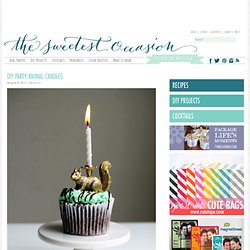
As soon as I thought of making these I got a huge kick out of naming them Party Animals. Hilarious, but if you hear groaning…it’s coming from my house. Regardless of how cheesy the name is, these turn out awesome. Your kid’s favorite animal holding that birthday candle minus those red eyes that are oh so typical for plastic creatures, awesome. Supplies - plastic animalsplastic candle holdersdrill with 1/8″ drill bitpliersgold spray paint For the plastic animals, you can use any kind you can find. Hold the animal with the pliers and drill a hole straight down, being careful not to pop out the other side. Spray paint the animals in a few light coats, rotating them to cover all sides. I also painted the candle holders to match. That’s it. {Photos by Hank + Hunt for The Sweetest Occasion.}