

DIY Bobby Pins. This year, I'd really like to stay on top of birthday gifts.
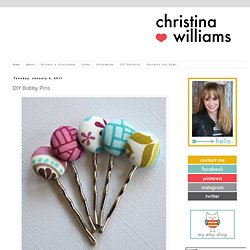
It seems like I'm always making a last-minute run to the toy store on the way to the birthday party. Not this year. I'm going to stay ahead of the game by making birthday gifts ahead of time so they're ready to go well before the party arrives. I've given these bobby pins to several of my friends' daughters and they're always a hit. I've seen these selling online for as much as $2.50 each. Step 2: Cut circles of fabric to fit the button form. Step 3: Cover the buttons according to package directions. Step 4: Using needle-nose pliers, gently remove the shanks from the buttons. Step 5: Use a small amount of glue to to adhere the buttons to the bobby pins. (Tip: The glue expands as it dries, so take it easy on the glue.) All done. Do you like covering things with fabric? ***UPDATE*** I've received a lot of specific questions about this project.
How to make a wrapped leather bracelet. DIY Friendship Bracelet - Honestly WTF. For several months now, we’ve been receiving emails requesting a friendship bracelet DIY.
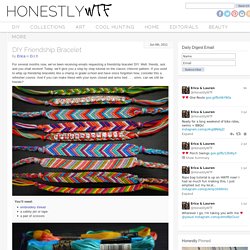
Well, friends, ask and you shall receive! Today, we’ll give you a step by step tutorial on the classic chevron pattern. If you used to whip up friendship bracelets like a champ in grade school and have since forgotten how, consider this a refresher course. And if you can make these with your eyes closed and arms tied . . . umm, can we still be friends? You’ll need:embroidery threada safety pin or tapea pair of scissors Start by cutting several strands of embroidery thread at about 24 inches each. Start on the left side with the outermost color (shown here in red) and make a forward knot by creating a 4-shape over the 2nd color, loop it under and back through the opening. Pull up and to the right to tighten. Now pick up the outermost color on the right side (show here in red) and make a backward knot, creating a reverse 4-shape over the 2nd color, loop it under and back through the opening.
Craft DIY Projects, Patterns, How-tos, Fashion, Recipes @ Craftzine.com - Felting, Sewing, Knitting, Crocheting, Home & More. Quilling, the coiling and shaping of narrow paper strips to create a design, has been around for years — hundreds, in fact.
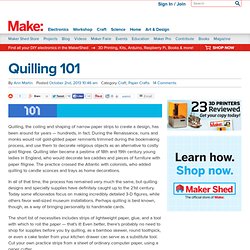
During the Renaissance, nuns and monks would roll gold-gilded paper remnants trimmed during the bookmaking process, and use them to decorate religious objects as an alternative to costly gold filigree. Quilling later became a pastime of 18th and 19th century young ladies in England, who would decorate tea caddies and pieces of furniture with paper filigree. The practice crossed the Atlantic with colonists, who added quilling to candle sconces and trays as home decorations.
In all of that time, the process has remained very much the same, but quilling designs and specialty supplies have definitely caught up to the 21st century. Today some aficionados focus on making incredibly detailed 3-D figures, while others favor wall-sized museum installations. Many arts and crafts stores sell basic tools and packages of multicolor paper strips.
Materials Directions Ann Martin. How to Make a Simple Bow. These little bows are so simple and fun-- I make them all the time.
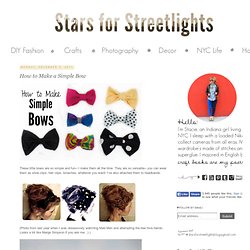
They are so versatile-- you can wear them as shoe clips, hair clips, broaches, whatever you want! I've also attached them to headbands. (Photo from last year when I was obsessively watching Mad Men and attempting the bee hive hairdo. Looks a bit like Marge Simpson if you ask me. ;) ) Button Monogram. This is a really COLORFUL & creative way to display your child’s initial.
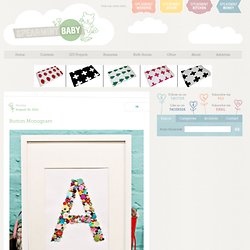
Super easy for sewers & crafters who have lots of extra buttons laying around. Gosh I LOVE buttons… Supplies needed: - Printer (to print out your letter) or a large letter stencil - Scissors - Cardstock (large enough to fit your frame) - Pen or Pencil - Adhesive, Scotch Tape Runner allows you to reposition buttons - Paper Piercer - Buttons and Brads - Frame without glass or shadowbox (this one is from IKEA)