
Make your own clothing labels. This is part 2 of my 3 part label tutorial for textiles like clothing and bedding.
Here are the 3 chapters: part 1 – what to say (or what the FTC wants you to put on your labels) part 2 – how to make them (DIY process of printing & cutting the labels on fabric) [you are here] part 3 – how to attach them (considerations for comfortable labels) This photo tutorial will walk you through how to print your own fabric labels and some lessons I’ve learned along the way. Step 1 – choose your treated fabric for your labels. In order for your printer ink to stain the fibers and last, you must use 100% natural fibers. If you don’t want to treat the fabric yourself, you can buy pretreated fabric sheets for your printer at craft stores or google them.
And here is why picking your own fabric is important: you want your clothing labels to be comfortable when the garment is worn, and you don’t want them to unravel. I’ve got 2 fabric options for making your own labels that are comfortable: Done! Katie's Mercantile Mount Morris, New York NY - Affordable Modest Amish Mennonite Clothing. Www.shelley.nl. NORI'S!◇WEB素材/デスクトップアイテム. Custom labels. Custom clothing labels using iron-on transfers (©2005, www.grumperina.com.
Updated September 13th, 2010. Information and images contained within this tutorial are copyrighted and cannot be used for any unintended purposes without my explicit permission. E-mail me.) Many people have asked how I make these adorable and completely customized labels for my handknits: It's simple, cheap, creative, and allows me to put the recipient's name, fabric content, care instructions, and even a little cartoon on the label!
Click here to proceed with the tutorial: You will need: - inkjet printer - iron (no steam!) - satin ribbon, 5/8" - 1/2" wide, or whatever is suitable for your project - anti-fraying liquid (Fray Check , Fray Block, etc.) - iron-on transfers, whichever are suitable for your printer. Let's get started! You will need to design your label using graphic software. Follow the instructions on your iron-on transfers. You can reuse the same iron-on transfer paper over and over again. Ta da! All done! Fabric Labels Tutorial. Many people have asked me how I make my labels so I have decided to make this little tutorial including pictures and any little tips that I have learned along the way.
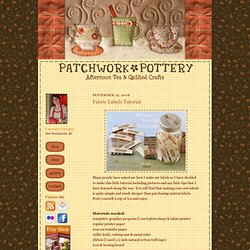
You will find that making your own labels is quite simple and much cheaper than purchasing custom labels. Pour yourself a cup of tea and enjoy. Materials needed:computer, graphics program (I used photoshop) & inkjet printerregular printer paperiron-on transfer paperutility knife, cutting mat & metal rulerribbon (I used 1/2 inch natural cotton twill tape)iron & ironing boardscissors Step 1: Design your image using your program of choice working with a resolution of 300ppi for a clear image. The height of your image should be smaller than the width of your ribbon. Step 2: Print your labels. Step 3: Cut out the images preferably into long strips using your utility knife, cutting mat and ruler. Step 4: Iron the transfer onto the ribbon. Step 5: Peel off the backing paper. Step 6: Use them! Lang-8 - Multi-lingual language learning and language exchange.
30+ Free Printable Recipe Cards: {A Nice Collection. The best thing in printing since Gutenberg.