
Surprise DIY. Surprise DIY. Surprise DIY. Little Bird in Flight: A Free Sewing Pattern! - While She Naps. I made a little felt bird in flight and I thought you might like to make one, too.
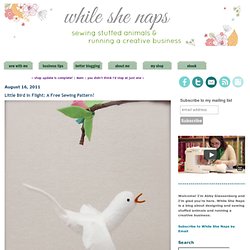
Pretty as ornaments for the holidays, or hanging from a branch for a mobile. Simple to make with a few scraps of felt and some embroidery floss. Here are some birds made up in different colors. To make a white bird, you'll need: a scrap of wool-blend felt, about 6 inches x 12 inches a tiny scrap of brown wool-blend felt for the beak, about 2 inches x 2 inches embroidery floss in black, about 18 inches fiberfill stuffing, about 1 ounce coordinating all-purpose thread monofilament or metallic thread to make a loop for hanging Okay, let's get started! Download the pattern template, print and cut out. Mark and cut a small slit in each body piece. Make two small folds each wing pieces, like a tuck, and press to hold. Insert a wing into a body through the slit.
Fold the wings up inside the body. Trim the seam allowance to 1/8 inch. Press the wings to smooth them out. Fold the brown felt in half and press. Aoy_4. Aoy. Aoy_3. Aoy_2. Aoy_1. Hot Pink Giraffe Tutorial & Pattern. ProjectToothless's deviantART Gallery. Craft is in session. Bookbinding University is in full swing!

If you missed the last lesson on “How to Make a Text Block,” you’d better study up because today we’re moving on to the fun part! Today we’re making the covers for our text blocks and this is where you get to tap your creativity and personalize your notebook. If you are like me, you have a stash of 12 x 12 patterned paper that would make Hobby Lobby jealous. Well, today’s tutorial will have you searching through your collection for the perfect “statement” pattern for your notebook. Let’s get started. Amish soap. Hi, Great to post recipes like that, but a soap recipe that after all involves the potentially very hazardous lye, should involve more information about which precautions to take and not just that, very important information that the soap MUST NOT be used right away, it MUST be cured first (most say a minimum of 3 weeks, preferably 4 weeks or even longer – it gets milder as it ages as the neutralization process goes on.
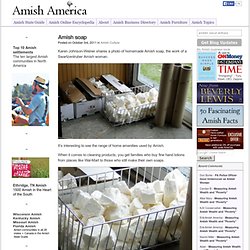
Fresh soap will burn skin! See some say online they never sell soap until it is at least 3-4 weeks old). If you e.g. want to make soap with your kids for presents etc, this is NOT the way, as this is a long process. Then you need to use already made and cured soap base you can buy quite reasonably, melt it and add all kinds of fun things to make pretty soaps. Here is a portion from the Wikipedia article on lye about the hazardous reactions that may happen: The reaction between sodium hydroxide and a few metals is also hazardous.
Homemade Lye Crisco Soap. Good morning, it is a beautiful sunny day.
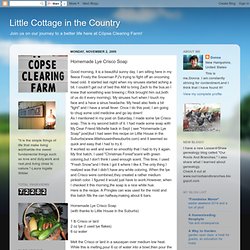
I am sitting here in my fleece Frosty the Snowman PJ's trying to fight off an oncoming head cold. It started last night when my sinuses started aching a bit. I couldn't get out of bed this AM to bring Zach to the bus,so I knew that something was brewing ( Rick brought him out,both of us do it every morning). My sinuses hurt when I touch my face and a have a sinus headache. My head also feels a bit "light" and I have a small fever. Homemade Lye Crisco Soap(with thanks to Little House in the Suburbs) 1 lb Crisco or lard2 oz lye (I used lye flakes) 6 oz water Melt the Crisco or lard in a saucepan over medium low heat. DIY ANTI-DUST PLUGS. Okay, so anti-dust plugs.
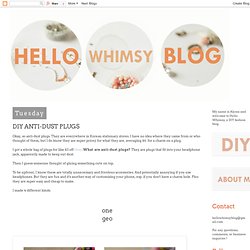
They are everywhere in Korean stationary stores. I have no idea where they came from or who thought of them, but I do know they are super pricey for what they are, averaging $6 for a charm on a plug. I got a whole bag of plugs for like $3 off ebay. What are anti-dust plugs? They are plugs that fit into your headphone jack, apparently made to keep out dust. Then I guess someone thought of gluing something cute on top. To be upfront, I know these are totally unnecessary and frivolous accessories. I made 4 different kinds. one geo. How to Upcycle a Pallet into a Couch. Ready to totally transform your living space?
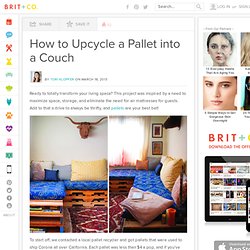
This project was inspired by a need to maximize space, storage, and eliminate the need for air mattresses for guests. Add to that a drive to always be thrifty, and pallets are your best bet! To start off, we contacted a local pallet recycler and got pallets that were used to ship Corona all over California. Each pallet was less than $4 a pop, and if you’ve got time to scout around a little bit you can even get them for less than $1 per pallet! Be sure to bring a measuring tape to make sure pallets are the size and shape you want, and fit nicely together.
Materials: - pallets (you’ll need 12 pallets to make an L-shape, 6 to make a love seat) - twin mattresses ($79 on Ikea!) We love the look of these mix-and-match textiles. Start by making your shape, and stacking pallets at least 3 high. Next, put your mattresses into the twin duvet covers. Enjoy the fruits of your labor and RELAX! Self Publish a Book - Lulu.com. Tutorials.