
Ribbon Princess. These are so much easier to make than they appear!

Read on for the full tutorial! Cinderella Note: To keep things quick and simple I will be referring to the ribbon widths as "super skinny," "thin," and "wide. " I feel like you know what I mean instantly when I say that, as opposed to giving actual widths. You'll Need: thin yellowish gold ribbon thin baby blue ribbon thin cream ribbon thin white ribbon hair clippies (or a headband, magnet, clothespin... whatever) hot glue gun and glue scissors (or heated ribbon knife <--- AMAZING!) Rope Coaster. DIY // Rope and Chain Coaster A DIY rope and chain coaster for your Wednesday viewing pleasure!
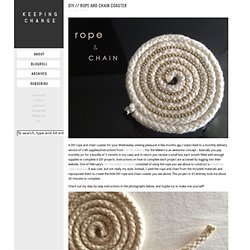
A few months ago I subscribed to a monthly delivery service of craft supplies/instructions from For the Makers. For the Makers is an awesome concept – basically you pay monthly (or for a bundle of 3 months in my case) and in return you receive a small box each month filled with enough supplies to complete 4 DIY projects. Instructions on how to complete each project are accessed by logging into their website. One of February’s For the Makers projects consisted of using the rope you see above to construct a malachite rope necklace. Check out my step-by-step instructions in the photographs below, and maybe try to make one yourself!
Cardboard Guitar. ..Thank you, thank you, thank you for all of the sweet love (from this post).
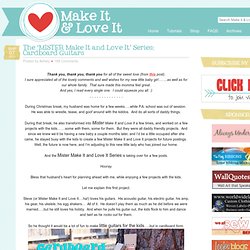
I sure appreciated all of the lovely comments and well wishes for my new little baby girl……..as well as for our whole family. That sure made this momma feel great. And yes, I read every single one. I could squeeze you all. :). . . . . . . . . . . . . . . During that break, he also transformed into Mister Make It and Love It a few times, and worked on a few projects with the kids…….some with them, some for them. And the Mister Make It and Love It Series is taking over for a few posts. Hooray. Bless that husband’s heart for planning ahead with me, while enjoying a few projects with the kids. Let me explain this first project. Steve (or Mister Make It and Love It….ha!) So he thought it would be a lot of fun to make little guitars for the kids…..but in cardboard form. And then jam out with the little monkeys. The guitars come complete with rubber band strings………..great for strumming and a small amount of sound. Cardboard Guitar.
'3D' Photo. I know you are invited to at least one wedding this summer.
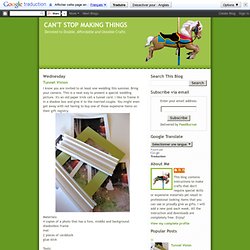
Bring your camera. This is a neat way to present a special wedding picture. It's an old paper trick call a tunnel card. I like to frame it in a shadow box and give it to the married couple. You might even get away with not having to buy one of those expensive items on their gift registry. Materials: 4 copies of a photo that has a fore, middle and background. shadowbox frame mat 2 pieces of cardstock glue stick Tools: scissors In this sample, the frame and mat are 8" x 10". Leave one photo as is. Beaded Dragonfly. Nature is the one of the best sources to look for crafts ideas.
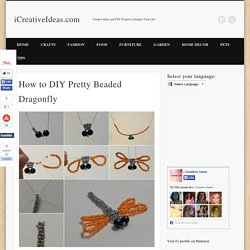
Dragonfly is such a lovely little insect! Here’s a nice beading tutorial on how to make a pretty beaded dragonfly. It uses the simple technique of parallel braiding. You can try different color combination of beads to create your own style. It can be used for brooches, pendants, ornaments, charms and so on. Here are the supplies you may need: Beads;Wire;Wire cutter.
You may also like this DIY Beaded Dragonfly. Click here for DIY Beaded Dragonfly. Ribbon Cupcake. These are so fun and easy to make!
Tools: A glue gun Scissors (or a ribbon cutter) Materials: Aligator Clip 7/8" Ribbon (cupcake base) 3/8" Ribbon (frosting) small red button (cherry) skinny ribbon (cherry stem, decoration for cake base) Step 1: Cover The Clip Use 3/8" Ribbon in the color of your choosing (it's best to use the same color as your cupcake base) Starting on the inside upper part of the clip, glue the ribbon on and continue up onto the top of the clip, around the part of the clip that you pinch to open, and then to the bottom.
Step 2: The Cupcake Base Cut a 2 1/2" piece of the 7/8" ribbon. Using scissors, cut straight across the top of the cupcake base. Cut another piece of the 7/8" ribbon about 2" in length. Step 3: The Frosting! Just like with a real cupcake, the frosting is the best part! I secured it to the right and looped back to left, where I began to bring the loops upward and back to the center. Step 4: Decorating your Cupcake.