The Shirt. As with all these designs, try to start with a relatively clean, crisp bill. It will make it much easier. All folds should be sharply creased. It helps to go over the fold with a fingernail on a flat, hard surface. Start by folding the bill precisely in half lengthwise. (I prefer to fold in toward the front of the bill.
Fold the bill one quarter of the way in from each side lengthwise. Turn the bill over. Turn the bill over again. Fold a little less than one third of the bill lengthwise from the opposite end as shown. Now you will fold inward in the same direction, tucking the previous fold under the "collar" created in step 4. Gently unfold the previous two folds, keeping the creases. (This step is hard to describe, but it is actually fairly easy.) (This is a close-up of what the fold should look like when complete.) (This is what it should look like after both sides are complete.) When you re-tuck the fold you've been working on back under the collar, you're done! Marble magnets. I finally gave in and made marble magnets.
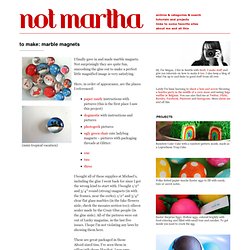
Not surprisingly they are quite fun, smooshing the glue out to make a perfect little magnified image is very satisfying. Here, in order of appearance, are the places I referenced: paper candy instructions with pictures (this is the first place I saw this project) dogmestic with instructions and pictures photogeek pictures ugly green chair cute ladybug magnets – pictures with packaging threads at Glitter:onetwothree I bought all of these supplies at Michael’s, including the glue I went back for since I got the wrong kind to start with. Judah Method - Bleaching Experemnet on the Behance Network. {every}nothing wonderful: Tutorial: Repurposed Envelopes (From Magazines to Mailing) Note: If you like this idea, be sure to check out how to make paper ruffles to add to your envelopes!
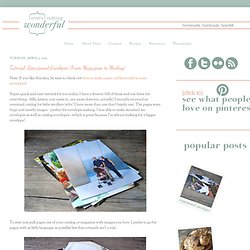
Super quick and easy tutorial for you today. I have a drawer full of these and use them for everything - bills, letters, you name it...my mom does too, actually! I recently received an oversized catalog for baby strollers (why? I have more than one that I barely use). The pages were huge and mostly images - perfect for envelope making. To start just pull pages out of your catalog or magazine with images you love. Other supplies you'll need: Pencil Glue - glue stick or craft glue - whichever you prefer Old envelope or envelope template. If this is a project you see yourself recreating in the future or with other papers you could invest in an envelope template kit, or you can print templates (you'll need to print at 100% on a larger format printer) from Designer's Toolbox on a heavy stock (mount to board for a longer lasting template). Next, cut out along the lines.
Happy re-purposing!