
Project Inspiration : Hobby Lobby - Hobby Lobby. Itsy Bitsy Paper: October 2010. Mom's Crafty Space. Wobisobi. Happy Hour Projects. Crafterhours: Tee to Tank: A Tutorial by Jen from Upcycled Education. This is one of my favorite t-shirt refashions of all time.
For a number of reasons. First, let me tell you that this t-shirt to tank refashion wasn’t my idea. Jen posted this on her facebook page and I jumped at the chance to have a crafty morning with her and watch her make it. Jen blogs at Upcycled Education– a blog I recommend you peruse, especially if you’re an educator– formally or informally. She’s full of good ideas and fun finds and her enthusiasm is catchy. Second, it is soooo quick and easy that it takes less than half an hour. Third, it uses tees you probably already have a million of and don’t enjoy the fit of but have a hard time discarding. Fourth, this t-shirt to tank only requires a tee, scissors and thread. So my girls and I spent a lovely morning yesterday with Jen and her daughter.
Are you ready to see? One of Jen’s tips for this project is that you can use a tee that already fits well. In step 1 you’re making five cuts. DIY Macrame Bracelet. Growing up by the beach in Southern California, the ability to knot a macrame bracelet was practically a right of passage.

Although those days are long behind us, we’ve never forgotten the ever-so-simple square knot technique. This time, however, we’re replacing hemp and wooden beads for more updated elements like colorful nylon cord and glossy metal charms. Happy knotting! You’ll need: Start by cutting the knotting cord into two 30 inch, two 20 inch and one 10 inch lengths. Center the 30 inch cord under the two middle strands. Pull tightly and slide the knot up to the top. Finish the 2nd half of the square knot by folding the left cord over the middle strands and under the right cord. Pull tightly and repeat the steps – left, right, left, right . . . To finish the knots, thread one of the cords onto a needle and sew up the center of 3-4 knots along the backside. Repeat the same step on the other cord. After sewing up both knotting cords, trim away any excess.
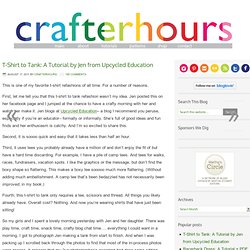
How to make chalk paint - Pictured {TUTORIAL} Thanks for stopping by!

Make sure to subscribe or join us on facebook to get our newest posts. So I’ve heard about the glorious chalk paint for a few months now and decided to see what all the hype was about. If you love the shabby look you will l-o-v-e chalk paint. It gives you a nice chalky finish and makes distressing a piece of cake. One thing I love about chalk paint is it can be used on any surface. I looked up the chalk paint price point and it is about double regular paint. With a little research and talking with a few friends I came up with this formula. Supplies: Traveling Toothbrush/Paste Caddy. [a kind of, sort of, tutorial of sorts...] So I thought it might be nice to get you all that travel desk tutorial I promised you before the summer was over.
![[a kind of, sort of, tutorial of sorts...]](http://cdn.pearltrees.com/s/pic/th/mer-kind-sort-tutorial-sorts-31896072)
Maybe you can squeeze in some sewing time right before your last road trip of the summer. This might seem pretty extensive but I promise that it's easier than it looks! My sewing skills/vocabulary/etc. are still novice so I apologize if some of the steps don't make sense. Hopefully the pictures will help. 1. 11. 16. *I also keep coloring and activity books under the board for storage. I hope this was helpful. **Oh and a big thanks to Ohdeedoh and Cafe Mom (and any other kind bloggers) for posting about Little A's desk! Eyeballs By Day, Crafts By Night. Evi's Country Snippets. Making the ordinary EXTRAORDINARY!
CAN'T STOP MAKING THINGS. Tagxedo - Word Cloud with Styles.