
Adventures in Candlemaking. Yes, my friends, it appears that I may have picked up a new hobby.
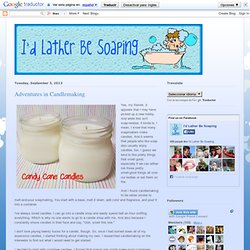
And while this isn't soap-related, it kinda is. I mean, I know that many soapmakers make candles. And it seems that people who like soap also usually enjoy candles, too. I guess we tend to like pretty things that smell good, especially if we can either rub those pretty smell-good things all over our bodies or set them on fire. And I found candlemaking to be rather similar to melt-and-pour soapmaking. I'd Lather Be Soaping: Adventures in Candlemaking.
DIY Candle Favors Ruffled. We’re this close to our final DIY wedding favor project, but fret not.
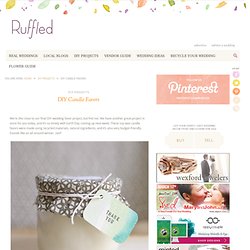
We have another great project in store for you today, and it’s so timely with Earth Day coming up next week. These soy wax candle favors were made using recycled materials, natural ingredients, and it’s also very budget-friendly. Sounds like an all around winner, non? What you’ll need: - Soy wax flakes (can be purchased in bulk in places like here…or at your local candle supply shop since we’re talking green) - Wick (here + here) - Containers.
They can be vintage teacups, recycled jars, old tumblers, Depression glass goblets … - Pitcher with spout - Fragrance oil (I recommend this Etsy store if you’re making them in several different scents for your guests to choose from) - Popsicle sticks, chopsticks, or something to hold the wick (we drilled a hole in the middle of Popsicle sticks, but you can also find readymade ones at candle supply stores) - Candle dye, optional View all step-by-step photos. DIY Candle Favors Ruffled. TheCandleMakersStore.com. At the Candlemakers Store one of our specialties is our candle making scents.
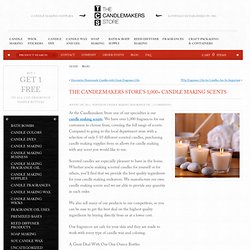
We have over 1,000 fragrances for our customers to choose from, covering the full range of scents. Compared to going to the local department store with a selection of only 5-10 different scented candles, purchasing candle making supplies from us allows for candle making with any scent you would like to use. Scented candles are especially pleasant to have in the home. Whether you’re making scented candles for yourself or for others, you’ll find that we provide the best quality ingredients for your candle making endeavors. We manufacture our own candle making scents and we are able to provide any quantity in each order. We also sell many of our products to our competitors, so you can be sure to get the best deal on the highest quality ingredients by buying directly from us at a lower cost. Poured mason jar candle » Something Turquoise {ideas for the DIY bride} I am so excited to share today’s DIY with you!

For one, because I have a new DIY logo… and two, because I absolutely love making candles! Last christmas I made a candle for every single lady in my family and a few of my close friends, which came to around 45 candles… which was so much fun! Shopping at thrift and vintage stores to find cool and unique glass containers… melting the wax, coloring it, and wrapping them all up… I want to do it all over again! EcoSoya Advanced Soy Wax. EcoSoya® CB Advanced Wax: This wax is 100% vegetable, made with soybean and botanical oils.
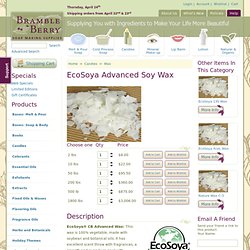
It has excellent scent throw with fragrances, a smooth and even burn pool with consistent color retention. It’s specifically designed for container candles. This wax contracts slightly, producing a beautiful consistent appearance. Extremely frost resistant. Safe for lip balm and other skin care products. Containers/Jars: Containers and jars should be clean and at ambient temperature. EcoSoya Advanced Soy Wax. Colours Pack of 25 White Utopia Wall Tiles (L)100 x (W)100mm, 5010921475134. The Sassy Pepper: TUTORIAL: Mod Podge Canvas.
We've had people asking how to do this Mod Podge wall project: So while my baby was napping yesterday afternoon, I created this little tutorial for you all! Though, instead of using scrapbook paper like I did in my previous project, I decided to recycle a cute image from an old calendar. The calendar was 12x12, as was my canvas, so it was a perfect fit! Materials Needed: bottle of Mod Podge, small amount of paint (any paint, really--I just used some leftover paint from my Fab for $15 post), cheap sponge brushes and a calendar page. *You can also use scrapbook paper or fabric in place of the calendar page. Water Balloon Luminaries. A fun and easy project with a beautiful payoff.
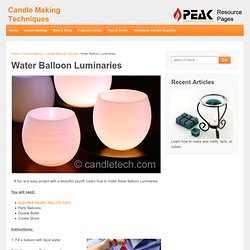
Learn how to make these Balloon Luminaries. You will need: Scrap Your Stash guest post: fabric scrap key chain tutorial. *This tutorial was originally posted over on Living with Punks!
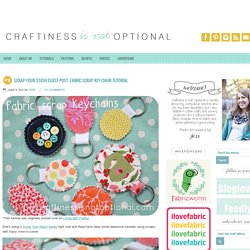
She’s doing a Scrap Your Stash series right now and there have been some awesome tutorials using scraps, with many more to come! I think I may be in love with these adorable little key chains. So much in love that I made a bunch with no plans for them. After all, I don’t need 7 key chains…but I have friends and family who do! Whether they know that or not. lol. Teacup Lights. How to make an etched glass gift. According to crafter Kelly Wilkinson, “If you choose a design instead of letters, simple two-dimensional graphics work best.”
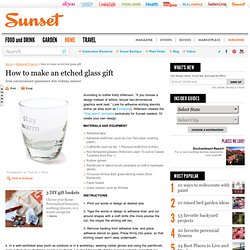
Look for adhesive etching stencils online (at sites such as Etchworld). Wilkinson created the “Stay warm” template exclusively for Sunset readers. Or create your own design. Quick bread in a bottle. Cool weather puts us in the mood to bake.
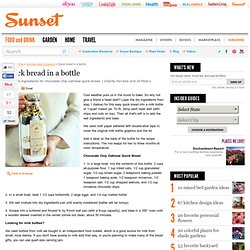
So why not give a friend a head start? Layer the dry ingredients from step 1 (below) for this easy quick bread into a milk bottle or 1-quart mason jar. To fit, tamp each layer well (with chips and nuts on top). Then all that's left is to add the wet ingredients and bake. We used craft paper adhered with double-stick tape to cover the original milk bottle graphics and the lid. Add a label on the back of the bottle for the recipe instructions. Chocolate Chip Oatmeal Quick Bread 1.
Classic Cocoa Recipe. Fruit Jellies Recipe. How to monogram a handkerchief. How to make a personalized rock paperweight. How to make a travel candle. Give used candy or mint tins a second life with a bit of melted wax and a fresh wick.

Here's how: Small candy or mint tin with a lid, such as an empty Altoids container (recycle your own tins or buy them used on eBay) Washcloth Pencil Ruler Decorative paper, such as Japanese washi paper (from the Paper Studio) Scissors Paintbrush (we like Craft Smart’s 3-piece brush sets from Michaels) 8-ounce Classic Mod Podge with matte finish for paper (from Jo-Ann) Paper towels Prewaxed medium bleached candlewick with wick clip (from Jo-Ann) Microwavable soy wax (from Jo-Ann) 1. Clean tin with soap and water. Dry with a washcloth. 2. 3. 4. 5. 6. 7. 8. 9. 10. Bow Belt. We're always looking for fun ways to add embellishments and touches of color to our outfits especially in the winter when we tend to get bored with everything and anything. With bows being fiercely back in style, what better way than with a bright bow belt!
You can pick any color for this but we'd recommend something solid and cotton. You'll need a simple snap as well to hand stitch on. The measurements for the three pieces you'll need to make are in the directions below. Measure your waist (over a thin shirt) and add 2 inches to that length. Making the belt: Fold in half the long way and sew along the long side. Fold over one open end and hand stitch one side of the snap into the inside. Flip right side out now. Once it's right side out, measure it around your waist. Now sew the second snap on through both pieces. V and Co how to: jersey knit bracelet. I don't know what it is about this time of year that makes me just want to have my bare feet in the sand, be watching the sun setting into the ocean, and breathing in the warm salty air of the beach...as i get older, more and more i find myself missing that place i used to go to almost every.single.day. as a teen.
(my skin doesn't miss it. as a matter of fact, i now wish i listened more and DID put SPF on my face...hindsight is 20/20). my mom calls me from her walk on the beach almost every morning... *sigh*yeah, i get a little homesick around this time of the year. heck on my pinterest my "dreaming of summer" has the most pictures in it. ah yes. i miss my ocean. case in point. this bracelet, brought a flood of memories, not because i used to have one like it but because i can totally see me wearing it by the beach, not caring that it's gotten salty and wet, because i can totally make another one in like less than 5 minutes flat when i get home.
*sigh* okay... Blueprint Crafts » Tile Coaster Tutorial. Tile Coaster Tutorial April 7th, 2010 So my good friend Emily just moved into her completely redone house a few weeks ago, and she asked me to make her some unique coasters. I love the look of these from Target, but $15? Get real. UPDATE! For this tutorial, you’ll need a set of tiles – I got a handful from Home Depot for $0.20 a piece, some scraps of scrapbooking paper or any kind of paper really, some mod podge, clear acrylic spray, and felt pads for the bottom. First, cut and measure you paper to the fit your tile. Next, clean and dry your tiles – they are much easier to work with if you clean them off thoroughly.