
How to Make Leaf Skeletons. I wanted to share with you a project from one of my readers who shares with us how to make leaf skeletons.

I LOVE this! I have several leafs in various forms displayed in my home and knew I needed to make some of her leaf skeletons to add to my decor. I love how a pattern of leaves can enhance the beauty in your home. So I asked Heather if she would mind sharing her project with you. You can find more great projects from Heather at her blog The Other White House. I have spent hours and tried various ways of making these. You need washing soda, not baking soda! Gather your leaves. Washing soda is a strong base so you may want to wear gloves when handling the leaves.
You will add 3/4 cup of washing soda and 4 cups of water to your pot of leaves. Keep going, you will need to add more water so your pan doesn’t dry out. When 1.75 hours are up fill a glass baking dish with cool water. I carefully removed them and rinsed with water and added clean water to the pan. 37.1Kstumbleupon. You knew i was going to make one.
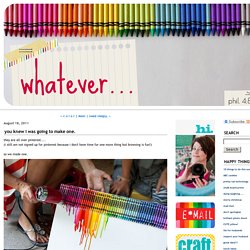
They are all over pinterest....

(i still am not signed up for pinterest because i don't have time for one more thing but browsing is fun!) So we made one. i took a box of 64 crayons and took out the blacks and browns.i used another small box and doubled up on the good colors i liked and hot glued them to the top of our canvas. then we turned our blow dryer to hot on high. not long after you set the hair dryer by the crayons they get shiny and then the wax starts to melt! And it dries really quickly too. seriously. what could be happier than this?? GREAT project. loved it today is the first FULL day with ALL my kids in ALL day school.yeah...i am smiling as i type that. it's good. it's quiet. i am rockin' it. removing wallpaper.....making code for craft weekend stuff.....doing my hair....going to lunch..... it's all good. hooray for school! Hemp Pendant Lights {diy lights. Tutorial: Shabby Chic Dangly Earring Display.
This fun little shabby chic earring stand, made from an altered picture frame, is a great way to hang and display all your beautiful, dangling earrings.

I had the idea for this project after we talked about my love affair with dangly earrings and how to display them. I don’t know about you, but I just love seeing them all hanging in a row! :) The next day I made this earring frame, and it was so quick, easy, and inexpensive to put together, I knew I had to share it with you! :) I spent a grand total of $5.34 on this project. Cost: Less than $10 Time: 30 mins Supplies: picture frame, 12′ of picture wire, acrylic paint & brush, staple gun (or nails/tacks, etc) I started out with a black 8×10 picture frame from Walmart, $3.
Since the frame wasn’t real wood, I was a little concerned with how it would turn out once I painted it. But as you can see from the above images, this little inexpensive frame did great! Next, I took a piece of wire and laid it across the back of the frame. Make: Projects – Doortop Stash.