
Fabric Covered Frame. We all love to display photos, but fancy frames can be pricey.
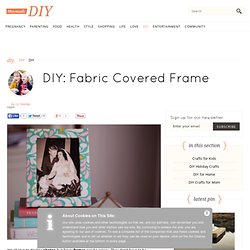
They don't have to be, though! With a thrifted frame and some pretty fabric you can add a pop of spring color to your desk or bookshelf. This would make a great Mother's Day gift too! Thrifted frame cotton fabric Modge Podge Glue Brush Scissors Plastic cup Lay frame on fabric and cut one inch around Cut about 1/2 inch from the inside edge as well. Cut a diagonal line from the edge of the fabric to the frame for each inside corner Brush on modge podge underneath the inside of the frame, wrap the piece of fabric around, and add more modge podge on top. For the outside, cut off the triangles from each corner as shown Brush a bit of modge podge undernearth before you wrap each fabric piece around the frame. The back should look something like this. After the back dries for a couple hours, turn the frame around and add modge podge to the front, smoothing out wrinkles as best you can. Une mine d’infos pour réussir vos travaux d’aiguille.
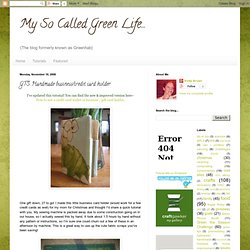
How To Make Fabric Photo Frames. From Make Me Im Yours Just For Fun You can never have too many photo frames and with these little fabric-covered photo frames even the smallest snapshots can be beautifully displayed.
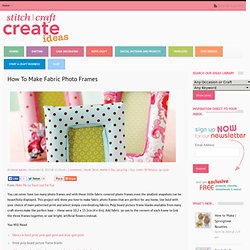
This project will show you how to make fabric photo frames that are perfect for any home. Use bold with your choice of main patterned print and select simple coordinating fabrics. Pulp board picture frame blanks available from many craft stores make the perfect base – these were 10.2 x 15.2cm (4 x 6in). Add fabric yo-yos to the corners of each frame to link the three frames together, or use bright, artificial flowers instead. Blog de nunta si design de evenimente. Party + Wedding Ideas. Springy Paper Garland DIY by Kathleen Ballos.
Cold Hands Warm Heart: Sewing Tips for Beginners. I don’t consider myself the best in the world at sewing, however, I have been doing it for quite a few years now and have learned a few things over the years that I feel are worth sharing (Side note: I started sewing at around age 8 when my Grandma gave me an old sewing box of hers.
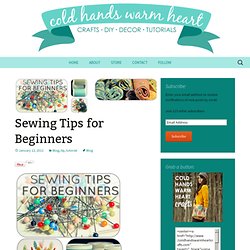
Back then my sewing projects mainly consisted of cutting the legs off my jeans and then sewing up the bottom to make a ridiculously ugly denim purse. I thought I was awesome and those denim bags would be my claim to fame one day). If you are like me and are self-taught at sewing then you know that it is a gradual process that includes stumbling upon random bits of information that, over time, improve your technique and skill level. Here is a list of things I wish I would have known sooner and some Blog articles that have helped me along the way: 1) The importance of ironing and steaming your projects 2) Interfacing…My new best friend This zipper pouch is not interfaced. 3) Using straight pins. My So Called Green Life...: GTS: Handmade business/credit card holder. I've updated this tutorial!
You can find the new & improved version here~ Cold Hands Warm Heart: tutorial. DIY Wedding Blog. We recently created this fabric pom pom as a tree topper for an inspiration shoot over at Design*Sponge, but it’s a great DIY project for a wedding as well.
They have so many creative uses… hung above tables, chair aisle decor, or an alternative to the expensive flower poms that flower girls use to walk down the aisle. -Ashley of Dolci Odille Supplies: Fabric, scissors, hot glue gun, and chinese lanterns. Step 1: Cut circles out of fabric. Step 2: Fold the circle in half and put a little hot glue on the center, then fold over to secure. Step 3: Apply more hot glue to the bottom of the folded circle. Step 4: Press the bottom of the folded circle with the hot glue onto the chinese lantern. Step 5: Repeat these steps until the whole lantern is covered.
Origami Lucky Star Folding Instructions - How to Make an Origami Star. The origami lucky star is fairly simple to make.
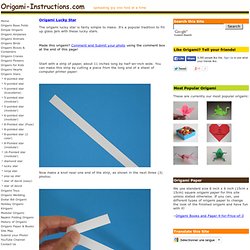
It's a popular tradition to fill up glass jars with these lucky stars. Made this origami? Comment and Submit your photo using the comment box at the end of this page! Start with a strip of paper, about 11 inches long by half-an-inch wide. You Asked 4 It: A Handy List Of Our Tutorials On Sewing Basics. About a month ago, we ran a survey to find out what you'd like to see on Sew4Home. We were curious what you would like to make. Which projects are the ones that not only inspire you to turn on your machine, but also make you want to share that project with your friends and family?
Are there techniques you've always wondered about? Is there a tool or notion you wish you knew how to use? We wanted to make sure we continued to bring our fans and followers the type of inspiration and information you're looking for. Our You Asked 4 It survey article is still live on the site and we still check for new comments. The articles below are (believe it or not) just a of the how-to type of tutorials, buying guides and reviews we've done here at Sew4Home. As another part of our "You Asked 4 It" follow-up, we are in the process of putting together a brand new Site Index that will re-categorize our articles into a helpful cross-referenced listing.
Hand Sewing: Thread the Needle & Tie the Knot. Heartland Paper: Handmade Chandelier's on Studio 5. Swarming Butterfly Chandelier.