

How to Build a Pergola - DIY Building a Pergola. Here's a structure that won't provide shelter from wind or rain, and is only marginally better when it comes to the midday sun.
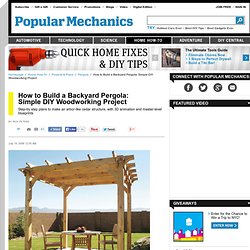
So, why build it? Because in the absence of walls and a roof, it defines an outdoor space without constraining it. It's a unique architectural blend that places you both inside and out at the same time. The structure is called a pergola, and it's just the thing to bring backyard landscaping to life. Pergolas were common features of Italian Renaissance gardens, often covering walkways or serving as grape arbors. Our pergola fits on an 8-ft. square, but it's easy to modify it to suit your site. Model designed in Alibre Design Xpress. Download a larger animated PDF of this project with a printable step-by-step guide (Requires Adobe Reader). Installing the Posts The posts are composed of pressure-treated 4 x 4 cores that are sheathed with 1 x cedar. Lay out the post positions and mark the screw locations [1].
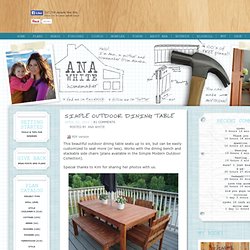
We used 1/4-in. Then secure each end with four 3-in. Build a Simple Outdoor Dining Table. The free content provicded by this website is made possible by the following current sponsors.
Thank you! Custom Cabinet Knobs. Chicken wire frame & memory card clips. Thank you for all the sweet comments about my niece.
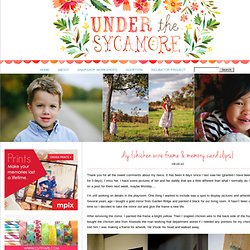
It has been 4 days since I last saw her (granted I have been out of town for 3 days). I miss her. I have some pictures of her and her daddy that are a little different than what I normally do. I am working on a post for them next week, maybe Monday…. I’m still working on details in the playroom. After removing the mirror, I painted the frame a bright yellow.
To hold pictures to the chicken wire I hot glued small clothes pins to the back of some of my Charlie Harper memory cards. Super easy, super affordable and I think it is pretty practical and cute! DIY: Paint Stick Sunburst Mirror. My friends, if there ever was a bandwagon, this carefree DIYer is jumping right on it.
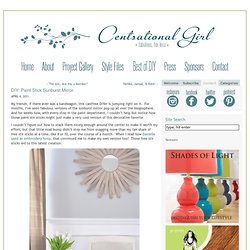
For months, I’ve seen fabulous versions of the sunburst mirror pop up all over the blogosphere. And for weeks now, with every stop in the paint department, I couldn’t help but notice how those paint stir sticks might just make a very cool version of this decorative favorite. I couldn’t figure out how to stack them nicely enough around the center to make it worth my effort, but that little road bump didn’t stop me from snagging more than my fair share of free stir sticks at a time, like 8 or 10, over the course of a month. When I read how Danielle used an embroidery hoop, that convinced me to make my own version too! Those free stir sticks led to this latest creation: How to Make a (Paint Stir Stick) Sunburst Mirror Paint your embroidery hoop. Some paint stir sticks have a small curve in them, so I simply trimmed mine with my compound miter saw. (quick Photoshop examples) Mason Jar Key Hook.
Hey guys! Hope you all had a great Wednesday I have a fun project to share today! I started with a 1×8 board from Lowe’s that I cut to about 2′ long. I used a different paint method on this board and I love how it turned out so I am going to share it with you in my next post. So for now… Here is my board after it is painted and ready to go. I also purchased 3 hooks and a pipe clamp from Lowe’s. My next step was attaching them to my board. Then it was time to attach the clamp. Swatch Portraits. In our teeny-tiny fabric shop, Purl Patchwork, it is a challenge to find fresh ideas to display our favorite products in customer-friendly ways.
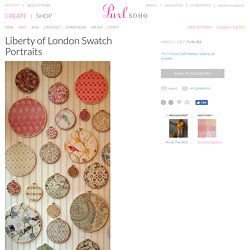
We were really scratching our heads when a bunch of new Tana Lawn prints from Liberty of London arrived last week on unruly five-foot-tall bolts! Our solution: we filled a handful of simple wooden embroidery hoops with swatches of fabric and displayed them all on the wall like a family portrait gallery. These swatch portraits are so easy to make and they make great gifts too!
Enjoy! Materials To make one portrait: A square of fabric, at least 2″ wider than your hoop in all directions. Pattern Place fabric in the hoop, pull taught. Turn to wrong side, run a small line of glue around the inside hoop, just next to the fabric. Allow Glue to dry. Trim fabric to edge of hoop.